
Now it’s time to focus on the cheesecake filling! In a clean mixing bowl, I beat the softened cream cheese with the powdered sugar and vanilla extract until it’s creamy and smooth. Then I add in the heavy whipping cream and whip it all together until I get those nice peaks formed. Finally, I gently fold in the chopped Twix bars, which adds that delicious crunch and caramel flavor to the creamy filling.
Pour the luscious cheesecake mixture over the chilled crust, smoothing it out evenly with a rubber spatula. After that, I cover it with plastic wrap and let it chill in the fridge for at least 4 hours, but overnight is even better if you can wait! This allows the flavors to meld beautifully and for the cheesecake to get nice and firm.
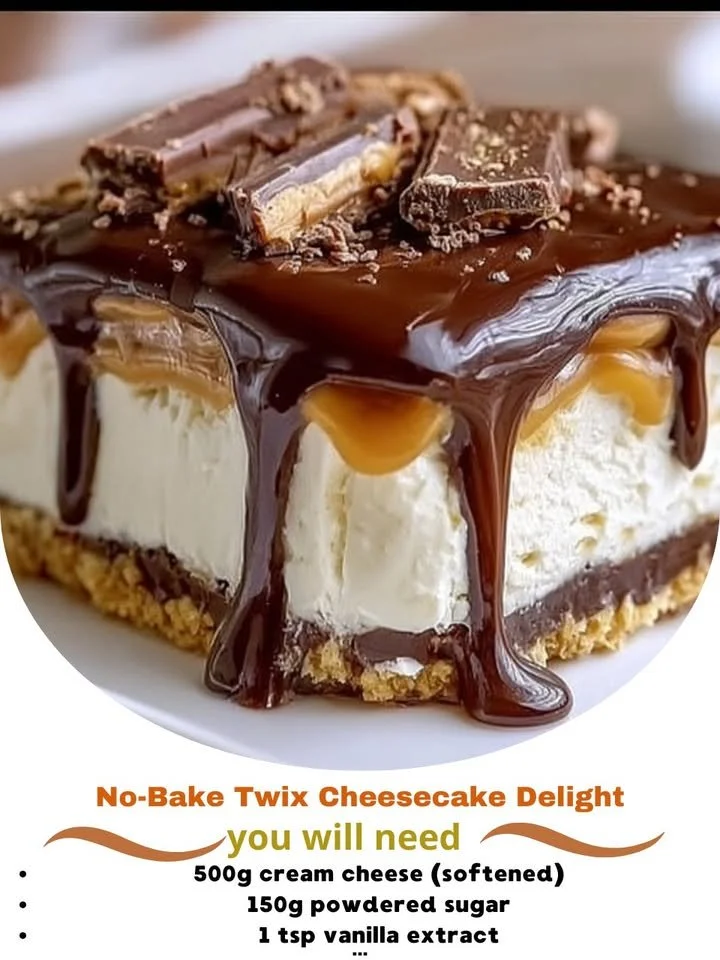
When it’s finally time to serve this beauty, I drizzle the caramel and chocolate sauces on top. The sight of the glossy drizzles over the creamy cheesecake is just mouthwatering! I slice it up and serve it with extra chopped Twix on the side for that finishing touch.
Pro Tips for Best Results
I truly believe that details make the difference when it comes to desserts. For this no-bake cheesecake, I tested the filling consistency three different ways. I found that using a mix of heavy whipping cream and cream cheese gives the best texture—it achieves that wonderful lightness while still being rich and creamy.
Another tip I have is to let your cream cheese come to room temperature before mixing. It makes a world of difference! Trust me; you’ll avoid the pesky lumps that can ruin the silky smooth texture of your cheesecake. I learned this the hard way on my first attempt, and it was a lesson worth sharing!
Lastly, I highly recommend letting the cheesecake chill overnight if time allows. The flavor really deepens, and the texture becomes even more delightful. This dessert is like fine wine—it only gets better with a little patience!
Common Mistakes to Avoid
One common mistake I’ve made in the past is not chilling the crust long enough before adding the filling. I assumed a quick chill would suffice, but the texture simply didn’t hold up! Make sure to let that crust firm up in the fridge so it can be the perfect base for your creamy cheesecake. (See the next page below to continue…)