
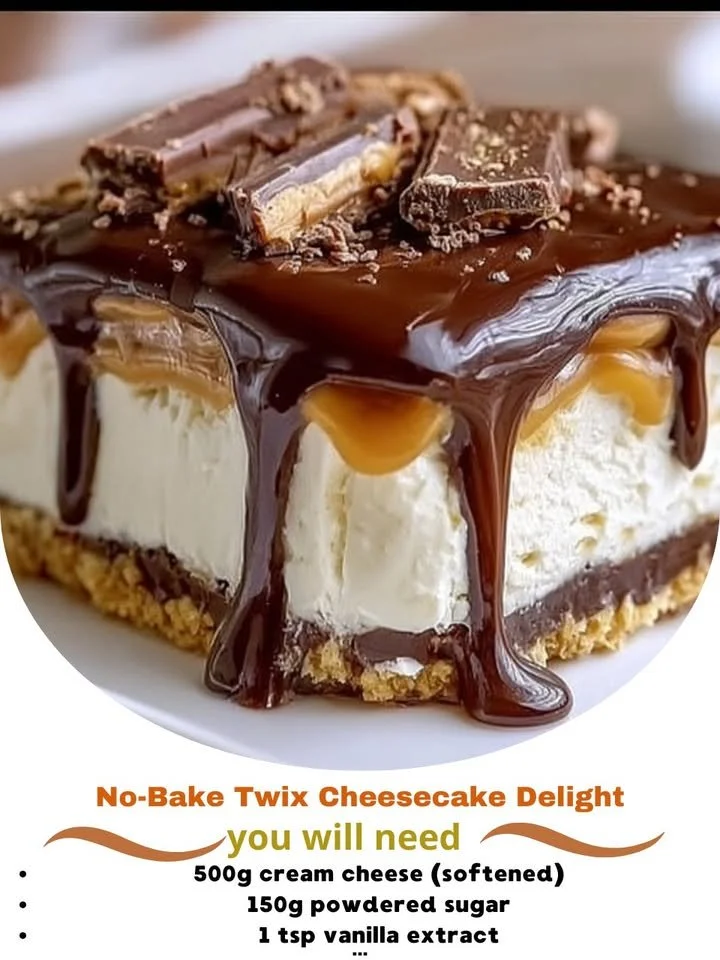
There’s something magical about desserts that require no baking, and this No-Bake Twix Cheesecake Delight is truly a treat for the senses! The creamy cheesecake filling, combined with the crispy chocolatey layers and a hint of caramel, creates a dessert that’s just as indulgent as it sounds. Perfect for any occasion, this cheesecake delight gives all the yummy vibes without the heat of the oven. If you’re looking for a showstopper that will leave your guests begging for the recipe, you’ve come to the right place!
Why You’ll Love This Recipe
First and foremost, this cheesecake delight is incredibly easy to whip up! There’s no baking involved, which means less mess and more time to enjoy the company of friends and family. Plus, it looks stunning when served, making it a great centerpiece for any gathering. And let’s not forget the amazing combination of flavors and textures—from the smooth cheesecake to the crunchy biscuit base and the rich chocolate topping. I promise each bite is a little slice of heaven! (See the ingredients in the next page below…)
Ingredients
– 1 ½ cups graham cracker crumbs
– ½ cup unsalted butter, melted
– 2 cups cream cheese, softened
– 1 cup powdered sugar
– 1 tsp vanilla extract
– 1 cup heavy whipping cream
– 10 Twix bars, chopped
– ½ cup caramel sauce
– ½ cup chocolate sauce
Equipment Needed
– 9-inch springform pan
– Mixer (hand or stand)
– Mixing bowls
– Rubber spatula
– Measuring cups and spoons
– Knife and cutting board for chopping Twix
Step-by-Step Instructions
Let’s dive into making this delightful cheesecake! First, I start by preparing the crust. In a mixing bowl, I combine graham cracker crumbs with melted butter until it’s well-mixed and resembles wet sand. Next, I press this mixture firmly into the bottom of my springform pan, making sure to create a nice, even layer. After that, I pop it in the fridge to firm up while I prepare the filling. (See the next page below to continue steps…)
Now it’s time to focus on the cheesecake filling! In a clean mixing bowl, I beat the softened cream cheese with the powdered sugar and vanilla extract until it’s creamy and smooth. Then I add in the heavy whipping cream and whip it all together until I get those nice peaks formed. Finally, I gently fold in the chopped Twix bars, which adds that delicious crunch and caramel flavor to the creamy filling.
Pour the luscious cheesecake mixture over the chilled crust, smoothing it out evenly with a rubber spatula. After that, I cover it with plastic wrap and let it chill in the fridge for at least 4 hours, but overnight is even better if you can wait! This allows the flavors to meld beautifully and for the cheesecake to get nice and firm.
When it’s finally time to serve this beauty, I drizzle the caramel and chocolate sauces on top. The sight of the glossy drizzles over the creamy cheesecake is just mouthwatering! I slice it up and serve it with extra chopped Twix on the side for that finishing touch.
Pro Tips for Best Results
I truly believe that details make the difference when it comes to desserts. For this no-bake cheesecake, I tested the filling consistency three different ways. I found that using a mix of heavy whipping cream and cream cheese gives the best texture—it achieves that wonderful lightness while still being rich and creamy.
Another tip I have is to let your cream cheese come to room temperature before mixing. It makes a world of difference! Trust me; you’ll avoid the pesky lumps that can ruin the silky smooth texture of your cheesecake. I learned this the hard way on my first attempt, and it was a lesson worth sharing!
Lastly, I highly recommend letting the cheesecake chill overnight if time allows. The flavor really deepens, and the texture becomes even more delightful. This dessert is like fine wine—it only gets better with a little patience!
Common Mistakes to Avoid
One common mistake I’ve made in the past is not chilling the crust long enough before adding the filling. I assumed a quick chill would suffice, but the texture simply didn’t hold up! Make sure to let that crust firm up in the fridge so it can be the perfect base for your creamy cheesecake. (See the next page below to continue…)
Another issue might be overmixing the filling when adding in the whipped cream. You want to fold it in gently to maintain the airiness, as overmixing can lead to a denser cheesecake instead of the light, fluffy delight we’re going for.
Also, it’s essential to use fresh Twix bars. Old or stale candies can change the texture and flavor, and you really want that crispy and chewy experience in each delicious bite. If you’re buying Twix from a store, check the expiration date and grab a fresh box!
Lastly, I’ve found that cutting the cheesecake too soon can lead to messy slices. It’s crucial to let the cheesecake set for the full time; if it’s still too soft, the presentation won’t be as pretty. Just be patient, and the results will be worth it!
Serving Suggestions
When it comes to serving this No-Bake Twix Cheesecake Delight, presentation is key! I like to garnish each slice with a sprinkle of extra chopped Twix and a drizzle of caramel and chocolate sauce. It really elevates the dessert and makes it even more inviting.
You can also pair this cheesecake with a scoop of vanilla ice cream on the side for an extra creamy experience. The cool ice cream contrasts beautifully with the rich cheesecake, making it an unforgettable treat. If you’re feeling particularly indulgent, add some whipped cream on top for that lovely finishing touch!
Finally, don’t forget about coffee or tea! This cheesecake pairs perfectly with a warm cup of coffee or a light herbal tea. The sweetness of the dessert alongside a nice beverage creates a delightful balance that makes for a lovely meal finale.
Variations & Customizations
The great thing about this cheesecake is its versatility! If you’re a fan of peanut butter, consider swirling in some creamy peanut butter into the filling for added richness. The combination of chocolate, caramel, and peanut butter is heavenly and takes this delight to a whole new level!
For a fruity twist, try adding some chopped strawberries or bananas into the filling, or even layering them between the crust and filling. The freshness of the fruit really brightens up the flavor profile and provides a lovely color contrast to the cheesecake, perfect for summer gatherings.
If you’re looking for a gluten-free option, simply substitute the graham crackers for gluten-free cookies or almond flour crust. This way, everyone can enjoy this delightful treat, and the flavors will still be absolutely divine!
How to Store, Freeze & Reheat
Storing this cheesecake is a breeze! Just cover it with plastic wrap or aluminum foil and keep it in the refrigerator. It will last for about 5-7 days, but trust me, it’s unlikely to last that long!
If you’d like to make this cheesecake in advance, you can freeze it for up to two months. Just be sure to wrap it well in plastic wrap and then foil to prevent freezer burn. When you’re ready to enjoy it, simply thaw it in the fridge overnight.
Reheating isn’t necessary for this no-bake cheesecake, but if you have leftover slices, allowing them to reach room temperature before serving can enhance the flavors. I find that letting them sit out for just a bit brings out the best in every bite!
Conclusion
I hope you enjoy making and indulging in this No-Bake Twix Cheesecake Delight as much as I do! It’s a simple yet delicious dessert that’s perfect for any occasion and is sure to impress everyone. Don’t forget to get your loved ones involved—the sounds of laughter and togetherness will make this treat even sweeter. Happy baking (or rather, no-baking)!