
Another pitfall is using cold tortillas straight from the fridge. A cold tortilla is stiff and will crack when you try to roll it. Always warm them for 15-20 seconds in the microwave (wrapped in a damp paper towel) or for a few seconds on each side in a dry skillet. A warm tortilla is pliable and seals your wrap perfectly.
Don’t skip drying the chicken before seasoning. If the chicken is wet, it will steam in the pan instead of sear, and the seasoning won’t stick as well. That quick pat with a paper towel is the first step to getting those beautiful, flavorful browned bits on your chicken strips.
Finally, avoid cooking the chicken on too low heat. You want a good sear to lock in juices and create flavor. If the pan isn’t hot enough, the chicken will release its liquids and boil in them, becoming tough and grey. Wait for the oil to shimmer before adding the chicken, and listen for that satisfying sizzle.
Serving Suggestions
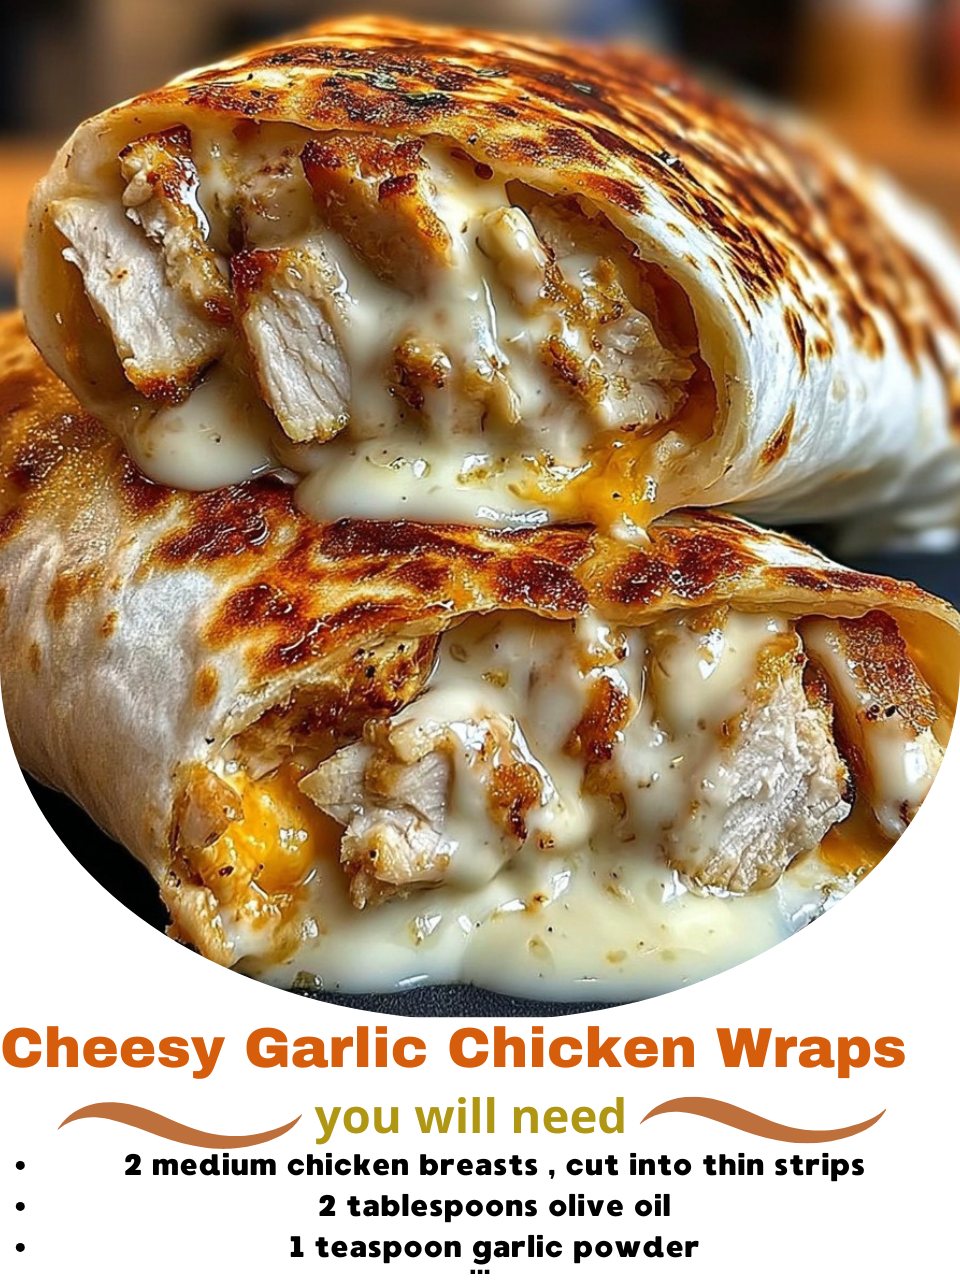
I like serving these wraps immediately, cut in half on a diagonal to show off the cheesy filling. On the side, I’ll serve a simple, crisp garden salad or a bowl of tortilla chips with salsa and guacamole. The fresh, cool sides are the perfect complement to the warm, rich wraps.
For a fun DIY dinner, I’ll set out all the components—the cheesy garlic chicken, warm tortillas, and bowls of toppings like shredded lettuce, pico de gallo, sour cream, and sliced jalapeños—and let everyone build their own wrap. It’s interactive and ensures everyone gets exactly what they want.
When I’m packing lunch for the next day, I’ll wrap one tightly in foil. Eaten cold or slightly warmed in the office microwave, it’s a lunch that feels much more exciting than a typical sandwich. Just maybe pack some napkins!
Variations & Customizations
This recipe is a fantastic base. My favorite variation is a Buffalo Chicken version. I toss the cooked chicken strips in 1/3 cup of buffalo sauce before adding the cheese, and I use a blue cheese crumble instead of cheddar. Serve with celery sticks and ranch on the side.
For a veggie-packed twist, I’ll add a handful of fresh spinach to the skillet right after the garlic, letting it wilt, before adding the chicken back in. Sliced bell peppers or mushrooms can also be sautéed with the chicken from the start.
If you want to change up the cheese, try using Pepper Jack for a kick, or a creamy havarti for a milder, meltier experience. You can also swap the flour tortillas for spinach wraps, sun-dried tomato wraps, or even crunchy lettuce cups for a low-carb option.
How to Store, Freeze & Reheat
The cheesy chicken mixture stores very well on its own. Let it cool and keep it in an airtight container in the refrigerator for up to 3 days. Reheat gently in a skillet or microwave before assembling fresh wraps. This is a great meal-prep component.
You can freeze the assembled, uncooked wraps individually. Wrap each tightly in plastic wrap, then in foil. Freeze for up to 1 month. To cook from frozen, unwrap, wrap in a new piece of foil, and bake at 375°F for 25-30 minutes until heated through.
I do not recommend freezing already assembled and cooked wraps, as the tortilla can become soggy upon thawing. For best results, freeze the filling separately or assemble and freeze the uncooked wraps. To reheat a cooked wrap, the oven or air fryer at 350°F for about 10 minutes will keep the tortilla from getting soggy, unlike the microwave.
Conclusion
These Cheesy Garlic Chicken Wraps are the happy solution for busy nights, proving that a delicious, crowd-pleasing meal doesn’t have to be a production. They’re fast, flexible, and packed with the kind of flavor that makes everyone ask for seconds. I hope this recipe brings as much easy, cheesy joy to your table as it has to mine. Give them a try tonight—you won’t be disappointed! Happy cooking, friends.