
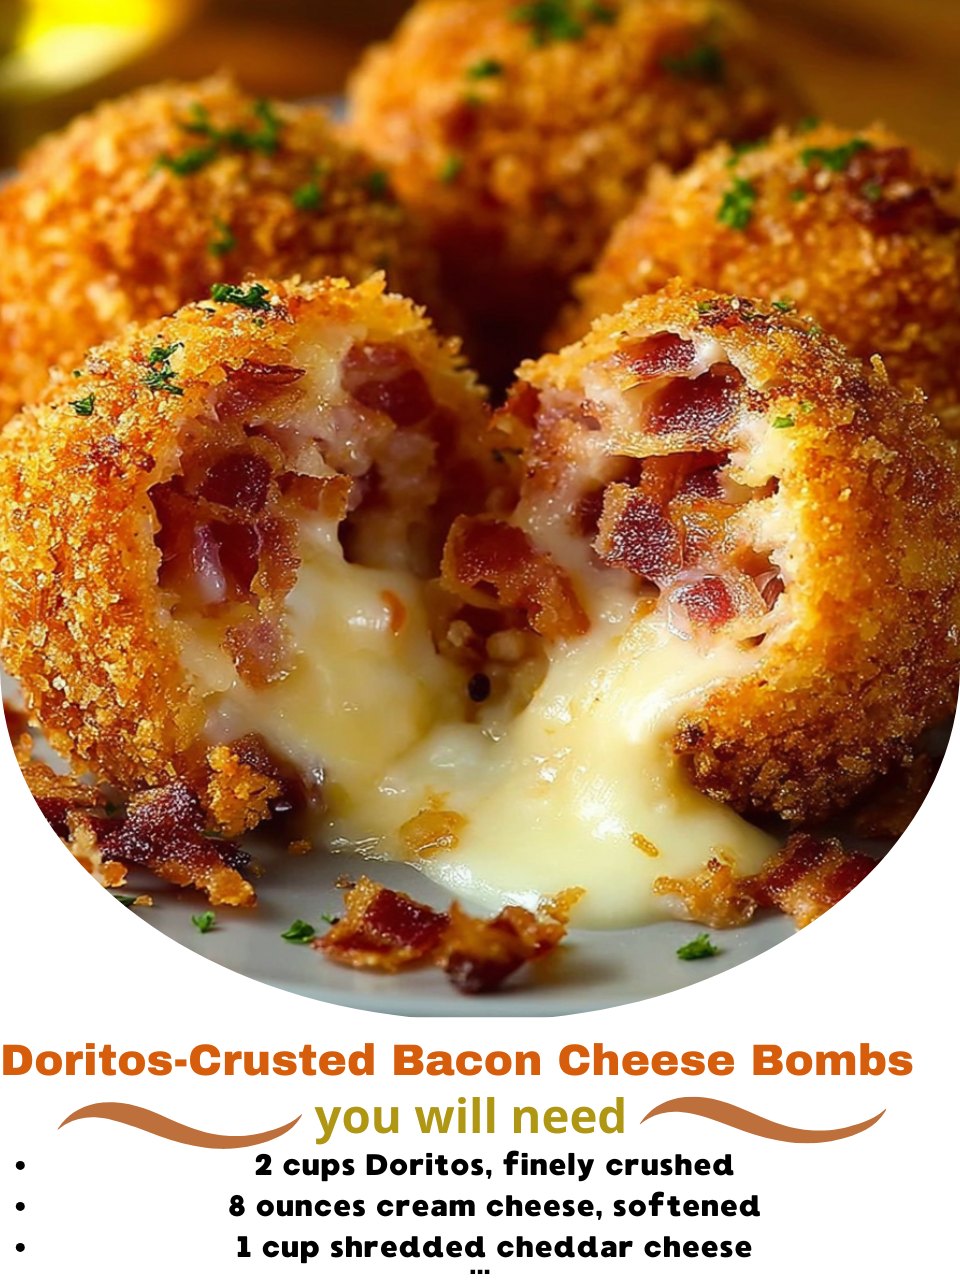
The moment I crushed a whole bag of Doritos in my kitchen, a wave of nostalgic, cheesy-dust air hit me, and I knew I was on to something either genius or completely ridiculous. I was trying to create the ultimate game day snack, something with a serious “wow” factor. As I mixed the crushed chips into creamy cheese and formed little balls, the smell was pure childhood fun. When they came out of the oven, golden and smelling like a spicy, cheesy dream, the first bite was a revelation: a crispy, crunchy shell giving way to a molten, bacon-studded cheese center. They were a ridiculous, delicious triumph.
Why You’ll Love This Recipe
You’ll love this recipe because it takes three epic snack foods—Doritos, bacon, and cheese—and fuses them into one addictive, poppable, and surprisingly easy-to-make bite. It’s the perfect conversation-starting appetizer for parties, game day, or any time you want to treat your inner kid to something gloriously over-the-top. They’re crispy, creamy, savory, and absolutely impossible to eat just one. From my oven to yours, I promise these bombs will be the first thing to disappear from your snack table.
Ingredients
- 2 cups Doritos, finely crushed (Nacho Cheese flavor is classic, but Cool Ranch is amazing too)
- 8 ounces (1 block) full-fat cream cheese, very soft
- 1 cup shredded sharp cheddar cheese
- 6 slices bacon, cooked until very crisp and finely crumbled
- 2 green onions, finely sliced (green and white parts)
- 1/2 teaspoon garlic powder
- 1/4 teaspoon smoked paprika
- 2 large eggs
- 1/4 cup all-purpose flour
- Cooking spray or extra oil for baking
Let’s talk ingredients. The Doritos are your crust and your major flavor punch. Nacho Cheese is the classic, but Cool Ranch works beautifully for a tangy, herby twist. Crush them finely—you want a texture like coarse sand, not big chunks. The cream cheese must be very soft to mix smoothly; take it out of the fridge a few hours ahead. For the bacon, cook it until it’s extra crispy so it stays crunchy inside the cheese mixture. Don’t use pre-shredded cheddar; it’s coated to prevent clumping and won’t melt as smoothly into the filling. Shred it yourself for the best gooey texture.(See the next page below to continue…)
Equipment Needed
- Food processor or large zip-top bag and rolling pin (for crushing Doritos)
- Mixing bowls (medium and large)
- Baking sheet
- Parchment paper or silicone baking mat
- Small bowls for dredging
- Cookie scoop or tablespoon (for portioning)
Step-by-Step Instructions
I always start by dealing with the Doritos. I pour a whole family-sized bag into my food processor and pulse until I have fine, even crumbs. If you don’t have a processor, put them in a sturdy zip-top bag, press out the air, and roll a rolling pin over it until they’re crushed. I pour these vibrant orange crumbs into a shallow bowl and set them aside. Then, in a large mixing bowl, I combine the super-soft cream cheese, shredded cheddar, crumbled bacon, sliced green onions, garlic powder, and smoked paprika. I use a sturdy spatula to mix it all together until it’s completely uniform. The mixture will be thick, creamy, and speckled with bacon and green onion.
Now, it’s time to get my hands a little dirty. I line a baking sheet with parchment paper and set up my dredging station. In one small bowl, I whisk the two eggs until smooth. In another small bowl, I place the 1/4 cup of all-purpose flour. My bowl of Dorito crumbs is ready. Using a small cookie scoop or a tablespoon, I scoop out a portion of the cheese mixture. I roll it quickly between my palms to form a tight, smooth ball, about 1 to 1.5 inches in diameter. I’ve found that lightly damp hands prevent too much sticking.
The coating process is a three-step dance that ensures a perfect, non-leaky crust. First, I roll the cheese ball lightly in the flour, shaking off any excess. This dry layer helps the egg adhere. Next, I dip it into the beaten egg, rolling it to coat completely. Finally, I roll it in the crushed Doritos, pressing gently to get a thick, even coating of crumbs all over. I place each fully coated bomb on the prepared baking sheet. I repeat until all the cheese mixture is used, spacing the bombs about an inch apart. At this stage, they look like little, crumbly orange planets.(See the next page below to continue…)
Here’s a crucial step I learned the hard way: I pop the entire baking sheet into the freezer for 15 minutes. This firms up the cheese filling, which prevents it from bursting out the sides during baking. While they chill, I preheat my oven to 400°F (200°C). After the chill, I give the bombs a light spray with cooking oil to help them crisp up and turn golden. I bake them for 15-18 minutes, until the Doritos crust is crisp and deeply golden. The smell is absolutely intoxicating—like the best part of a ballpark concession stand.
Pro Tips for Best Results
I tested the cream cheese consistency three different ways: cold, room temperature, and very soft. Very soft (almost spreadable straight from the tub) is the winner. Cold cream cheese is impossible to mix smoothly with the other ingredients, leading to lumpy filling. Letting it soften for 2-3 hours on the counter ensures a perfectly smooth, homogenous mixture that’s easy to roll and melts beautifully.
Here’s what I learned the hard way about the coating: the flour step is not optional. I once tried to skip it, going straight from cheese ball to egg. The wet cheese repelled the egg, causing it to slide off in patches, which led to patchy Dorito coverage and filling leaks during baking. The thin layer of flour creates a perfect “glue” surface for the egg to stick to, which then holds the crumbs securely.
Don’t skip the freezer chill before baking. My first batch went straight into the oven, and several bombs erupted like cheesy volcanoes, as the center melted faster than the crust set. A quick 15-minute freeze solidifies the fat in the cheeses just enough to slow the melt, giving the crust time to crisp up and form a protective shell around the molten center.
Common Mistakes to Avoid
My biggest first-time mistake was not crushing the Doritos finely enough. I left some bigger pieces for texture, but they created gaps in the crust and didn’t adhere well, leading to bald spots on the bombs. You want a consistent, sandy texture. A few pulses in the food processor is the most reliable method to get it just right.(See the next page below to continue…)
Another pitfall is over-handling the cheese mixture when rolling. If you roll the balls too much, the heat from your hands can start to melt the cheese, making them sticky and difficult to coat. Work quickly with cool hands, and if the mixture becomes too soft, pop the whole bowl in the fridge for 10 minutes to firm back up.
Don’t skimp on the bacon or use flabby, undercooked bacon. The crisp texture is vital for contrast inside the soft cheese. If it’s soft, it will become chewy and lost in the filling. Cook it until it’s very crisp, and let it drain and cool completely before crumbling it.
Finally, avoid baking them on an unlined baking sheet. The cheese that inevitably leaks (even with the chill) will fuse to the metal and create a nightmare cleanup. Parchment paper or a silicone mat is essential for easy removal and a stress-free clean-up.
Serving Suggestions
I like serving these bombs piping hot, straight from the oven on a large platter. They are perfect all on their own, but I always put out small bowls of dipping sauces. My favorites are a cool, creamy ranch dressing, a spicy sriracha mayo, or even just a side of extra nacho cheese sauce for the ultimate cheese-on-cheese experience.
For a fun party setup, I’ll stick a toothpick in each bomb and serve them on a tiered stand. This makes them easy to grab and encourages people to mingle. They’re the perfect one-bite wonder that doesn’t require a plate, keeping the focus on fun and conversation.
When I’m serving them as a more substantial snack, I’ll pair them with a big, refreshing veggie platter with crisp carrots, celery, and cucumbers. The fresh, cool crunch is the perfect palate cleanser between bites of these rich, decadent bombs.
Variations & Customizations
This recipe is a fantastic base for flavor experimentation. My favorite variation is a Buffalo Chicken version. I replace the cheddar cheese with shredded cooked chicken (about 1 cup) and add 1/4 cup of buffalo sauce to the cream cheese mixture. Use Cool Ranch Doritos for the crust and serve with blue cheese dressing.
For a spicy jalapeño popper twist, add 1-2 finely diced jalapeños (seeds removed for less heat) and swap the cheddar for Pepper Jack cheese. You could even wrap the cheese ball around a small cube of pepper jack before coating for a molten spicy center.
If you want to change up the chip, this method works with any sturdy, flavorful chip. Try it with crushed Flamin’ Hot Cheetos, barbecue potato chips, or even everything bagel seasoned chips. The three-step coating method remains the same; just swap the crumb ingredient.
How to Store, Freeze & Reheat
These are truly best served fresh, but you can store leftovers in an airtight container in the refrigerator for up to 2 days. The crust will soften, but the flavor is still great.
You can freeze the unbaked, coated cheese bombs for a fantastic make-ahead appetizer. After the freezer chill step, transfer the baking sheet to the freezer until the bombs are solid, then pack them into a freezer-safe container. They’ll keep for up to 1 month. Bake from frozen, adding 3-5 minutes to the baking time.
To reheat leftover baked bombs, the air fryer or a toaster oven at 375°F for 5-7 minutes is your best bet to recrisp the exterior. The microwave will make the crust very soggy and should only be used as a last resort. For the best experience, I recommend making and baking them fresh for guests.
Conclusion
These Doritos-Crusted Bacon Cheese Bombs are the edible embodiment of fun. They’re unapologetically indulgent, incredibly tasty, and guaranteed to bring a smile (and maybe a nostalgic tear) to anyone who tries them. I hope this recipe brings as much playful, cheesy joy to your table as it has to mine. Give them a try for your next gathering and prepare to be hailed as a snack-time hero. Happy (and crunchy) cooking, friends!