
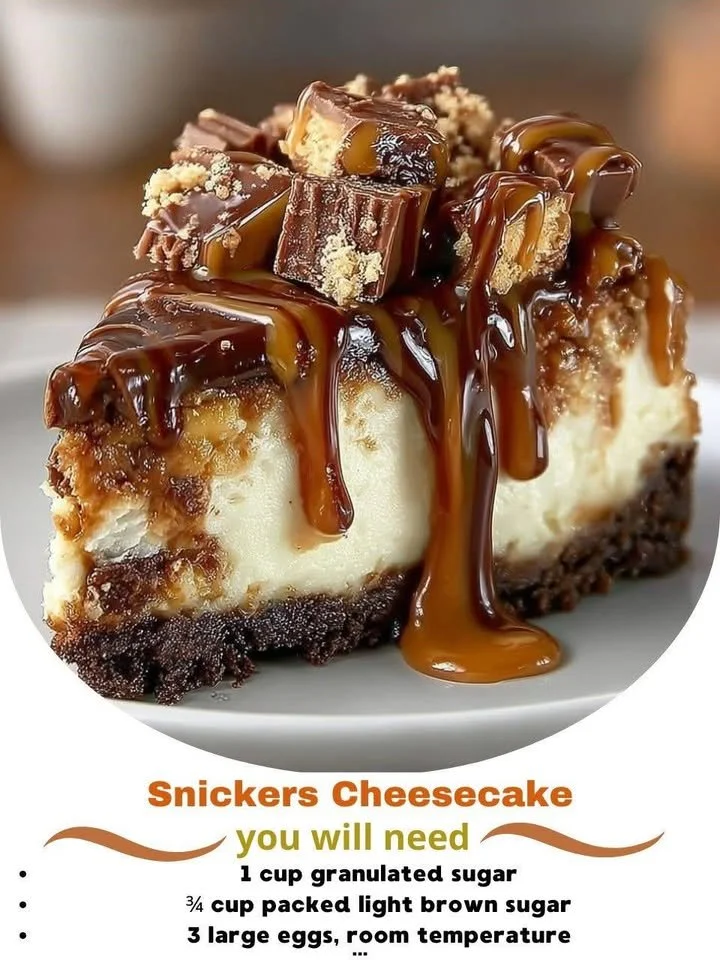
There’s something truly magical about combining a classic candy bar with a creamy cheesecake, and when I first whipped up my Snickers Cheesecake, I instantly knew I stumbled on a treasure. This dessert offers the best of both worlds—the smooth, rich texture of cheesecake and the delightful crunch of Snickers, all enveloped in a perfect crust. If you’re a fan of the famous chocolate bar or just love a good cheesecake, this recipe will tickle your taste buds and have everyone coming back for seconds.
Why You’ll Love This Recipe
I can’t think of a better way to indulge than with a slice of Snickers Cheesecake. It’s super easy to make, and every bite is an explosion of flavor—creamy, nutty, and oh-so-sweet! Not only does it look stunning on a dessert table, but it tastes like a slice of heaven. Just wait until you get a mouthful of chewy caramel, crunchy peanuts, and smooth chocolate mixed in with that rich cheesecake filling! Trust me, you will be in dessert paradise in no time. (See the ingredients in the next page below…)
Ingredients
– 1 ½ cups graham cracker crumbs
– ½ cup unsalted butter, melted
– 1 cup sugar
– 3 blocks (8 oz each) cream cheese, softened
– 3 large eggs
– 1 teaspoon vanilla extract
– 1 cup sour cream
– 1 cup chopped Snickers bars (plus extra for topping)
– ½ cup chocolate sauce
– ¼ cup caramel sauce
– Chopped peanuts for garnish
Equipment Needed
– 9-inch springform pan
– Mixing bowls
– Electric mixer
– Rubber spatula
– Measuring cups and spoons
– Refrigerator
– Oven
Step-by-Step Instructions
Let’s get started! First, preheat your oven to 325°F (160°C). In my kitchen, I like to begin by mixing the graham cracker crumbs with melted butter and sugar until it resembles wet sand. Then, press this mixture firmly into the bottom of your springform pan. This forms a delightful base that’ll hold all that creamy filling beautifully. Once that’s done, pop it in the oven for about 10 minutes to get that crust just right. The smell of toasty graham crackers fills the kitchen during baking, and I love it! (See the next page below to continue steps…)
After letting your crust cool slightly, it’s time to make the filling. In a large mixing bowl, beat the cream cheese and sugar together until it’s super smooth (no lumps, please!). I find that letting the cream cheese soften at room temperature beforehand makes all the difference here. Then, add in the eggs, one at a time, mixing well after each addition. Add the vanilla extract and sour cream and beat until combined. Finally, fold in the chopped Snickers, which makes the batter so much fun to look at and taste!
Pour the delicious filling over the cooled crust and give it a gentle shake to settle everything nicely. Place the pan into the oven and bake for 50-60 minutes, or until the center is set but slightly jiggly when you shake it. The back-and-forth motion is all it takes to see that gorgeous, creamy goodness. Once done, let it cool to room temperature before placing it in the fridge for at least 4 hours (or overnight, if you can wait that long!).
Don’t forget to drizzle the top with chocolate and caramel sauces before serving. I love adding a few chopped peanuts on top for an extra crunch. Your guests will swoon over how beautiful and decadent it looks!
Pro Tips for Best Results
When I first tried this recipe, I made a few minor adjustments that resulted in the most scrumptious cheesecake. One of my favorite tips is to beat the cream cheese well before adding other ingredients. This prevents lumps and gives the cheesecake that luxurious texture. I also recommend chilling the cheesecake overnight; the flavors meld beautifully, and the texture becomes even creamier after a longer rest.
Additionally, if you want to add an even richer flavor, consider using a touch more vanilla extract or even a splash of espresso powder to enhance the chocolate in the recipe. I tested this three ways and found that a little extra touch makes a world of difference.
Lastly, let your cheesecake come to room temperature before serving. I find that the flavors truly pop when it’s not pulled straight out of the fridge. You’ll be amazed at how the textures and tastes transform!
Common Mistakes to Avoid
One of the most common mistakes when making cheesecake is overmixing the batter. I’ve learned this the hard way! Overmixing can incorporate too much air, leading to cracks during baking. Instead, mix just until combined, especially after adding the eggs. This way, your cheesecake will remain smooth and intact. (See the next page below to continue…)
Another tip? Make sure your cream cheese is really soft before mixing. Taking the time to let it warm up at room temperature avoids those pesky lumps in your batter, which I once overlooked and didn’t have the creaminess I wanted! I recommend letting it sit out for about 30 minutes before you start.
Lastly, don’t skip the cooling steps! This is critical for a perfect cheesecake. Basically, letting your cheesecake cool slowly will help prevent cracks. I used to rush and stick it right in the fridge, but trust me—it’s worth that extra patience for a beautiful end result.
Serving Suggestions
When it comes to serving this delightful Snickers Cheesecake, I find that adding a dollop of whipped cream on the side is an excellent touch. The light texture of the whipped cream balances the richness of the cheesecake, creating a well-rounded dessert experience. You can also serve it with extra drizzles of chocolate and caramel sauce for that overly indulgent vibe—because who doesn’t love a little extra sweetness?
For special occasions, I recommend slicing the cheesecake into smaller pieces. I learned that people often appreciate a smaller slice after a large meal, allowing them to savor each bite without feeling overwhelmed. Plus, it gives you the chance to share and enjoy with friends and family.
Don’t forget about garnishes! Placing a few carefully arranged chopped peanuts on top adds both visual appeal and crunch, making your dessert as beautiful as it is delicious. A sprinkle of sea salt can also enhance the flavors if you’re feeling adventurous!
Variations & Customizations
One of the best things about cheesecake is how easily it can be adapted. If you’re looking for a peanut butter twist, consider swirling in some creamy peanut butter into the filling for added flavor. You’ll have a Snickers cheesecake that tastes even more like the candy bar!
If you want to change up the chocolate flavor, try using dark chocolate instead of milk chocolate in the filling or drizzling. I’ve tried both, and the dark chocolate adds an elegant depth that many people enjoy. You could also use more caramel sauce if you love that sweet, sticky goodness.
For a fun surprise, feel free to add different candies along with the Snickers. Chopped Reese’s or M&M’s can lend a unique twist, making your cheesecake a true candy lovers’ delight. This creativity lets you infuse your personality into the dessert!
How to Store, Freeze & Reheat
If you happen to have leftovers (which I don’t often count on!), storing your Snickers Cheesecake is quite straightforward. I usually wrap it well with plastic wrap or aluminum foil and keep it in the refrigerator, where it can last for about 5-7 days. Just make sure to keep it covered to avoid absorbing any foreign odors from the fridge.
Freezing cheesecake is an option if you ever want to prepare it in advance. Make sure to let your cheesecake cool completely before slicing it into pieces. Then, wrap each slice tightly in plastic wrap, followed by aluminum foil, to keep it fresh. In this way, you can freeze it for up to 2-3 months! When you’re ready to enjoy it again, let it thaw in the refrigerator overnight, and it will be just as good as fresh.
Reheating isn’t necessary for cheesecake, but if you prefer a warm slice, pop it in the oven at 300°F (150°C) for about 10-15 minutes. Just be careful not to let it get too hot—cheesecake is supposed to be creamy and delicious!
Conclusion
I hope you’re as excited as I was when I first created this Snickers Cheesecake! It’s truly a perfect indulgent dessert for any occasion, from family gatherings to special celebrations. I promise that each bite will transport you to a sweet candy-filled dream, and your guests will be raving about it long after they’ve left. So, gather up the ingredients and let’s whip up some love in the form of this decadent treat! Happy baking!