
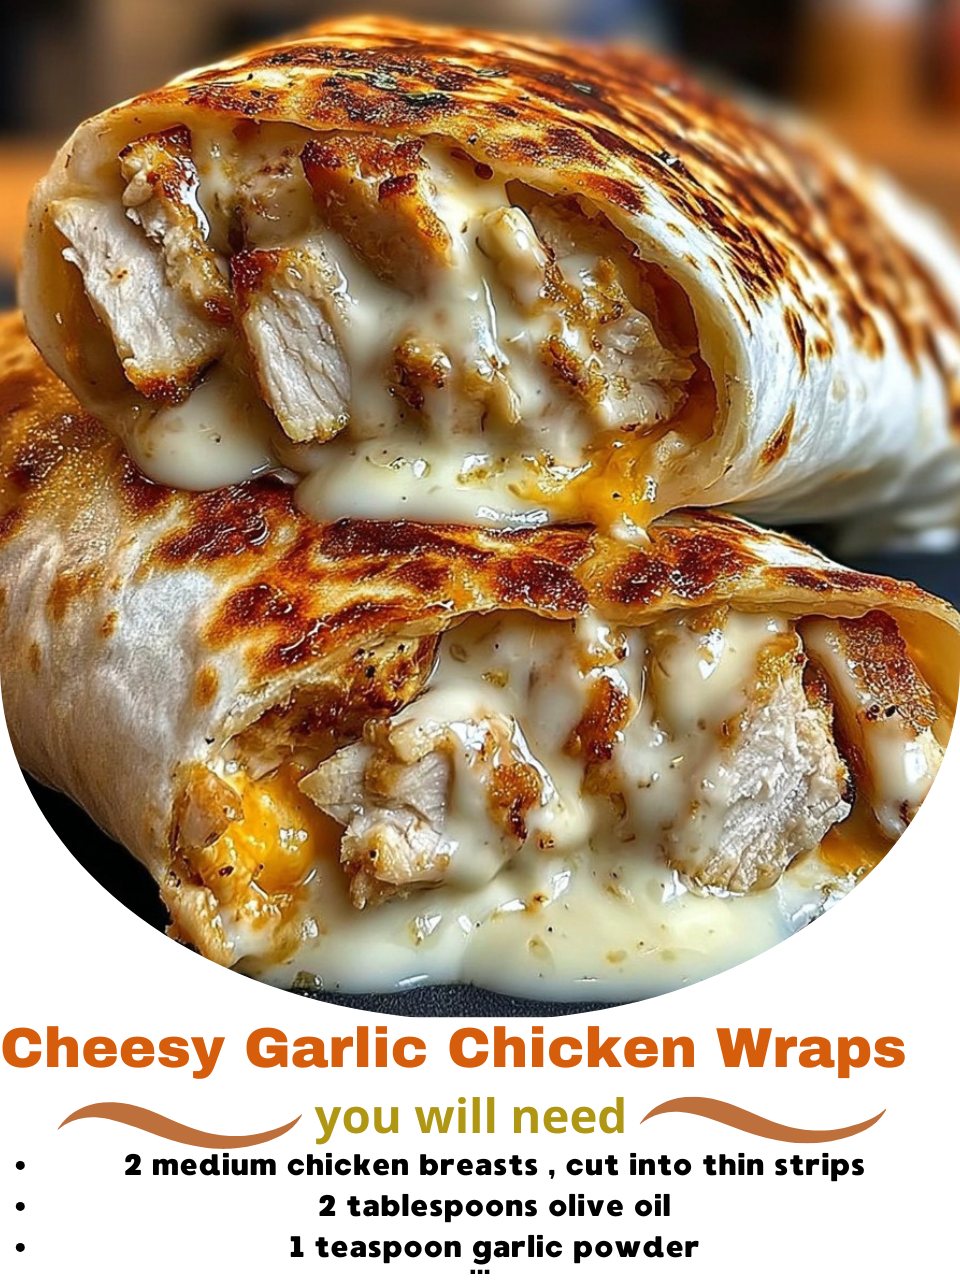
The moment the garlic hit the warm olive oil, my kitchen was filled with an aroma so good it made everyone wander in asking, “What’s for dinner?” I was trying to create something fast, flavorful, and family-friendly with some chicken breasts that needed using. As I watched the thin strips sizzle and brown, then tossed them with melted cheese in a warm tortilla, I knew I’d found a new weeknight champion. That first bite of the cheesy, garlicky, perfectly seasoned chicken wrapped in a soft tortilla was pure comfort. These wraps are my delicious proof that a fantastic meal doesn’t need to be complicated.
Why You’ll Love This Recipe
You’ll love this recipe because it takes simple ingredients and transforms them into a meal that’s bursting with flavor in under 30 minutes. It’s incredibly versatile, perfect for a quick lunch, a satisfying dinner, or even a fun party appetizer when sliced into pinwheels. Even picky eaters can’t resist the combination of tender chicken, gooey cheese, and garlic. From my skillet to yours, I promise this will become your new go-to recipe when you need a delicious, no-fuss meal that feels like a treat.
Ingredients
- 2 medium chicken breasts (about 1 lb total), cut into thin strips
- 2 tablespoons olive oil
- 1 teaspoon garlic powder
- 1 teaspoon smoked paprika
- 1/2 teaspoon onion powder
- 1/2 teaspoon salt
- 1/4 teaspoon black pepper
- 3 cloves fresh garlic, minced
- 1 cup shredded mozzarella cheese
- 1/2 cup shredded cheddar cheese
- 1/4 cup grated Parmesan cheese
- 4 large flour tortillas (burrito-size)
- Optional for serving: shredded lettuce, diced tomatoes, sour cream, ranch dressing
Let’s talk ingredients. Cutting the chicken into thin, uniform strips is the key to quick, even cooking—don’t skip this step. While garlic powder is great for seasoning the chicken, the fresh minced garlic added later is non-negotiable for that punch of real garlic flavor; trust me, it makes a huge difference. For the cheese blend, the mozzarella gives you that wonderful stretch, the cheddar adds sharpness, and the Parmesan brings a salty, nutty depth. Using a blend is far better than just one type. A burrito-sized tortilla is sturdy enough to hold all the filling without tearing.(See the next page below to continue…)
Equipment Needed
- Large skillet or frying pan
- Sharp knife and cutting board
- Tongs
- Mixing bowl (for seasoning chicken)
- Grater (if shredding cheese from a block)
Step-by-Step Instructions
I always start by prepping my chicken. I pat the breasts dry with a paper towel—this helps them brown instead of steam. Then, I slice them against the grain into strips about 1/2-inch thick. In a small bowl, I mix the garlic powder, smoked paprika, onion powder, salt, and black pepper. I toss the chicken strips in this spice mix until they’re evenly coated. This dry brine step, even if just for the few minutes it takes to heat the pan, makes the chicken incredibly flavorful throughout.
I place my large skillet over medium-high heat and add the olive oil. Once the oil is shimmering, I add the chicken strips in a single layer, making sure not to crowd the pan. I cook them for 3-4 minutes per side, using my tongs to flip them, until they’re golden brown and cooked through. The smell of the spices toasting in the oil is absolutely fantastic. I then remove the cooked chicken to a clean plate and reduce the heat to medium-low.
In the same skillet, there will be delicious browned bits and a little oil left. This is flavor gold! I add the three cloves of minced fresh garlic right into that pan. I stir it constantly for just about 30 seconds until it becomes fragrant—you have to watch it closely so it doesn’t burn. Then, I return all the cooked chicken strips to the skillet, tossing them to coat in the garlicky pan juices. I turn off the heat.(See the next page below to continue…)
Now, for the cheesy finale. I sprinkle all of the shredded mozzarella, cheddar, and Parmesan cheeses directly over the hot chicken in the skillet. I don’t stir yet. I just let the residual heat begin to melt the cheese for a minute. Then, I give it one gentle toss to create a gloriously cheesy, garlicky chicken mixture where every strip is coated. I warm my tortillas briefly in the microwave or a dry pan to make them pliable. I divide the cheesy chicken mixture among the tortillas, add any desired fresh toppings like lettuce or tomato, roll them up tightly, and dinner is served.
Pro Tips for Best Results
I tested cooking the chicken three different ways: whole breasts, cubed, and thin strips. The thin strips were the clear winner. They cook in minutes, get more surface area for browning and seasoning, and are the perfect size for wrapping. Cubes can dry out, and whole breasts take too long and don’t integrate into the wrap as nicely.
Here’s what I learned the hard way about the garlic: add the fresh minced garlic after cooking the chicken. I once added it with the raw chicken, and it burned in the time it took for the chicken to cook, leaving a bitter taste. By quickly cooking the garlic in the residual pan juices after the chicken is done, you get the perfect, potent garlic flavor without any bitterness.
Don’t use pre-shredded bagged cheese if you can help it. Those cheeses are coated to prevent clumping, which also prevents them from melting into a smooth, cohesive sauce. Taking two extra minutes to shred a block of cheese yourself makes the cheesiness in these wraps incredibly smooth and gooey. It’s a small step with a big payoff.
Common Mistakes to Avoid
My biggest first-time mistake was overfilling the wraps. I loaded up each tortilla so much that when I went to roll it, cheese and chicken spilled out everywhere, creating a messy eat. A moderate, even filling down the center of the tortilla is much easier to roll tightly and eat without disaster. You can always make a fifth wrap if you have extra filling.(See the next page below to continue…)
Another pitfall is using cold tortillas straight from the fridge. A cold tortilla is stiff and will crack when you try to roll it. Always warm them for 15-20 seconds in the microwave (wrapped in a damp paper towel) or for a few seconds on each side in a dry skillet. A warm tortilla is pliable and seals your wrap perfectly.
Don’t skip drying the chicken before seasoning. If the chicken is wet, it will steam in the pan instead of sear, and the seasoning won’t stick as well. That quick pat with a paper towel is the first step to getting those beautiful, flavorful browned bits on your chicken strips.
Finally, avoid cooking the chicken on too low heat. You want a good sear to lock in juices and create flavor. If the pan isn’t hot enough, the chicken will release its liquids and boil in them, becoming tough and grey. Wait for the oil to shimmer before adding the chicken, and listen for that satisfying sizzle.
Serving Suggestions
I like serving these wraps immediately, cut in half on a diagonal to show off the cheesy filling. On the side, I’ll serve a simple, crisp garden salad or a bowl of tortilla chips with salsa and guacamole. The fresh, cool sides are the perfect complement to the warm, rich wraps.
For a fun DIY dinner, I’ll set out all the components—the cheesy garlic chicken, warm tortillas, and bowls of toppings like shredded lettuce, pico de gallo, sour cream, and sliced jalapeños—and let everyone build their own wrap. It’s interactive and ensures everyone gets exactly what they want.
When I’m packing lunch for the next day, I’ll wrap one tightly in foil. Eaten cold or slightly warmed in the office microwave, it’s a lunch that feels much more exciting than a typical sandwich. Just maybe pack some napkins!
Variations & Customizations
This recipe is a fantastic base. My favorite variation is a Buffalo Chicken version. I toss the cooked chicken strips in 1/3 cup of buffalo sauce before adding the cheese, and I use a blue cheese crumble instead of cheddar. Serve with celery sticks and ranch on the side.
For a veggie-packed twist, I’ll add a handful of fresh spinach to the skillet right after the garlic, letting it wilt, before adding the chicken back in. Sliced bell peppers or mushrooms can also be sautéed with the chicken from the start.
If you want to change up the cheese, try using Pepper Jack for a kick, or a creamy havarti for a milder, meltier experience. You can also swap the flour tortillas for spinach wraps, sun-dried tomato wraps, or even crunchy lettuce cups for a low-carb option.
How to Store, Freeze & Reheat
The cheesy chicken mixture stores very well on its own. Let it cool and keep it in an airtight container in the refrigerator for up to 3 days. Reheat gently in a skillet or microwave before assembling fresh wraps. This is a great meal-prep component.
You can freeze the assembled, uncooked wraps individually. Wrap each tightly in plastic wrap, then in foil. Freeze for up to 1 month. To cook from frozen, unwrap, wrap in a new piece of foil, and bake at 375°F for 25-30 minutes until heated through.
I do not recommend freezing already assembled and cooked wraps, as the tortilla can become soggy upon thawing. For best results, freeze the filling separately or assemble and freeze the uncooked wraps. To reheat a cooked wrap, the oven or air fryer at 350°F for about 10 minutes will keep the tortilla from getting soggy, unlike the microwave.
Conclusion
These Cheesy Garlic Chicken Wraps are the happy solution for busy nights, proving that a delicious, crowd-pleasing meal doesn’t have to be a production. They’re fast, flexible, and packed with the kind of flavor that makes everyone ask for seconds. I hope this recipe brings as much easy, cheesy joy to your table as it has to mine. Give them a try tonight—you won’t be disappointed! Happy cooking, friends.