
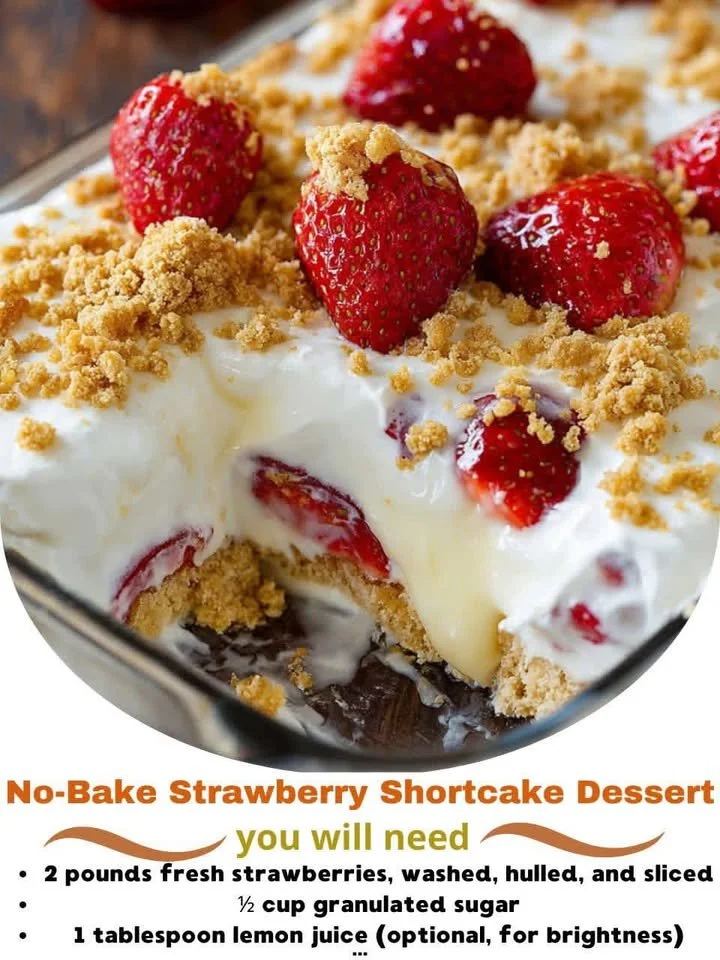
I absolutely love having a dessert that feels light and refreshing, especially during the warmer months. That’s why I’m so excited to share my No-Bake Strawberry Shortcake Dessert recipe with you! This delightful treat combines the sweetness of fresh strawberries with the rich, creamy texture of whipped topping and a crumbly biscuit base. It’s simple to put together and is a crowd-pleaser every time I make it. Plus, no baking means fewer dishes to wash, which is always a win in my kitchen!
Why You’ll Love This Recipe
You’ll love this No-Bake Strawberry Shortcake Dessert because it caters to my lazy-gourmet side! It comes together in minutes and is perfect for those hot summer days when you want something sweet without the oven cranking up the heat. The layers of strawberries and fluffy cream create a perfect harmony of flavors and textures, making every bite a slice of bliss. It’s super versatile, too, allowing for adjustments based on your preference. I guarantee this dessert will transport you to a sunny picnic, one delightful spoonful at a time. (See the ingredients in the next page below…)
Ingredients
– 1 pound fresh strawberries, hulled and sliced
– 1 cup heavy whipping cream
– 1/2 cup powdered sugar
– 1 teaspoon vanilla extract
– 1 package (8 oz) cream cheese, softened
– 1 cup graham cracker crumbs
– 1/4 cup butter, melted
– Fresh mint leaves for garnish (optional)
Equipment Needed
– Mixing bowls
– Electric mixer (or whisk if you’re feeling adventurous!)
– 9×9 inch baking dish
– Rubber spatula
– Measuring cups and spoons
Step-by-Step Instructions
To begin making this scrumptious No-Bake Strawberry Shortcake Dessert, I first prepare my strawberries. I love using fresh ones, as they add a delightful burst of flavor. Simply hull and slice up your strawberries, and set them aside so they can release their juices while I whip the cream. In a mixing bowl, I whip together the heavy cream, powdered sugar, and vanilla extract until stiff peaks form. It’s so satisfying to watch that transformation as the cream goes from liquid to cloud-like perfection! (See the next page below to continue steps…)
Next, in another bowl, I blend the softened cream cheese until it’s smooth and well-combined. Once that’s ready, I gently fold in the whipped cream, being careful not to deflate all that lovely air we’ve just whipped in. This creates a luscious filling that’s just begging to be layered with strawberries and crumbs! Now, for the base: I mix the melted butter with the graham cracker crumbs until they resemble wet sand. Press this mixture firmly into the bottom of my baking dish; it’s the perfect crunchy foundation for my layers.
Once the base is ready, it’s time for the fun part! I spread half of the whipped cream and cream cheese mixture over the graham cracker crust followed by a generous layer of sliced strawberries. I repeat the layers, finishing off with the rest of the cream mixture on top. For a final touch, I love adding a few more sliced strawberries and a sprig of mint for color before popping it into the fridge. This dessert needs to chill for at least two hours (though a little longer is even better). And trust me, the waiting is the hardest part!
When the dessert is finally chilled, I slice into it and serve. The moment I dig in, the layers start to blur beautifully together, with creamy textures and pops of fresh berries cascading with each scoop. The crunchy crust provides the necessary contrast to the soft filling, and it’s impossible not to feel like you’re indulging in a cloud of sweetness.
Pro Tips for Best Results
One of my biggest tips for this recipe is to whip your cream until it’s just right. I’ve learned the hard way that over-whipping can lead to a grainy texture, which is not what we want! You want light, fluffy whipped cream that holds its shape, so keep an eye on it. I usually slow the mixer down toward the end to keep control.
Secondly, use freshly-hulled strawberries. I always prefer the taste and texture of fresh berries over frozen ones in this recipe. But if you find yourself short on fresh strawberries, you can mix in a few frozen ones to stretch what you have. Just be mindful not to add too many, or your dessert can get watery. I’ve tried it both ways, and fresh berries truly make the difference!
Lastly, I’ve experimented with the graham cracker crust by adding a pinch of cinnamon for a warm spice note. It worked wonders! If you have a favorite cookie, like Oreos or ginger snaps, subbing them for the graham crackers can give your dessert an entirely new twist. Trust me; the possibilities are delicious!
Common Mistakes to Avoid
One common mistake I often see is not letting the dessert chill long enough. I’m guilty of wanting to dive right in after only an hour or so of chilling—it smells so good! However, I quickly learned that the flavors meld beautifully with a good two hours in the fridge. It’s worth the wait for that creamy, decadent texture! (See the next page below to continue…)
Another mistake is not pressing the graham cracker base firmly enough into the bottom of the dish. If it’s too loose, it might crumble and break apart when you go to slice the dessert. I like to use a flat-bottomed measuring cup to really pack it down well! It’s a little extra effort but makes such a big difference in the final product.
Also, consider the size of your strawberries. If you slice them too thickly, they won’t blend well into the layers and can overpower the dessert. A uniform thickness ensures that every bite holds just the right amount of strawberries without overwhelming the creamy layers. I aim for slices that are about 1/4 inch thick for that perfect balance!
Finally, be careful with how much liquid your strawberries produce. If they sit too long after being sliced, they release juices that can make the whole dessert watery. I find that capturing those juices in a separate bowl and mixing them with a little sugar to macerate adds a lovely drizzle over my slices when serving, enhancing that strawberry flavor without compromising the layers.
Serving Suggestions
When it comes to serving this No-Bake Strawberry Shortcake Dessert, I love to finish them off with a dollop of whipped cream and a few extra slices of fresh strawberries on top. It makes each piece feel like a special occasion! The mint leaves also add a lovely touch of color and fresh aroma to the presentation.
For a gathering or picnic, I often slice it into squares and present it on a pretty platter. I’ve even considered putting the individual squares into cupcake liners for easy serving! This is especially fun for parties, where guests can grab their own piece without needing extra utensils. The more, the merrier!
Another lovely serving suggestion is to drizzle a little balsamic reduction over the top. It sounds fancy, but it brings out the flavor of strawberries in a delightful way that feels effortless. It’s just the right touch to impress your guests while remaining simple—and of course, it tastes divine!
Variations & Customizations
If you’re feeling adventurous, one of my favorite variations is to swap out the strawberries for other berries, like blueberries or raspberries. The cream layer still complements those fruits beautifully, and it creates a colorful medley of flavors. You could even mix some berries together for a wild berry fiesta! The key is to keep the current ratios the same; the creaminess balance stays enjoyable.
Another fun customization is to layer in some lemon curd. I discovered this by accident when I had some leftover in my fridge, and it adds a luscious citrus burst that contrasts wonderfully with the sweetness of the strawberries. Just be careful not to overpower—it’s all about balance! I find a thin layer in between the strawberry and cream adds a refreshing twist.
Lastly, consider adding a layer of chocolate. A thin layer of chocolate ganache between the cream and the fruit elevates this dessert to another level—perfect for all the chocolate lovers like me! Melt some chocolate, let it cool slightly, and pour it over the cream layer before adding the strawberries. You won’t regret it!
How to Store, Freeze & Reheat
This delightful dessert can be stored in an airtight container in the refrigerator for up to three days—if it lasts that long! I always cover it tightly with plastic wrap to keep it fresh. Each slice remains creamy and delicious, making it perfect for make-ahead desserts for gatherings. Just be careful to avoid letting it sit out too long once served, as the texture might not hold up if it gets warm.
If you want to make this dessert ahead of time, consider freezing it instead! I’ve done this a few times, especially when strawberries are in season. Just cover the dessert well and seal it in the freezer. You can easily thaw it overnight in the fridge before serving, and it’s just as good as fresh. Just remember, the whipped cream layer may be a bit thinner after freezing, but the flavors remain vibrant!
Unfortunately, this isn’t a dessert that reheats well in the traditional sense, so I wouldn’t recommend it for heating up in the microwave. Instead, serving it cold is part of the experience! This isn’t too much of a problem since it’s so quick to whip up, but if you want to maintain its texture, keep it cool until serving!
Conclusion
I hope you find as much joy in making this No-Bake Strawberry Shortcake Dessert as I do! It’s the perfect way to embrace the vibrant flavors of fresh strawberries while enjoying a hassle-free treat that everyone will love. Whether it’s for a picnic, a family gathering, or just a sweet indulgence at home, this recipe will surely bring smiles. Let me know how yours turns out—I’d love to hear about your delicious creations!