
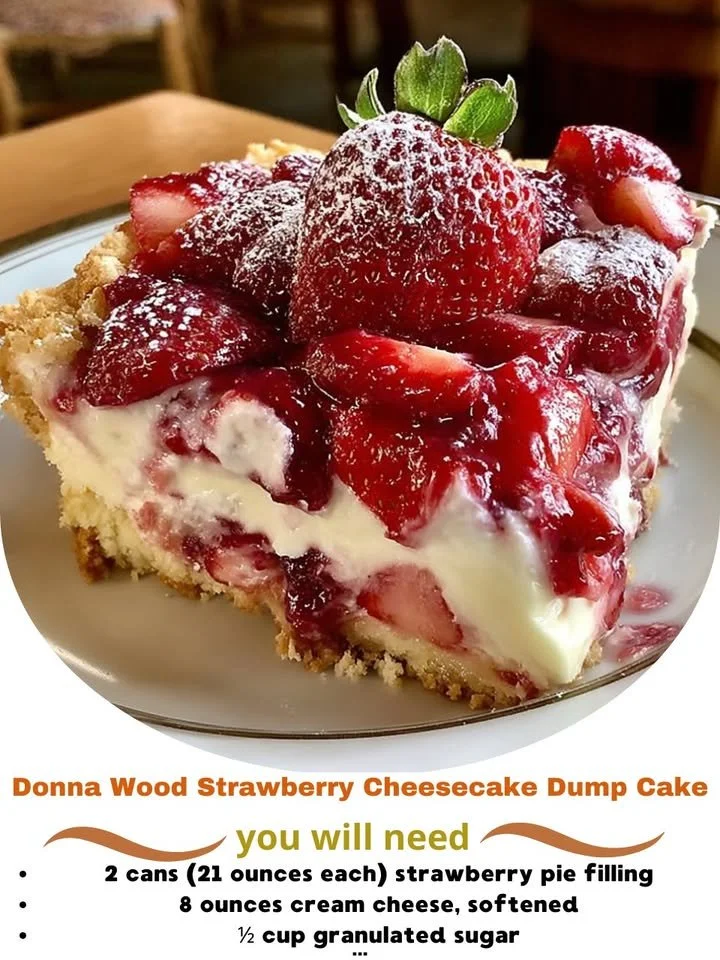
The Donna Wood Strawberry Cheesecake Dump Cake. It’s a delightful dessert that’s as easy to make as it is delicious. Whenever I take a bite, I’m transported to warm summer days, basking in the sun, surrounded by fresh strawberries and sweet memories. Trust me; this cake is guaranteed to bring a smile to your face and warmth to your heart.
Why You’ll Love This Recipe
What I adore most about this dump cake is its simplicity. With just a few ingredients and minimal effort, I can whip together a mouthwatering dessert that’s perfect for any occasion, whether it’s a family gathering, a potluck, or just a sweet treat for myself. The magical combination of creamy cheesecake and juicy strawberries creates a flavor explosion that I can’t resist! It’s truly a no-fuss dessert that looks as beautiful as it tastes, making it a real showstopper in my kitchen. (See the ingredients in the next page below…)
Ingredients
– 2 cups fresh strawberries, hulled and sliced
– 1 can (21 oz) strawberry pie filling
– 1 package (8 oz) cream cheese, softened
– 1 cup granulated sugar
– 1 teaspoon vanilla extract
– 1 box (15.25 oz) yellow cake mix
– 1 stick (1/2 cup) unsalted butter, melted
– 1/2 cup powdered sugar for dusting (optional)
Equipment Needed
– 9×13 inch baking dish
– Mixing bowls
– Electric mixer or whisk
– Measuring cups and spoons
– Rubber spatula
– Oven mitts
Step-by-Step Instructions
Let’s dive into the delicious process of making this incredible dump cake! First, I preheat my oven to 350°F (175°C) while I prepare my ingredients. In a mixing bowl, I combine the softened cream cheese, granulated sugar, and vanilla extract. Using an electric mixer, I whip it all together until it’s smooth and creamy. This step alone fills my kitchen with such a lovely sweet aroma that I can hardly wait to dive in! (See the next page below to continue steps…)
Next, I spread the fresh strawberries evenly across the bottom of my greased baking dish. On top of that, I pour the strawberry pie filling, letting it cascade beautifully over the fresh berries. Then, I take my luscious cream cheese mixture and dollop it over the fruity layer. I gently spread it out with a rubber spatula, making sure it covers the berries just right.
Now comes the fun part! I sprinkle the dry yellow cake mix all over the cream cheese layer in an even layer. It looks like a sunny blanket of yellow goodness! Then, I drizzle the melted butter generously on top. This will create that scrumptious, crumbly topping we all love. Finally, I pop my baking dish into the preheated oven and set the timer for about 45-50 minutes. The anticipation builds as the delightful smells waft through my kitchen.
Keep an eye on your cake in the last few minutes of baking! You want the top to be golden brown and bubbly. Once it’s ready, I pull it out of the oven and let it cool for a few minutes before slicing. If I can resist, I love to dust a little powdered sugar over the top for an added touch of sweetness and elegance.
Pro Tips for Best Results
From my experience, using fresh strawberries makes all the difference in enhancing the overall flavor of the dump cake. I’ve tried using frozen strawberries, but they tend to release too much juice, which can make the cake soggy. So, whenever I can, I opt for those bright red, juicy ones from my farmers’ market.
Also, if you’re short on time, you can absolutely prepare the cream cheese mixture in advance. I usually whip it up the night before, just to save a little time the next day. It’s delightful to know I have everything ready to go when I want to bake!
Lastly, don’t skip the cooling step after baking. I know it’s tempting to dive right in—believe me, I’ve been there! But letting it cool slightly allows the flavors to meld beautifully and makes slicing a lot easier. Your friends and family will thank you for that perfect piece!
Common Mistakes to Avoid
One mistake I made early on was not greasing my baking dish well enough. I learned the hard way when half of my cake decided to stick! Now, I always make sure to use either cooking spray or butter to coat the dish so that flipping it out becomes a breeze. (See the next page below to continue…)
Another common pitfall is using too much butter. I’ve experimented with varying amounts, and I found that just enough to moisten the cake mix works best. Too much can lead to an overly greasy topping that might drown out the wonderful strawberry flavor.
Also, be mindful of your oven temperature. If it’s running hot, your cake might brown too quickly or even burn on the edges. I keep an oven thermometer handy to ensure everything bakes evenly.
Finally, resist the urge to cut into the cake right after it comes out of the oven. The cooling time really allows the layers to set, and trust me, the taste is much better when it has had just a bit of patience.
Serving Suggestions
When it comes time to serve this delightful dump cake, I like to present it warm, with a generous scoop of whipped cream on top. The cool cream contrasts beautifully with the warm cake, and the fluffy texture adds a lovely touch. Sometimes I even sprinkle a few fresh strawberries on top for an extra pop of color.
For those who love a little indulgence, I recommend adding a drizzle of chocolate sauce. The rich chocolate mingling with the gooey strawberry cheesecake is a combination that should be experienced!
If I’m serving this at a gathering, I often pair it with a scoop of vanilla ice cream on the side. The melting ice cream running into each slice creates an ooey-gooey goodness that makes this dessert unforgettable.
Variations & Customizations
While I’m partial to the classic strawberry version, this dump cake is incredibly versatile! Sometimes I like to switch things up by using a different fruit, like blueberries or peaches. Each fruit brings its unique flavor, turning the recipe into a whole new dessert experience.
Another fun idea I’ve experimented with is adding a splash of lemon juice or zest to the cream cheese mixture. This little twist brightens up the whole cake and gives it a refreshing zing that pairs beautifully with the strawberries.
For a richer taste, I’ve also played around with adding a layer of chocolate chips between the fruit and cake mix. Talk about decadent! The melty chocolate mingling with the fruit and creamy layer is like a sweet surprise in every bite.
How to Store, Freeze & Reheat
If you’re lucky enough to have any leftovers (which is rare in my house!), you can easily store the dump cake in an airtight container in the refrigerator for up to five days. It’s just as tasty the next day, especially when enjoyed cold or warmed up a bit in the microwave.
If you want to make this dessert ahead of time, I suggest freezing it. Allow the baked cake to cool completely, then wrap it tightly in plastic wrap and foil before storing it in the freezer for up to three months. That way, you can pull it out for impromptu gatherings or a sweet treat whenever you want it!
To reheat, I gently warm individual portions in the microwave for about 30 seconds, or if I have a larger piece, I’ll reheat it in the oven for around 15-20 minutes at 350°F (175°C). The melting pie filling and creamy layer will remind you why you loved it in the first place!
Conclusion
I hope you give this Donna Wood Strawberry Cheesecake Dump Cake a try! It’s one of those recipes that’s sure to impress, yet so easy that you’ll want to make it time and again. Each bite takes me back to cherished moments filled with laughter, love, and sweet indulgence. So roll up your sleeves, gather your ingredients, and let’s create some delicious memories together!