
Another pitfall is not letting the cheesecake sit long enough in the fridge. If you take it out too soon, it may not hold its shape when you slice into it, and that can be disappointing for presentation. I’ve learned that patience truly pays off here!
Also, keep an eye on your whipped cream. It needs to be whipped to stiff peaks, but if you overbeat it, it can turn grainy, which isn’t ideal for your cheesecake. I often use a light touch when I’m folding it into the cream cheese mixture to ensure it stays fluffy.
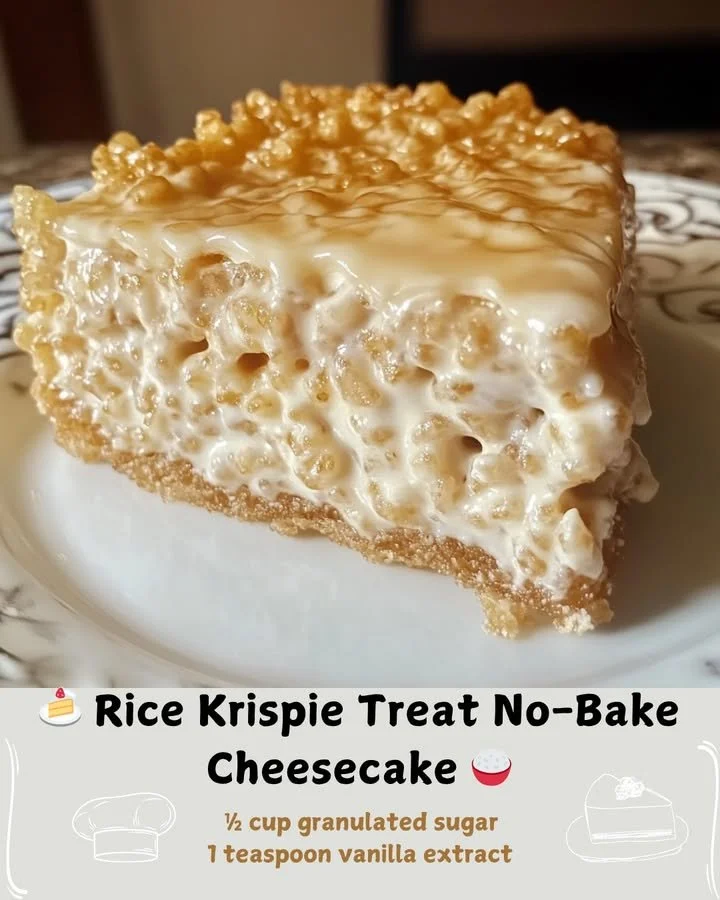
Lastly, I found out the hard way that using a non-springform pan can complicate things. The sides don’t come off, and you might end up struggling to get the cheesecake out in one piece. If you don’t have a springform pan, I suggest simply lining another pan with parchment paper.
Serving Suggestions
When it comes time to serve, I love to slice it into generous pieces and pair it with fresh berries. Strawberries or blueberries add a lovely tartness that complements the sweetness of the cheesecake beautifully. I can already imagine how colorful the platter looks!
Another idea is to offer a selection of toppings. I’ve had friends sprinkle crushed Oreos or drizzle some salted caramel over their slices, and it’s always a hit. Everyone can customize their treat, which makes it a fun addition to any gathering.
Lastly, don’t forget about drinks! A chilled mimosa or a cup of freshly brewed coffee pairs wonderfully with this sweet treat, creating a balanced dessert experience. I often serve it at brunch; it’s a crowd-pleaser!
Variations & Customizations
If you’re feeling adventurous, you can customize this cheesecake in many ways! For a chocolatey version, swap in cocoa powder into the cheesecake filling or fold in some mini chocolate chips before pouring it onto the Rice Krispie layer. It’s heavenly!
I’ve also played around with flavors by adding different extracts. A splash of almond extract instead of vanilla can give it a unique twist. You could also swap in a fruit puree, like strawberry or raspberry, for a delightful fruity flavor.
Lastly, think about adding some crunch! Try mixing in chopped nuts or toasted coconut into the Rice Krispies for added texture. It gives each bite an interesting twist while enhancing that delightful crunch factor.
How to Store, Freeze & Reheat
To store leftovers, simply cover the cheesecake with plastic wrap or transfer slices to an airtight container and refrigerate. It will last for about 3 to 5 days, and I can assure you—it rarely lasts that long in my house!
If you want to freeze it, I recommend slicing it first and placing the individual pieces in a freezer-safe container separated by parchment paper. It should keep well for up to two months. When you’re ready to enjoy, just transfer a slice to the fridge the night before or let it thaw at room temperature for a couple of hours.
Reheating isn’t really necessary with this no-bake cheesecake, but if you want to enjoy it a little warmer, I suggest letting it sit out for 10–15 minutes before serving. This way, the texture softens a bit, making it easier to slice and enjoy.
Conclusion
I hope you’re as excited to try this No-Bake Rice Krispie Treat Cheesecake as I was when I first made it! It’s such a fun and unique dessert that brings back childhood memories while indulging in the smoothness of a cheesecake. Give it a shot—I promise you and your loved ones will be delighted! Happy baking (or should I say, no-baking)!