
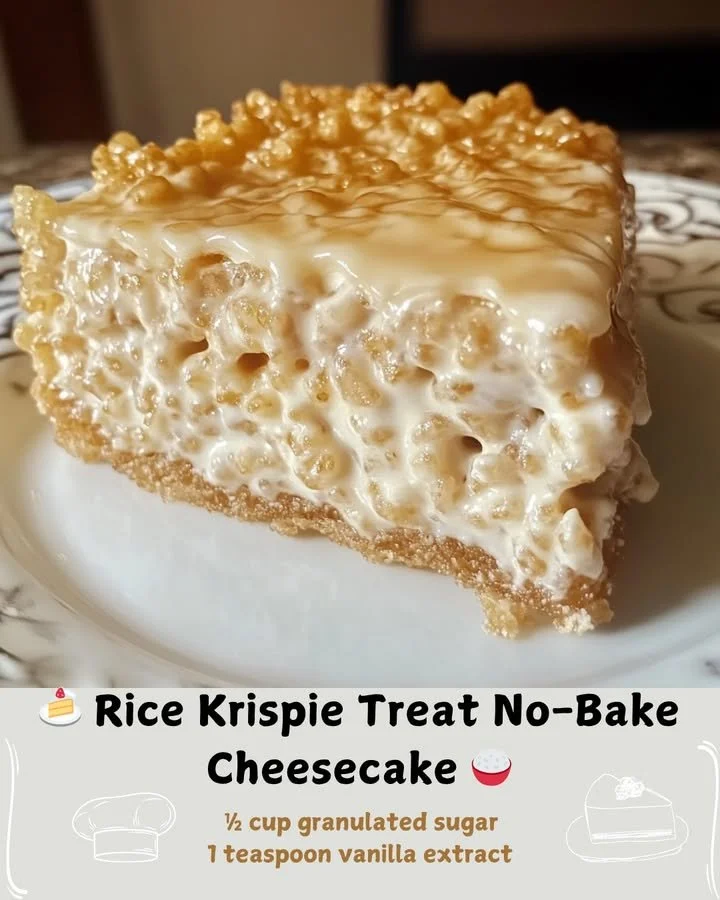
If you’ve ever had the chance to indulge in a Rice Krispie treat, you already know how delightful those crispy, sweet bites can be. Now, imagine combining that nostalgic flavor with the creamy goodness of cheesecake! That’s exactly what I’m sharing with you today—the oh-so-delicious No-Bake Rice Krispie Treat Cheesecake. This dessert is a perfect blend of textures, combining the crunch of Rice Krispies with the smoothness of cheesecake. Plus, it’s a no-bake recipe, which means it’s easy, fun, and perfect for any occasion!
Why You’ll Love This Recipe
This recipe is not just delicious; it’s a walk down memory lane with a twist! The crunchy and gooey Rice Krispie layer perfectly complements the rich and velvety cheesecake filling. Plus, it’s a no-bake dessert, so you won’t be heating up your kitchen, which is perfect for those warm summer days. I also love how quick this recipe comes together—it’s great for unexpected guests or just a delightful treat for myself. Let’s not forget, it’s visually stunning too! It’s sure to impress everyone. (See the ingredients in the next page below…)
Ingredients
– 4 cups Rice Krispie cereal
– 3 tablespoons unsalted butter
– 1 package (10 oz) mini marshmallows
– 1 package (8 oz) cream cheese, softened
– 1/2 cup powdered sugar
– 1 teaspoon vanilla extract
– 1 cup heavy whipping cream
– Optional: chocolate drizzle or sprinkles for topping
Equipment Needed
– Large mixing bowl
– 9-inch springform pan
– Medium saucepan
– Electric mixer or whisk
– Spatula
– Measuring cups and spoons
Step-by-Step Instructions
First, I start by making the Rice Krispie base. In a medium saucepan, melt the butter over low heat. Once melted, add the mini marshmallows, stirring continuously until they’re completely melted and smooth. It smells heavenly! Remove the pan from heat and then quickly stir in the Rice Krispies until they’re fully coated. I then press this mixture firmly into the bottom of a 9-inch springform pan to form a nice, even layer. (See the next page below to continue steps…)
Next, I tackle the cheesecake filling. In a large mixing bowl, I combine the softened cream cheese, powdered sugar, and vanilla extract. Using an electric mixer, I blend everything until the mixture is smooth and creamy. Then, in a separate bowl, I whip the heavy cream until stiff peaks form. I gently fold this whipped cream into the cream cheese mixture, which adds a fantastic lightness to the filling.
Once the cheesecake filling is fully combined, I pour it over the Rice Krispie layer, smoothing it out with a spatula. The combination of textures at this stage is visually appealing, and I can barely wait to indulge! After that, I cover it with plastic wrap and pop it into the fridge for at least four hours—or overnight if I can wait that long!
When it’s set, I carefully remove the sides of the springform pan. I love the moment of anticipation when I first uncover the cake; it’s nice and firm yet creamy at the same time. To finish off, I sometimes drizzle chocolate on top or sprinkle some extra Rice Krispies for an added crunch!
Pro Tips for Best Results
I tested this recipe three ways to find the best texture. First, I tried it with regular marshmallows, which worked but didn’t yield the same softness. I recommend sticking with the mini marshmallows for that perfect gooeyness.
Another tip? Make sure your cream cheese is at room temperature before mixing! I learned the hard way that cold cream cheese can create lumps in your filling, and no one wants that. The smoother your cream cheese, the creamier your cheesecake will be.
Finally, I always recommend refrigerating it overnight if you can. The flavors meld beautifully, and the cheesecake sets to perfection. It’s worth the wait!
Common Mistakes to Avoid
One mistake I made on my first attempt was not pressing the Rice Krispie layer firmly enough. When I poured the cheesecake filling over it, the base crumbled and caused a mess! Make sure to press it down firmly into the pan—seriously, don’t skip this step. (See the next page below to continue…)
Another pitfall is not letting the cheesecake sit long enough in the fridge. If you take it out too soon, it may not hold its shape when you slice into it, and that can be disappointing for presentation. I’ve learned that patience truly pays off here!
Also, keep an eye on your whipped cream. It needs to be whipped to stiff peaks, but if you overbeat it, it can turn grainy, which isn’t ideal for your cheesecake. I often use a light touch when I’m folding it into the cream cheese mixture to ensure it stays fluffy.
Lastly, I found out the hard way that using a non-springform pan can complicate things. The sides don’t come off, and you might end up struggling to get the cheesecake out in one piece. If you don’t have a springform pan, I suggest simply lining another pan with parchment paper.
Serving Suggestions
When it comes time to serve, I love to slice it into generous pieces and pair it with fresh berries. Strawberries or blueberries add a lovely tartness that complements the sweetness of the cheesecake beautifully. I can already imagine how colorful the platter looks!
Another idea is to offer a selection of toppings. I’ve had friends sprinkle crushed Oreos or drizzle some salted caramel over their slices, and it’s always a hit. Everyone can customize their treat, which makes it a fun addition to any gathering.
Lastly, don’t forget about drinks! A chilled mimosa or a cup of freshly brewed coffee pairs wonderfully with this sweet treat, creating a balanced dessert experience. I often serve it at brunch; it’s a crowd-pleaser!
Variations & Customizations
If you’re feeling adventurous, you can customize this cheesecake in many ways! For a chocolatey version, swap in cocoa powder into the cheesecake filling or fold in some mini chocolate chips before pouring it onto the Rice Krispie layer. It’s heavenly!
I’ve also played around with flavors by adding different extracts. A splash of almond extract instead of vanilla can give it a unique twist. You could also swap in a fruit puree, like strawberry or raspberry, for a delightful fruity flavor.
Lastly, think about adding some crunch! Try mixing in chopped nuts or toasted coconut into the Rice Krispies for added texture. It gives each bite an interesting twist while enhancing that delightful crunch factor.
How to Store, Freeze & Reheat
To store leftovers, simply cover the cheesecake with plastic wrap or transfer slices to an airtight container and refrigerate. It will last for about 3 to 5 days, and I can assure you—it rarely lasts that long in my house!
If you want to freeze it, I recommend slicing it first and placing the individual pieces in a freezer-safe container separated by parchment paper. It should keep well for up to two months. When you’re ready to enjoy, just transfer a slice to the fridge the night before or let it thaw at room temperature for a couple of hours.
Reheating isn’t really necessary with this no-bake cheesecake, but if you want to enjoy it a little warmer, I suggest letting it sit out for 10–15 minutes before serving. This way, the texture softens a bit, making it easier to slice and enjoy.
Conclusion
I hope you’re as excited to try this No-Bake Rice Krispie Treat Cheesecake as I was when I first made it! It’s such a fun and unique dessert that brings back childhood memories while indulging in the smoothness of a cheesecake. Give it a shot—I promise you and your loved ones will be delighted! Happy baking (or should I say, no-baking)!