
Next, add the eggs one at a time, mixing well after each addition. Then, incorporate the buttermilk and vanilla extract—this is where the cake starts to take on its rich Southern flavor. In a separate bowl, whisk together the flour, baking powder, baking soda, and salt. Gradually add the dry ingredients to the wet mixture, mixing until just combined. Be careful not to over-mix; I always remind myself that a few flour specks are perfectly fine. Once combined, divide the batter evenly between the prepared pans, smoothing the tops with a spatula.
Bake the cakes for about 25-30 minutes or until a toothpick inserted into the center comes out clean. This part always gets me buzzing with excitement; the smell of freshly baked cake is heavenly! Let the cakes cool in their pans for about 10 minutes before transferring them to a cooling rack to cool completely. This is crucial, as icing a warm cake can lead to a melty mess, which I’ve also learned the hard way!
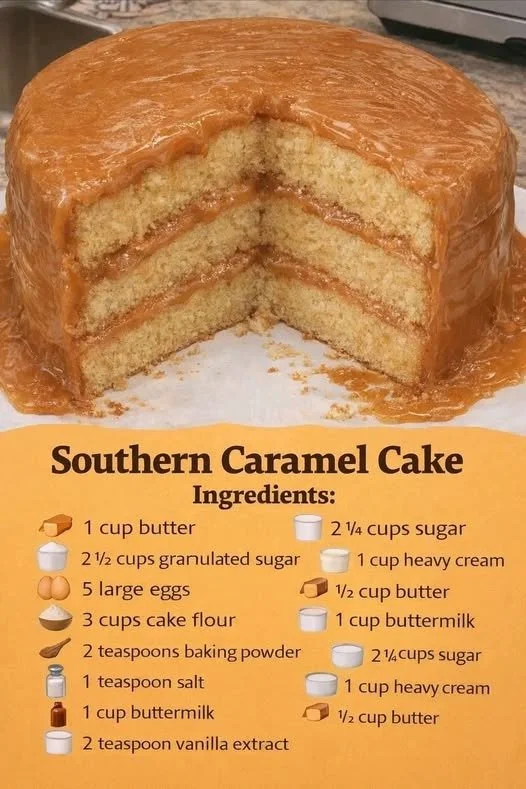
Now, while your cakes are cooling, let’s make that luxurious caramel icing! In a medium saucepan, melt 1 cup of sugar over medium heat, stirring constantly until it turns into a beautiful amber color. I can’t help but feel like a caramel wizard when it’s bubbling away. Add in about half a cup of heavy cream (be careful, as it can bubble up!), then stir in the butter and a pinch of salt. Let it cool slightly before you dive in—it’ll thicken as it cools, creating the perfect glossy finish for your cake!
Pro Tips for Best Results
Through trial and error, I’ve found that using room temperature ingredients—like butter and eggs—really does make a significant difference in the texture of the cake. It creates a better emulsion that results in a fluffier cake. So, I always make sure to pull those out ahead of time! Also, I try to measure my flour correctly by spooning it into the measuring cup and leveling it off with a knife. This method has saved me from the overly dense cakes I’ve experienced after packing too much flour in.
Another helpful tip is to make your caramel icing just before you’re ready to use it. If it cools down too much, it will thicken significantly and be harder to spread, and you want that perfect pourable consistency. If you find it’s too thick after cooling, simply reheat it gently on the stove. And remember, don’t be shy about adjusting the amount of caramel on your cake—it’s meant to be decadent, so layer it on generously!
Lastly, I always use a serrated knife to level off my cakes, which ensures that each layer stacks up beautifully. It really makes a difference when it’s time to frost the cake, as the layers fit together perfectly and look so professional. Trust me, a little care in preparation goes a long way!
Common Mistakes to Avoid
One mistake I frequently encountered was not allowing the cakes to cool before frosting, and let me tell you, it was a sticky situation! The icing just melted into the cake instead of sitting pretty on top. I’ve since learned to grant my cakes the proper cooling time and now have no regrets. On the flip side, if you leave them to cool too long, you can end up with dry cakes, so keep that balance in mind! (See the next page below to continue…)