
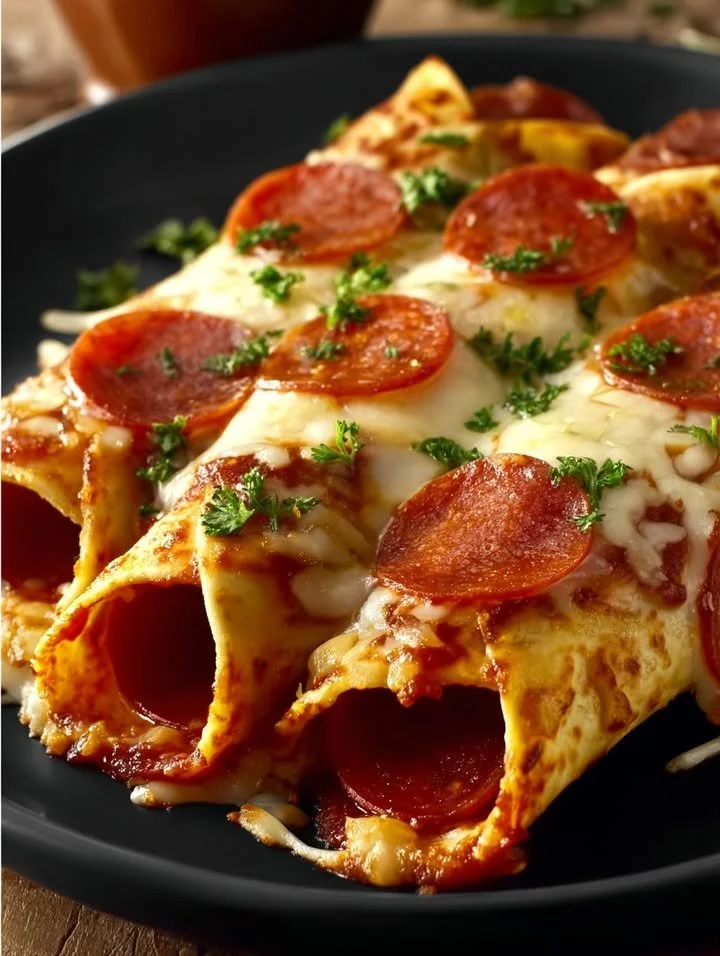
I absolutely love sharing recipes that bring joy and comfort to my kitchen, and today I’m excited to introduce you to my Cheesy Pepperoni Pizza Roll-Ups! These delightful snacks are perfect for movie nights, school lunches, or just a fun way to treat yourself on a cozy afternoon. They’re easy to make and the flavor combination of gooey cheese and savory pepperoni is a classic that never gets old. Let’s dive into how to create these irresistible roll-ups together!
Why You’ll Love This Recipe
What’s not to love about cheesy pepperoni pizza in a playful roll-up form? These little delights are crispy on the outside, warm and melty on the inside, and they pack a flavorful punch. Plus, they’re incredibly versatile and can be customized to suit your taste. I often find myself making these on a whim, and they always hit the spot. It’s a fun activity in the kitchen that my whole family enjoys. You can whip them up in no time! (See the ingredients in the next page below…)
Ingredients
– 1 package of refrigerated pizza dough
– 1 cup shredded mozzarella cheese
– 1 cup sliced pepperoni
– ½ cup marinara sauce (for dipping)
– 1 teaspoon Italian seasoning
– 1 tablespoon olive oil
– ½ teaspoon garlic powder
Equipment Needed
– Baking sheet
– Parchment paper
– Rolling pin
– Sharp knife or pizza cutter
– Mixing bowl
Step-by-Step Instructions
To get started, preheat your oven to 400°F (200°C). Line a baking sheet with parchment paper; this will make cleanup a breeze later. Next, take your package of pizza dough and unroll it onto a lightly floured surface. Use a rolling pin to stretch it out into a rectangle, about ¼ inch thick, ensuring that you have plenty of room for the toppings. This step is crucial because you want the roll-ups to be nice and thin for the perfect crunch. (See the next page below to continue steps…)
Now, sprinkle the shredded mozzarella evenly over the dough, leaving a small border around the edges for sealing. Next, layer on the sliced pepperoni. I usually go a little heavy on the pepperoni because who can resist an extra slice? Then, sprinkle the Italian seasoning and garlic powder over the top for that delicious aromatic touch. Once that’s done, it’s time to roll it up! Starting from one long side, carefully roll the dough tightly until it forms a log. Make sure to pinch the ends to seal in all those cheesy goodies.
After you’ve rolled everything up, cut the log into bite-sized pieces—about 1-2 inches thick. Arrange them on the prepared baking sheet, cut side up. Brush the tops with olive oil to get that golden color while baking. Pop them in the oven and let them bake for about 12-15 minutes, or until they’re beautifully golden brown. The aroma that fills the kitchen during this time is simply irresistible!
Once they’re out of the oven, let them cool for a few minutes before serving. I like to serve mine with warm marinara sauce for dipping—it’s the perfect complement to those delicious roll-ups!
Pro Tips for Best Results
When I first made these roll-ups, I tried using different types of cheese to see which worked best. Mozzarella is definitely my top choice, but cheddar adds a fantastic sharpness too if you’re looking to mix it up! Another tip is to let your dough come to room temperature before rolling it out; this makes it much easier to work with and helps avoid tearing.
I’ve also experimented with the thickness of the roll. Initially, I made them a little too thick, which left them doughy in the center. After some testing, I found that rolling the dough thinner not only gave a better crunch but also ensured that cheese and toppings were thoroughly heated.
Lastly, don’t be afraid to get creative! I often swap out the pepperoni for cooked sausage or veggie toppings when I’m in the mood, and they turn out delightful every time.
Common Mistakes to Avoid
One mistake I made early on was not sealing the edges properly. I learned the hard way when some of my cheesy goodness leaked out during baking. Make sure to pinch the edges well after rolling to keep everything inside! (See the next page below to continue…)
Another pitfall was assuming the baking time was one-size-fits-all. Every oven is different, so keep an eye on your roll-ups as they bake. If they start to brown too quickly, you can always tent them with aluminum foil to prevent burning.
I also found that using too much filling can lead to a messy situation. While it’s tempting to pile on the toppings, a moderate amount works better, allowing for even cooking and a proper seal.
Lastly, if you’re using pre-prepared ingredients, check for excess moisture. Sometimes, store-bought pepperoni can be oily, and you don’t want soggy roll-ups. Just blotted them with a paper towel to absorb some grease before adding them to your dough!
Serving Suggestions
These Cheesy Pepperoni Pizza Roll-Ups are just perfect on their own, but if you want to elevate your serving game, consider pairing them with a fresh side salad. It adds a nice crunch and flavor contrast that balances out the richness of the roll-ups. A simple Caesar or garden salad dressed with a light vinaigrette works wonders!
For a fun experience, you could set up a dipping station with various sauces. Aside from marinara, I like to offer ranch, garlic butter, or even a spicy sriracha mayo. It makes for an interactive snack time, and everyone can mix and match to find their favorite dips!
Don’t forget that these roll-ups can easily be a part of a larger gathering or game day spread. They pair wonderfully with finger foods like chicken wings and veggies, making them perfect for parties or watching the big game!
Variations & Customizations
There’s so much room for creativity with these roll-ups! For a meat lover’s twist, you can add cooked crumbled sausage or crispy bacon bits along with the pepperoni. It adds depth to the flavor profile that’s hard to resist.
If you’re looking for a vegetarian option, switch the pepperoni for sautéed mushrooms, bell peppers, and olives. The earthy flavors meld beautifully with the cheese, giving you that classic pizza taste without the meat. You can also experiment with adding some spinach or arugula for a healthy touch!
For a fun dessert version, consider making sweet roll-ups using Nutella with sliced bananas or strawberries. Swap the cheese and pepperoni for the sweet ingredients, and you’ll have a delightful treat that kids and adults alike will love!
How to Store, Freeze & Reheat
Storing leftovers is simple. Just place any extra roll-ups in an airtight container and pop them in the fridge. They’ll stay fresh for about 3-4 days—just make sure to reheat them gently in the oven or microwave to keep that melty cheese goodness intact.
If you want to prepare these roll-ups ahead of time, you can freeze them before baking. Simply roll them up, cut them, and place them on a baking sheet to freeze individually before transferring them to a freezer bag. They can be stored this way for up to a month. When you’re ready to bake, there’s no need to thaw; just add a few extra minutes to the oven time.
Reheating is a breeze. My favorite method is to reheat them in the oven at 350°F (175°C) for about 10-15 minutes. This keeps the roll-ups crispy on the outside and warm on the inside, exactly how they should be!
Conclusion
I hope you’re as excited to make these Cheesy Pepperoni Pizza Roll-Ups as I was when I first tried them! They are a delicious and fun treat that brings everyone together, perfect for any occasion. Feel free to personalize the ingredients to fit your tastes and enjoy the warm, cheesy goodness. Happy cooking!