
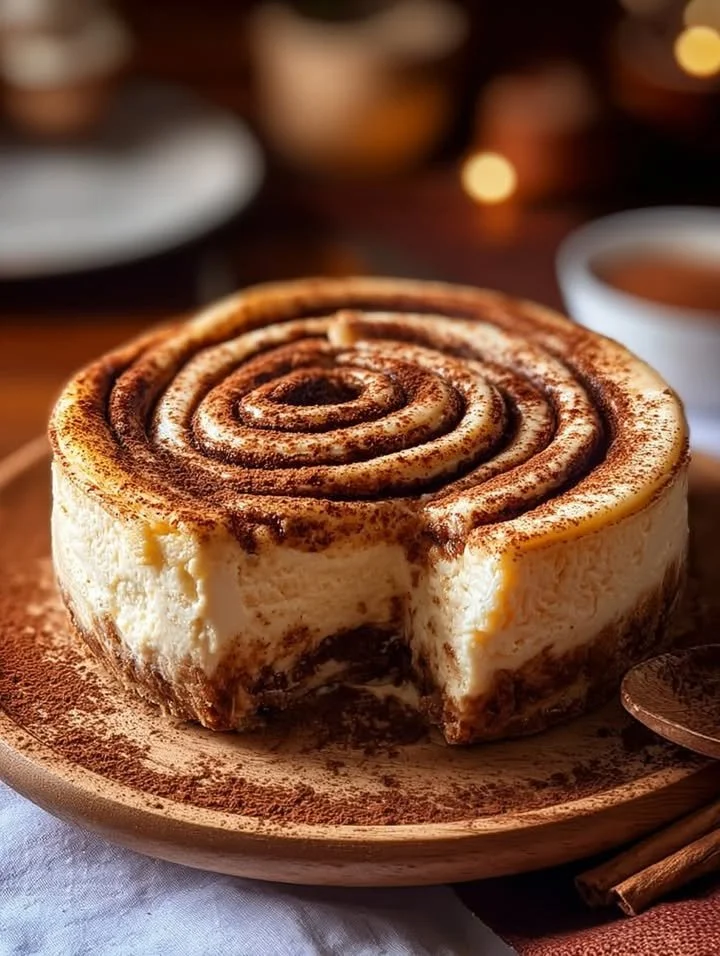
I don’t know about you, but there’s something magical about the combination of cinnamon and cream cheese that instantly transports me to my happy place. In my kitchen, I’m always looking for ways to merge my favorite desserts into one delightful creation. That’s how I stumbled upon the incredible recipe for Cinnamon Roll Cheesecake. Imagine a luscious cheesecake sitting atop a bed of gooey cinnamon roll goodness. It’s a treat that’s perfect for any occasion, and I’m thrilled to share this delicious adventure with you!
Why You’ll Love This Recipe
This Cinnamon Roll Cheesecake is the best of both worlds—it’s rich, creamy, and decadently sweet while still holding the comforting warmth of freshly baked cinnamon rolls. It’s a dessert that will have your friends and family gathering around the table for just one more slice. Plus, the aroma that fills my kitchen while it’s baking is downright dreamy. What more could you ask for? (See the ingredients in the next page below…)
Ingredients
– For the crust:
– 2 cups crushed cinnamon-flavored graham crackers
– ½ cup unsalted butter, melted
– ¼ cup sugar
For the cheesecake filling:
- 3 (8 oz) packages cream cheese, softened
- 1 cup sugar
- 1 teaspoon vanilla extract
- 3 large eggs
For the cinnamon roll topping:
- ½ cup brown sugar
- 2 tablespoons ground cinnamon
- 1 cup finely chopped pecans (optional)
For the glaze:
- 1 cup powdered sugar
- 2 tablespoons milk
- 1 teaspoon vanilla extract
Equipment Needed
– 9-inch springform pan
– Mixing bowls
– Electric mixer
– Rubber spatula
– Measuring cups and spoons
– Baking sheet
– Whisk
Step-by-Step Instructions
To start, preheat your oven to 325°F (163°C). I always get a little excited at this stage because the smell of something delicious in the making fills the air! First, in a medium bowl, combine the crushed graham crackers, melted butter, and sugar for the crust. Press this mixture into the bottom of your springform pan evenly, creating a solid foundation for all that creamy goodness. I always like to use my fingers to pack it down tightly so it holds its shape. (See the next page below to continue steps…)
Next, in a large mixing bowl, beat the softened cream cheese with an electric mixer until it’s nice and smooth. Then add the sugar and vanilla and mix until well combined. I found that scraping down the sides of the bowl periodically ensures a well-mixed batter. After that, add the eggs one at a time, mixing gently after each addition. This helps to keep the cheesecake light and fluffy rather than dense. Pour this cheesecake filling over your graham cracker crust and set aside while you prepare the cinnamon sugar topping.
For the topping, in a small bowl, combine the brown sugar and ground cinnamon. Sprinkle this mixture over the cheesecake layer evenly. If you love a bit of crunch, toss in some chopped pecans at this stage! Now, it’s time to bake. Place your springform pan on a baking sheet (to catch any drips) and bake for about 50-55 minutes, or until the center of the cheesecake is set but still slightly jiggly. Allow your cheesecake to cool in the pan for about an hour before placing it in the refrigerator to chill completely overnight.
For the glaze, simply whisk together the powdered sugar, milk, and vanilla extract until smooth. Once the cheesecake has set, drizzle the glaze on top before serving. Cut yourself a slice and savor that moment. Nothing beats that first bite as the creamy cheesecake contrasts beautifully with the sweet cinnamon topping and buttery crust. It’s pure bliss.
Pro Tips for Best Results
When I first made this dessert, I tested the crust using both regular and cinnamon graham crackers. I found that using cinnamon-flavored crackers enhances the flavor profile magnificently! Trust me on this one—it’s worth the extra effort. I also recommend letting the cream cheese come to room temperature before mixing; cold cream cheese is much harder to blend smoothly.
Another tip I discovered during my baking journey is to wrap the outside of your springform pan with foil. This prevents any water from seeping in if you choose to use a water bath. This step not only aids in even baking but keeps the crust from becoming soggy. Lastly, make sure to chill your cheesecake for at least 4 hours, but overnight is best. I learned this the hard way, as the flavors develop beautifully during that time!
Common Mistakes to Avoid
First and foremost, overmixing the cheesecake batter can make it dense and rubbery. I remember the first time I made this; I got a bit too excited with my mixer and didn’t realize I was making whipped cream instead of a smooth batter! Just mix until smooth and creamy. Also, watch the baking time closely—while I suggest 50-55 minutes, every oven is different. Check for doneness a few minutes early if you know your oven runs hot.
Another mistake I made was skipping the chilling step because I couldn’t wait to taste it! I ended up with a slightly grainy texture. It’s amazing how letting the cheesecake rest can enhance its flavors, so patience is key. Lastly, don’t forget the glaze! I missed this on my first try because I got so caught up in the cheesecake’s beauty. It adds the finishing touch that ties everything together. (See the next page below to continue…)
Serving Suggestions
This Cinnamon Roll Cheesecake is a showstopper all on its own, but I love to pair it with a hot cup of coffee or my favorite chai. The warmth of the beverage complements the sweet, rich flavors of the cheesecake brilliantly. I also enjoy sprinkling extra cinnamon or chopped nuts on top before serving for a little added crunch and flair.
Another delightful way to serve this cheesecake is to share it at gatherings—imagine the joy of friends and family as you present this masterpiece! It’s an instant hit at potlucks, holiday gatherings, or even a cozy Sunday brunch. You could also add a scoop of vanilla ice cream on the side for a delightful contrast in temperature and texture.
Lastly, consider packaging slices in cute boxes tied with a ribbon for thoughtful gifts or party favors. I’ve done this for friends during special occasions, and it never ceases to bring smiles.
Variations & Customizations
What I love about this recipe is how adaptable it is! You can easily swap out different flavor profiles. For those who appreciate a fruity twist, consider adding a layer of fresh berries like raspberries or strawberries atop the cheesecake before drizzling the glaze. Alternatively, you can infuse the cheesecake batter with chocolate by folding in some melted chocolate or using a chocolate graham cracker crust.
If you want to incorporate some seasonal flavors, how about adding pumpkin spice during the autumn months? It would pair beautifully with that classic cinnamon flavor and make it festive for the season. If you’re feeling adventurous, try a nutty flavor by incorporating almond extract or using nut butters as part of the cheesecake mixture.
How to Store, Freeze & Reheat
This Cinnamon Roll Cheesecake can be stored in the refrigerator for up to a week—if you can resist eating it all in one go! I always cover it with plastic wrap to prevent it from absorbing other odors in the fridge. In fact, I find that the flavors get even better over a day or two as they meld together.
If you have leftovers (which is rare), you can freeze slices for later enjoyment. Just wrap each slice in plastic wrap and then in a layer of aluminum foil to keep it fresh. They can last in the freezer for about a month—when I pull them out, I just let them thaw in the fridge overnight before serving again.
Reheating is simple as well; pop a slice in the microwave for about 15-20 seconds for a warm treat. I always enjoy my cheesecake fresh, but there’s something comforting about enjoying a slice that’s slightly warmed.
Conclusion
I hope you feel inspired to whip up this Cinnamon Roll Cheesecake in your kitchen. It’s such a delightful blend of creamy, sweet flavors and warm cinnamon goodness. Whether you’re treating yourself or sharing it with others, I can guarantee this dessert will bring smiles and warmth to any occasion. Happy baking, and enjoy every delicious bite!