
Equipment Needed
- Silicone hemisphere molds (about 2-inch diameter is perfect)
- Small saucepan or double boiler
- Mixing bowls (medium and small)
- Hand mixer or stand mixer
- Spatula
- Small spoon or melon baller
- Baking sheet lined with parchment paper
- Pastry brush (optional, for molds)
Step-by-Step Instructions
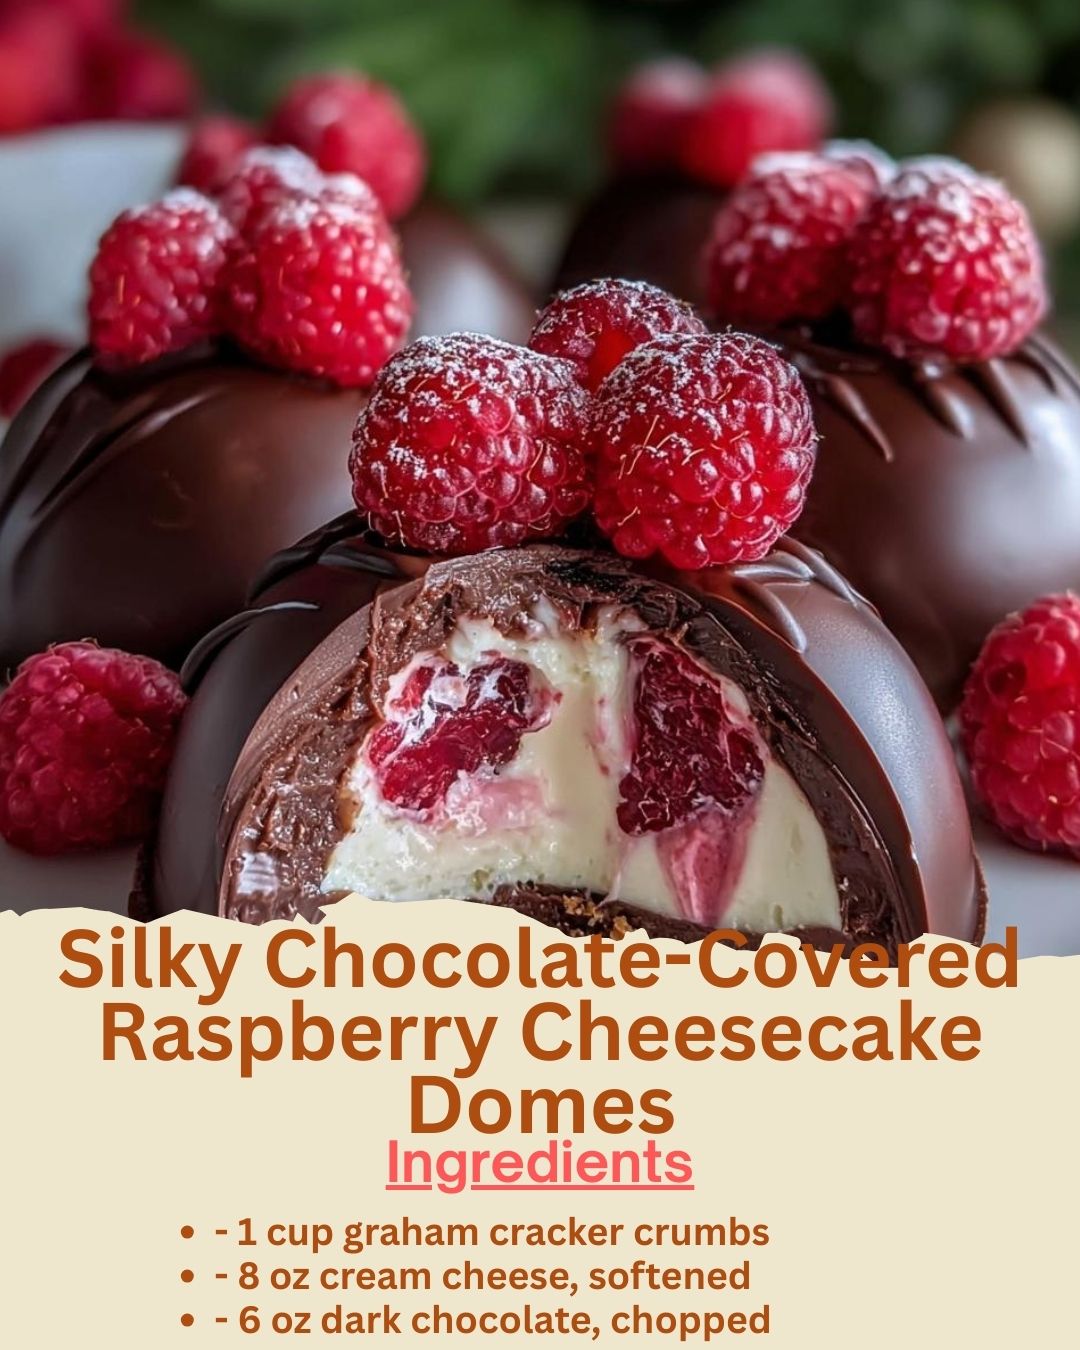
My adventure always starts with the molds. I take my silicone hemisphere molds and use a pastry brush to give each cavity a very light, even coating of melted coconut oil or butter. This isn’t always necessary with flexible silicone, but it guarantees a flawless release later. Next, I make the tiny graham cracker bases. In a small bowl, I mix the crumbs with the melted butter and sugar until it feels like wet sand. I press a small, compact amount (about a teaspoon) into the bottom of each mold cavity, creating a thin, firm layer. I use the back of a small spoon to really press it down. Then, I place the whole mold tray in the freezer to set solid while I make the filling.
Now for the creamy heart of the dome. In my mixing bowl, I beat the softened cream cheese with the powdered sugar and vanilla extract until it’s completely smooth and creamy, with no lumps. This is where I learned the hard way: the cream cheese must be truly soft. If it’s cold, you’ll get tiny lumps that ruin the silky texture. Once smooth, I gently fold in the seedless raspberry jam. I don’t fully mix it; I just swirl it a few times to create a beautiful marbled effect of white and bright pink. Overmixing will turn the whole filling pink, which is fine, but I love the visual surprise of the swirl.
The assembly is my favorite, almost meditative part. I pull the mold from the freezer. Using a small spoon or a piping bag, I fill each cavity halfway with the cheesecake mixture. Then, I gently press one perfect fresh raspberry into the center of each. I cover the raspberry completely with more cheesecake mixture, filling the mold right to the top and smoothing it flat with my spatula. It’s crucial the raspberry is completely encased to prevent moisture from seeping into the chocolate shell. I gently tap the mold on the counter to remove any air bubbles, then place the entire tray in the freezer for at least 4 hours, or ideally overnight. The filling must be frozen solid for the chocolate dip.(See the next page below to continue…)