
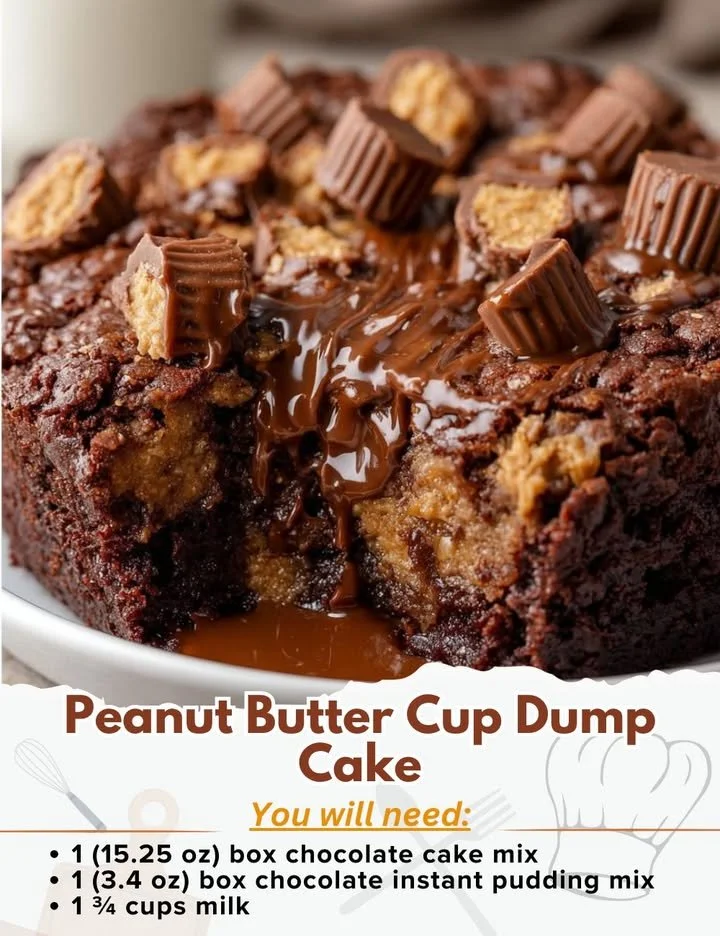
Peanut Butter Cup Dump Cake! If you’re anything like me, you appreciate a dessert that’s not only delicious but also incredibly easy to make. This cake combines the rich flavors of peanut butter and chocolate in a manner that’s sure to impress your friends and family. With minimal fuss and maximum flavor, this recipe has quickly become a staple in my household, and I think it will be in yours too!
Why You’ll Love This Recipe
This Peanut Butter Cup Dump Cake is a dream come true for any peanut butter and chocolate lover. Imagine warm, gooey, and chocolatey goodness with the creamy richness of peanut butter, all combined in one easy-to-make dessert. It’s perfect for get-togethers, potlucks, or even just a cozy night at home with a scoop of ice cream on top! Trust me – everyone will be coming back for seconds. (See the ingredients in the next page below…)
Ingredients
- 1 box of chocolate cake mix
- 1 cup of creamy peanut butter
- 1 cup of milk
- 1 cup of semi-sweet chocolate chips
- 1 cup of peanut butter cups (crumbled)
- 1/2 cup of unsalted butter (melted)
- 3 eggs
- 1 teaspoon of vanilla extract
Equipment Needed
- Large mixing bowl
- Whisk or electric mixer
- 9×13 inch baking dish
- Spatula
- Measuring cups and spoons
Step-by-Step Instructions
First, preheat your oven to 350°F (175°C). As that warm air starts to fill my kitchen, I can’t help but feel excited for the deliciousness coming my way. In a large mixing bowl, I combine the cake mix, melted butter, milk, eggs, and vanilla extract. I mix it all together until the batter is just well-combined, taking care not to overmix. The aroma of vanilla fills the air and I can already sense how delightful this cake will be! (See the next page below to continue steps…)
Next, I pour the batter into my greased 9×13 inch baking dish, spreading it evenly. This part always makes me a little giddy because you can practically see the deliciousness waiting to happen. It’s time to sprinkle on the chocolate chips and crumbled peanut butter cups. This extra step is what makes this cake extra special, as the melting peanut butter cups give it that gooey texture I love.
Once that’s done, I take a moment to enjoy the sight before me and then pop the dish into the preheated oven. I bake it for about 30-35 minutes or until a toothpick inserted in the center comes out clean. As the cake bakes, my kitchen is filled with the irresistible scent of chocolate and peanut butter—it’s truly heavenly!
After baking, I let it cool slightly before cutting it into squares. I watch the chocolate ooze out, and my mouth waters in anticipation. The shiny glaze on the top makes it look extra inviting. I can never resist it warm, but it’s also delicious when cooled down and served with a scoop of vanilla ice cream—just heavenly!
Pro Tips for Best Results
I always recommend using high-quality peanut butter for this recipe. I’ve tested it with a few different brands, and let me tell you, the creaminess and flavor really shine through when you choose the good stuff. Trust me, a little extra investment in ingredients goes a long way!
Another tip I’ve learned from countless baking adventures is to make sure your eggs and milk are at room temperature before mixing them in. This always results in a smoother batter, which I’ve found leads to a more tender cake texture. Plus, it ensures that the butter mixes in more evenly, and who doesn’t want a blissfully moist cake?
Lastly, I discovered that letting the cake cool for about 10 minutes before serving makes all the difference. Not only does it let the flavors meld together beautifully, but it also prevents those patiently waiting for dessert from burning their mouths on that fabulously warm cake!
Common Mistakes to Avoid
One common mistake I made in the beginning was not greasing my baking dish properly. A good greasing is critical for ensuring that the cake comes out easily and doesn’t stick to the pan. My first attempt ended up being a gooey mess that I had to scoop out. Forewarned is forearmed, right? So, don’t skimp on that step! (See the next page below to continue…)
Another mistake I frequently see is overmixing the batter. When I mix too vigorously, the result can be a dense cake instead of the fluffy dessert I desire. I’ve learned that a few gentle folds are all it takes to combine the ingredients without sacrificing texture.
Also, I once skipped the crumbled peanut butter cups, thinking the chocolate chips would be enough, and boy was I wrong! The peanut butter cups provide that indispensable gooeyness and texture that really takes this cake to the next level. Stick to the ingredients, and you won’t be disappointed!
Serving Suggestions
Serving this Peanut Butter Cup Dump Cake is an experience in itself! I love to scoop a generous portion into a bowl and top it with a big scoop of vanilla ice cream. The contrast of the warm cake against the cold ice cream is magical. It makes each bite a delicious adventure!
If I’m feeling a bit indulgent, I like to drizzle some chocolate syrup over the top. Just that extra touch really elevates the dessert and allows for an impressive presentation, especially when hosting friends or family. I always feel like a pastry chef when serving it this way!
For a little crunch, I sometimes sprinkle some crushed peanuts on top before serving. It adds texture and makes it look so delightful. Plus, it enhances the peanut flavor, which is a win-win in my book.
Variations & Customizations
One of the wonderful things about this recipe is how easy it is to customize! If you love caramel, consider adding a layer of caramel sauce either in the batter or drizzled on top before serving. The caramel pairs beautifully with the peanut butter and chocolate, taking the flavors to an entirely new level.
I’ve also tried using different cake mixes, such as yellow or Devil’s food cake mix, and while chocolate is my favorite, you might adore how a yellow cake brings a lightness that balances well with the peanut butter and chocolate.
For a healthier twist, you could substitute Greek yogurt for some of the butter or eggs. I once did this and was pleasantly surprised by how it produced a moist cake while reducing fat content, without compromising flavor.
How to Store, Freeze & Reheat
To store any leftover cake (if there are any!), I often cover it in plastic wrap or transfer it to an airtight container. It can stay fresh at room temperature for about 2-3 days, but don’t worry; it rarely lasts that long in my house!
If I want to make it ahead of time or have more for later, freezing this cake is a breeze! I cut it into individual squares, wrap them in foil, and then place them in a zip-top freezer bag. When I’m ready to indulge again, I let it thaw in the fridge overnight and simply reheat it in the microwave for about 15 seconds or in the oven at 350°F until warm.
Another tip I’ve learned is that the cake doesn’t lose its deliciousness when frozen. If anything, the flavors deepen a bit! You can’t go wrong with having a slice already prepared in the freezer for those unexpected sweet cravings.
Conclusion
I hope you’re as excited as I am to try this Peanut Butter Cup Dump Cake recipe in your kitchen! It’s an easy, heartwarming treat that brings comfort and joy with every bite. Give it a go, and who knows? This might just become your new go-to dessert. Happy baking!