
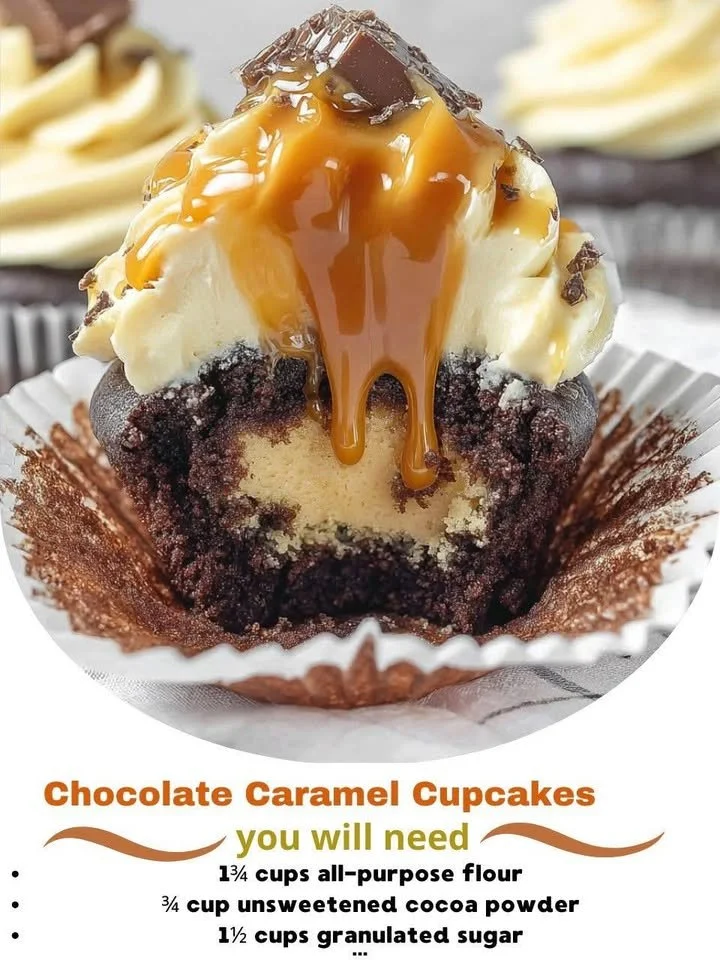
There’s something magical about the combination of chocolate and caramel, isn’t there? It sparks joy and indulgence, whisking me away to sweet childhood memories with every bite. Today, I want to share my recipe for Chocolate Caramel Cupcakes that not only taste divine but also bring a little slice of heaven into my kitchen. They’re rich, moist, and bursting with a gooey caramel center that will leave you craving just one more!
Why You’ll Love This Recipe
These cupcakes are perfect for any celebration—or even just a cozy night in. The fluffy chocolate cake pairs beautifully with the silky caramel filling, creating a luscious treat that’s hard to resist. Best of all, they are surprisingly easy to make, even for beginner bakers! Trust me, once you take your first bite, you’ll be convinced this is your new go-to recipe for desserts. (See the ingredients in the next page below…)
Ingredients
– 1 ¾ cups all-purpose flour
– 1 ½ teaspoons baking powder
– 1 teaspoon baking soda
– ½ teaspoon salt
– ½ cup unsweetened cocoa powder
– 1 cup granulated sugar
– ½ cup brown sugar, packed
– ¾ cup unsalted butter, softened
– 3 large eggs
– 1 teaspoon vanilla extract
– 1 cup buttermilk
– 1 cup caramel sauce (store-bought or homemade)
Equipment Needed
– Mixing bowls
– Electric mixer or whisk
– Cupcake pan
– Cupcake liners
– Measuring cups and spoons
– Ice cream scoop (for pouring batter)
– Piping bag or plastic bag (for caramel filling)
– Cooling rack
Step-by-Step Instructions
First, preheat your oven to 350°F (175°C) and line your cupcake pan with liners. In a large mixing bowl, whisk together the flour, baking powder, baking soda, salt, and cocoa powder. In another bowl, cream the softened butter with the granulated sugar and brown sugar until it’s light and fluffy. This may take about 3-5 minutes, but it’s worth it to achieve that perfect texture! (See the next page below to continue steps…)
Next, add the eggs one at a time, mixing well after each addition, then stir in the vanilla extract. Gradually mix in the dry ingredients with the buttermilk, alternating between each. The batter will be quite thick, but that’s exactly how we want it! Now, it’s time to fill the cupcake liners about two-thirds full with the batter. This helps leave enough room for expansion and a lovely dome on top.
Bake the cupcakes for 18-20 minutes or until a toothpick inserted into the center comes out clean. Once baked, allow them to cool in the pan for about 5 minutes before transferring them onto a cooling rack. While they cool, you can prepare the caramel filling. After the cupcakes have completely cooled, you can use a small knife or a cupcake corer to remove the center of each cupcake and make room for that luscious caramel!
Finally, fill a piping bag (or a plastic bag with a tiny corner cut off) with your caramel sauce and pipe it into the hollowed-out cupcakes until they overflow just a bit. To finish, you can drizzle a little extra caramel on top and top with a swirl of whipped cream or chocolate frosting if you’d like. How cute and decadent do they look?
Pro Tips for Best Results
I tested this recipe three ways: using homemade caramel, store-bought caramel, and even experimenting with different types of chocolate cakes. Each batch had its own charm, but I found that homemade caramel added an extra level of richness. Make sure to allow the caramel to cool slightly before filling the cupcakes; warm caramel can make a mess!
Also, don’t skip the cooling time before cutting holes in your cupcakes. If they’re even slightly warm, they’re more likely to crumble. I learned that the hard way after losing a few precious cupcakes to the “snack attack” while I was trying to hollow them out.
Lastly, be sure to avoid overmixing your batter. I’ve always been a bit guilty of going a little too enthusiastic with the mixing, but I’ve found that a gentle touch leads to fluffier cupcakes. So, next time, I promise to remember that!
Common Mistakes to Avoid
One common mistake I made when first making these cupcakes was using cold ingredients straight from the fridge. I found that it’s essential to bring your eggs and butter to room temperature before starting, as they blend much better and help create that light, airy texture. (See the next page below to continue…)
Another pitfall I encountered was filling the cupcake liners too full. I know, it’s tempting to fill them right to the top for that perfect dome! But trust me, leave a little room for them to rise; it makes all the difference. My first batch ended up more like cupcakes with a flat pancake top!
Also, remember not to skimp on the caramel sauce. I was hesitant during my first attempt and ended up with dry cupcakes. A generous filling keeps everything moist and indulgent. As they say, a little extra caramel never hurt anyone!
When you’re ready to store your cupcakes, don’t forget to keep them covered. I once left a few out uncovered and the frosting dried out (a sad discovery indeed). So, keep them in an airtight container and protect your delicious treasures!
Serving Suggestions
These Chocolate Caramel Cupcakes are lovely on their own, but if you’re feeling fancy, topping them with a little whipped cream or a sprinkle of sea salt adds an elegant touch! The salt really complements the sweetness of the caramel and gives each bite that perfect balance.
I also love serving them with a scoop of vanilla ice cream on the side. There’s just something about the warm cupcake paired with cold ice cream that’s heavenly! It’s a perfect combination for a cozy family dessert night or a sweet treat after dinner with friends.
Lastly, these cupcakes can also be a showstopper at any gathering. Picture a plate of these beauties dusted with powdered sugar, surrounded by fresh berries and a drizzle of chocolate. It’s like I’m serving little pieces of happiness to my guests!
Variations & Customizations
Feel free to play around with different fillings! I experimented with adding a chocolate ganache instead of caramel once, and it was a delightful change of pace. Mixing textures keeps things interesting! You could even use toffee bits, which add a nice crunch and a buttery flavor.
If you want to take things up a notch, consider swapping out the cocoa for different flavored cake mixes, such as vanilla or mocha. I recently tried making coffee-flavored cupcakes with a caramel center, and wow—my mornings will never be the same again!
And for a seasonal twist, you could add a hint of cinnamon or nutmeg to the batter for fall vibes or even a little peppermint extract around the holidays. The options are endless, and it’s so much fun to get creative in my kitchen!
How to Store, Freeze & Reheat
These cupcakes can be stored in an airtight container at room temperature for about 2-3 days. Just be sure they’re completely cool before sealing them in to avoid any sogginess. That said, if there are any leftovers, I highly recommend wrapping them individually in plastic wrap and putting them in the freezer.
To freeze, make sure the cupcakes are solidly cooled. Place them in the freezer in a single layer until they’re firm, then transfer them to a freezer-safe bag or container. When you’re ready to indulge again, just let them thaw at room temperature for about 30-60 minutes or pop them in the microwave for a few seconds.
When reheating, be cautious not to overdo it in the microwave, as that can change the texture. Instead, I like to warm them up in the oven for a couple of minutes at 350°F. That way, they regain their softness without becoming too dry. Trust me, it’s worth the wait!
Conclusion
I hope this Chocolate Caramel Cupcake recipe finds its way into your kitchen, spreading joy and indulgence just as it has in mine. Each bite is a little piece of heaven, and I can’t wait for you to experience the same delight. So whisk away, and happy baking!