
Pro Tips for Best Results
One tip I learned early on is to melt the chocolate slowly. Microwave chocolate is delicate—too much heat at once and it becomes grainy. Melting in 30-second bursts gives you control, and stirring frequently helps distribute heat evenly. I tested this several times and trust me, slow heating = silky fudge.
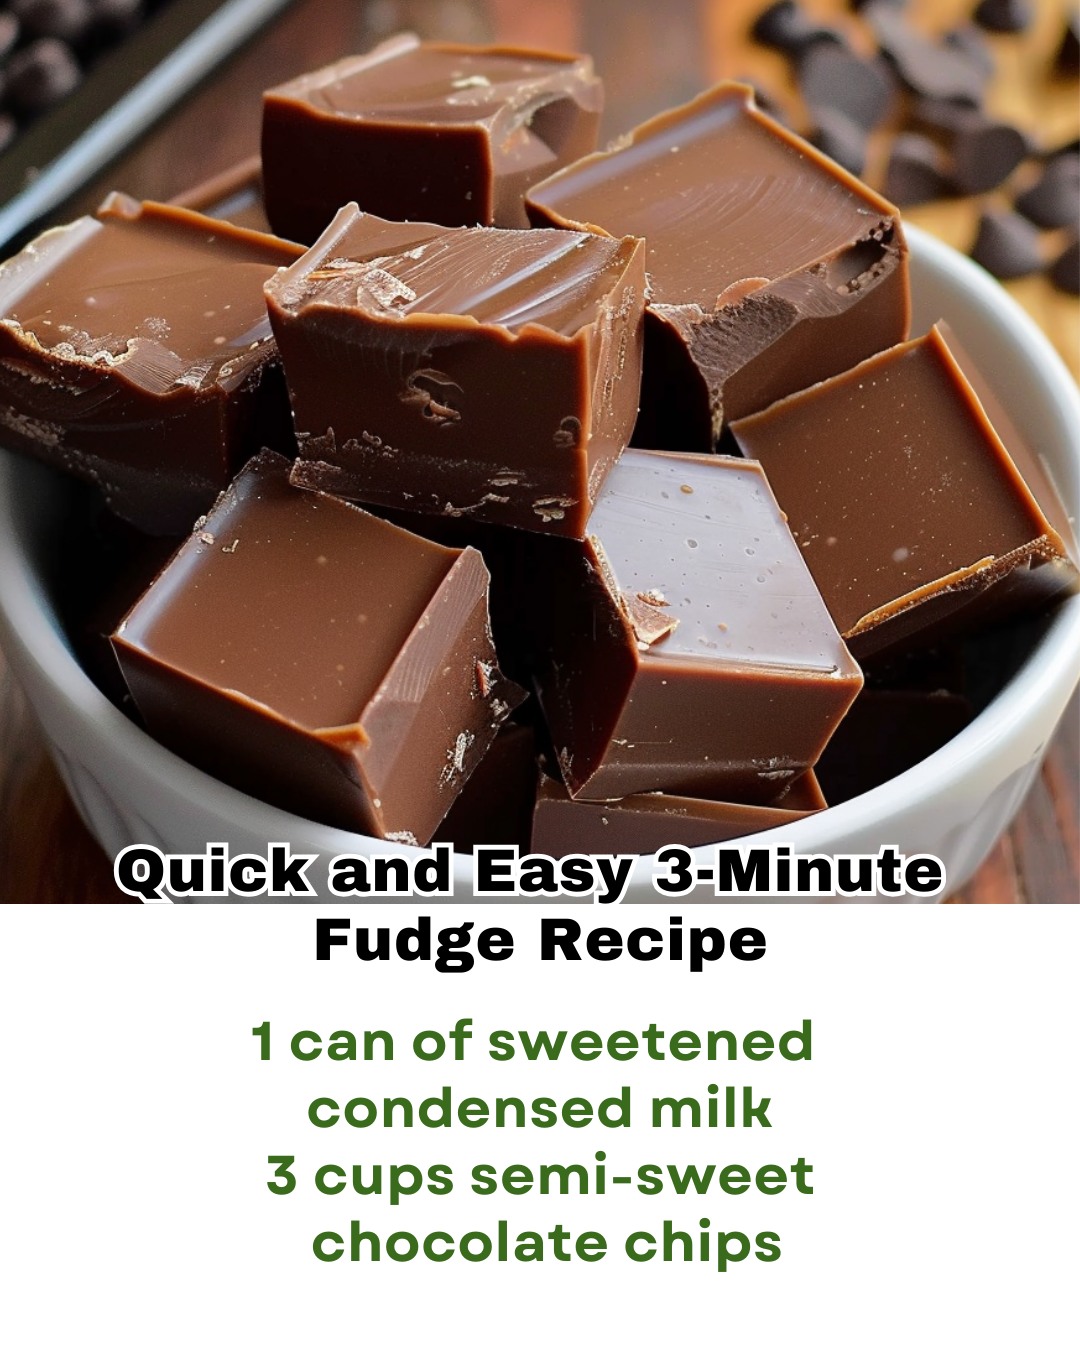
Another helpful tip is to use good-quality chocolate chips. You don’t need anything fancy, but higher-quality chocolate melts easier and results in a smoother, creamier fudge. I once used a bargain brand and ended up with slightly chalky texture. Ever since then, I stick with brands I trust.
If you like thicker fudge, use a smaller pan like a 9×5 loaf pan. I discovered this trick when I didn’t have an 8×8 pan clean—happy accident. The fudge was tall, decadent, and rich. On the other hand, if you prefer thinner pieces or want more servings, spreading the fudge in a 9×13 pan works well too.
Finally, let the fudge cool fully before cutting. I know it’s tempting—I’ve definitely rushed it before—but the squares cut more cleanly and hold their shape better once chilled. A warm fudge center will stick to the knife and crumble on the edges, so patience truly pays off.
Common Mistakes to Avoid
One mistake I made the first time was using evaporated milk instead of sweetened condensed milk. The result never set properly, even after hours of chilling. Sweetened condensed milk is thick, sweet, and sticky—evaporated milk is thin and unsweetened. They are not interchangeable here.
Another common mistake is overheating the chocolate. Chocolate burns easily, especially when microwaved. If you see it turning grainy, stiff, or developing a dry texture, it’s been overheated. Stir frequently and melt gradually to avoid this. When in doubt, microwave for less time—you can always melt more, but you can’t undo burnt chocolate.
A third mistake is not lining the pan. Fudge sticks to everything. Before I understood this, I ruined an entire batch trying to pry it out of a metal pan with a butter knife. Now I always use parchment with overhanging edges. It lifts right out in one perfect block.
Lastly, adding mix-ins too early can melt them or cause them to sink. The fudge mixture should cool slightly before adding anything delicate like mini marshmallows or chocolate chips. Hot chocolate mixture will melt them instantly, ruining the texture and visual appeal.
Serving Suggestions
When I serve this 3-minute fudge, I love arranging the squares on a pretty platter lined with parchment curls or crushed candy cane. It looks intentional and festive without much effort. I also like cutting a few pieces into different shapes—rectangles, triangles, even little bite-sized cubes—to make the presentation more dynamic.
If I’m making this in the winter, I love pairing it with hot cocoa. There’s something magical about sipping warm cocoa and nibbling on rich fudge. I often place a piece of fudge right on the saucer next to the mug; it looks charming and feels like a treat from a cozy café.
For parties, I’ll sometimes drizzle melted white chocolate or caramel over the top before chilling. It creates a beautiful pattern and adds another layer of flavor. You can even sprinkle crushed nuts or festive sprinkles on top to match the occasion. This fudge is a blank canvas for creativity.
If I’m gifting it, I cut the fudge into small squares and wrap them in wax paper or candy wrappers. A handful of wrapped fudge pieces in a tin or small gift box makes such a thoughtful homemade gift—simple but heartfelt. I’ve had friends tell me they look forward to it every year.
Variations & Customizations
One of my favorite variations is making peanut butter chocolate fudge. I stir in ½ cup of creamy peanut butter right after the chocolate melts. It becomes silky, nutty, and absolutely irresistible. Adding chopped peanut butter cups on top makes it extra decadent.
Another version I love is rocky road fudge. I stir in mini marshmallows, chopped walnuts, and extra chocolate chips. The combination of chewy and crunchy textures feels nostalgic, like a candy shop classic. It also looks beautiful when cut because you can see all the mix-ins inside.
For a holiday twist, I add crushed candy canes on top. The peppermint flavor pairs beautifully with the fudge, and the red-and-white bits look festive and fun. You can also make a “peppermint mocha” version by using dark chocolate chips and adding a splash of instant coffee to the melted mixture.
If you want something more sophisticated, try swirling caramel sauce into the fudge before pouring it into the pan. I’ve done this for dinner parties, and guests always comment on how fancy it tastes—even though it took only minutes to make. A sprinkle of flaky sea salt on top elevates it into gourmet territory.
How to Store, Freeze & Reheat
To store this fudge, I keep it in an airtight container at room temperature if I plan to eat it within three days. Room temperature keeps the texture soft and creamy. If you refrigerate it, the fudge becomes firmer, which some people prefer—but I like it softer, so I usually leave it on the counter.
If you want it to last longer, refrigerate it. It stays fresh for up to two weeks in the fridge. I always place parchment between layers to prevent sticking. When serving refrigerated fudge, I let it sit out for about 5–10 minutes so it softens slightly.
Freezing fudge works beautifully. I wrap each square individually in plastic wrap, then store them in a freezer-safe container or zip-top bag. Frozen fudge lasts up to three months and tastes just as good once thawed. To thaw, simply leave it at room temperature for a few minutes—no reheating needed.
You don’t technically “reheat” fudge, but if your fudge accidentally becomes too firm in the fridge, leaving it on the counter will soften it again. Avoid microwaving it to soften—the texture can turn grainy. Gentle room-temperature thawing is always the way to go.
Nutrition Information
This fudge is definitely an indulgent treat, but because it’s so rich, you only need a small square to satisfy a sweet craving. The chocolate provides antioxidants (which always makes me feel a little better about eating it), and the sweetened condensed milk gives the fudge its rich, creamy texture.
Because it’s made with minimal ingredients, you know exactly what’s going into it—no preservatives or mystery sweeteners. I like that about this recipe; it feels rustic and homemade, not overly processed. If you add nuts, you even boost the protein and healthy fats a bit, which balances out the sweetness.
A single piece is rich enough to feel like a decadent dessert without going overboard. I love sharing it at gatherings because guests can take small pieces and enjoy it without feeling weighed down. It’s also perfect for portioning into bite-sized treats for gifting.
Overall, while this fudge isn’t “light,” it’s definitely a manageable indulgence—especially when shared with friends and family, which is exactly what I love to do with it.
FAQ Section
1. Can I make this fudge without a microwave?
Yes! I’ve melted the chocolate, condensed milk, and butter together on the stovetop over low heat many times. Just stir constantly to prevent burning.
2. Why is my fudge grainy?
It was likely overheated. Chocolate scorches easily. Next time, melt it more slowly and stir frequently.
3. Can I use white chocolate chips?
Absolutely, but white chocolate behaves differently and may need a touch more butter. I always melt it gently because it burns quicker than regular chocolate.
4. How do I make my fudge firmer?
Chill it longer or use slightly more chocolate chips. I’ve done this when I wanted very clean-cut squares.
5. Can I double the recipe?
Yes! Just use a 9×13-inch pan and microwave the chocolate mixture in a larger bowl. I double it often for holiday gifting.
Conclusion
This QUICK AND EASY 3-MINUTE FUDGE RECIPE has become one of my favorite go-to treats because it’s unbelievably simple, incredibly creamy, and endlessly customizable—and every time I make it, I’m reminded just how magical homemade sweets can be when they come together in minutes.