
Skipping the foil-cover step is a sure path to disappointment. I learned this the hard way when I was impatient and wanted the top to brown faster. Without that initial covered baking time, the tortilla edges exposed to the direct oven heat can become dry and tough, almost like crackers. The covered steam is what ensures the entire enchilada becomes tender and heated through evenly.
Not letting the dish rest after baking is a tragic error. I’ve burned the roof of my mouth more than once because the cheesy, saucy interior is like molten lava straight out of the oven. Giving it 5-10 minutes to cool allows the filling to set slightly. This patience means you’ll get a neat serving that holds its shape, and you’ll actually be able to taste it without pain!
Finally, be cautious with salt. Between the seasoned beef, the pepperoni, the olives, and the pizza sauce, there’s already a good amount of sodium at play. I always taste my filling before I finalize the seasoning. It’s much easier to add a pinch of salt at the end than to try to fix an overly salty mixture. Remember, you can always add, but you can’t take away.
Serving Suggestions
I like serving these Pizza Enchiladas with a simple, crisp green salad dressed with a sharp Italian vinaigrette. The acidity and freshness of the salad cut through the richness of the enchiladas perfectly. It’s my go-to side because it balances the meal and makes it feel just a little bit more complete and wholesome.
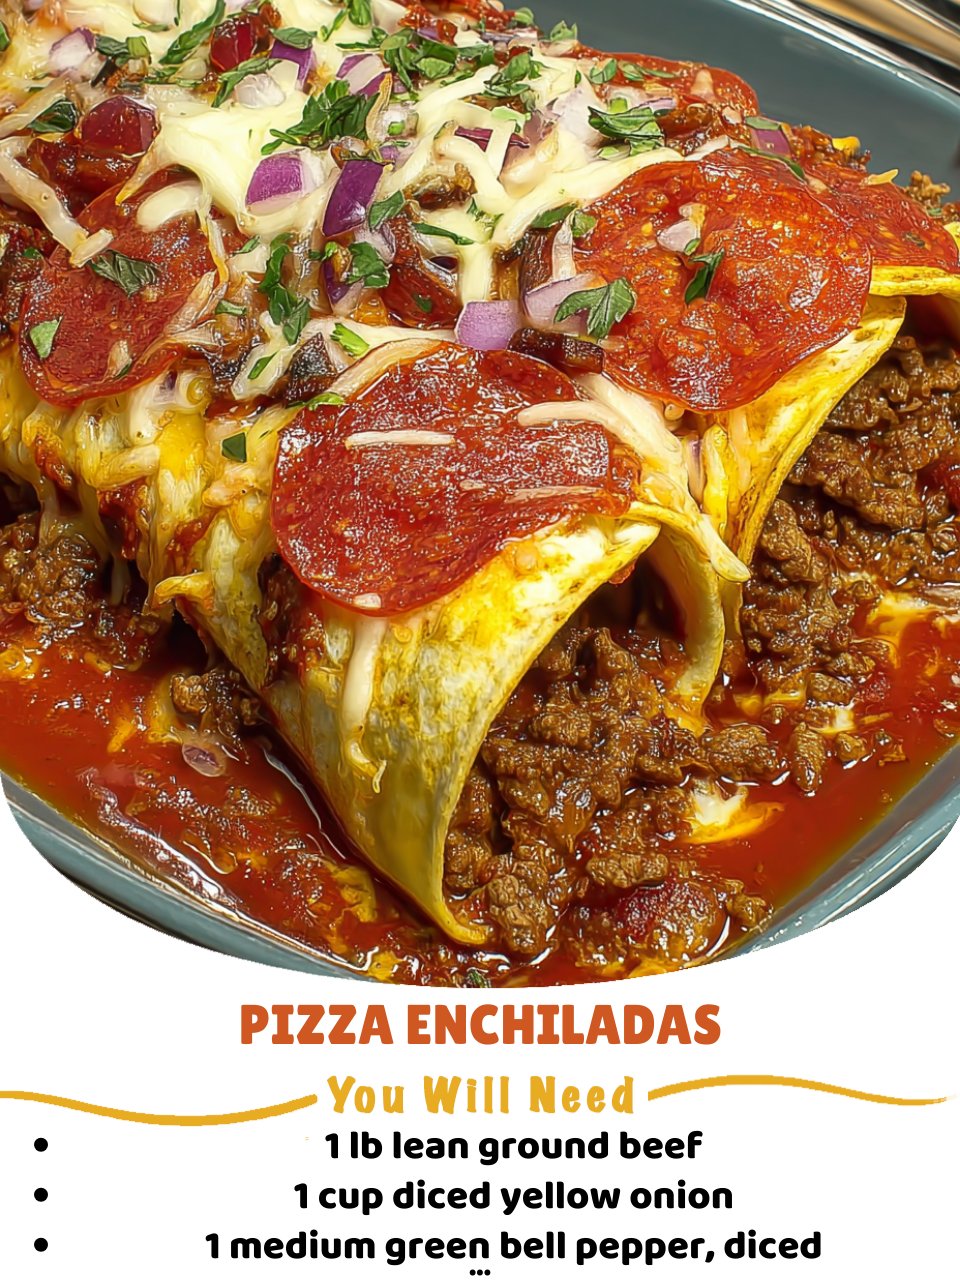
For a true pizza-parlor experience at home, I always put a small bowl of warmed pizza sauce and a bowl of garlic butter for dipping on the table. There’s something so fun and communal about dipping the cheesy ends of the enchilada into a little extra sauce. My family loves it, and it makes the meal feel more interactive and special.
If you’re serving a crowd or want a fuller spread, consider adding some garlic breadsticks or bread knots on the side. They’re perfect for sopping up any extra sauce and cheese that might escape onto the plate. I’ve also served these with a side of seasoned roasted broccoli or peppers and onions—any vegetable that you’d typically enjoy on a pizza works beautifully here.
Variations & Customizations
This recipe is a fantastic canvas. One of my favorite twists is making a “Supreme” version. I’ll add diced mushrooms and some crumbled Italian sausage to the beef filling. It reminds me of my favorite delivery pizza and makes the flavor even more complex and satisfying. You can truly use any pizza toppings you love—just be sure to sauté vegetables first to remove excess moisture.
For a “White Pizza” enchilada, I once swapped the red pizza sauce for a creamy Alfredo sauce mixed with ricotta cheese. I filled the tortillas with a mixture of shredded chicken, spinach, and mozzarella. It was a completely different, decadent experience. Drizzling a little Alfredo on top instead of marinara before adding the cheese creates a stunning and delicious alternative.
If you’re feeding vegetarians, this adapts beautifully. I’ve made a version using a mixture of sautéed mushrooms, zucchini, black beans, and corn as the filling base. I increased the Italian seasoning and used a robust, herby pizza sauce. Topped with cheese and pepperoni-style plant-based slices, it was a huge hit. The key is ensuring your veggie filling isn’t too wet, so sauté everything until well-cooked.
How to Store, Freeze & Reheat
To store leftovers, I let the enchiladas cool completely, then transfer them to an airtight container. They’ll keep in the fridge for 3-4 days. When reheating, the microwave is quick but can make the tortillas a bit soggy. My preferred method is to reheat individual portions in the oven at 350°F (175°C) for about 10-15 minutes, or until hot through. This helps revive some of the texture.
For freezing, I assemble the enchiladas right up to the point of baking—topped with sauce and cheese—but I do not bake them. Instead, I cover the dish tightly with both plastic wrap and foil and freeze it. Frozen this way, they last for up to 2 months. When you’re ready, you can bake them straight from frozen; just add 20-30 minutes to the covered baking time, and then proceed with the uncovered browning.
I do not recommend freezing already-baked enchiladas. I tried it once, and the tortillas became unpleasantly mushy upon thawing and reheating. The texture just isn’t the same. If you know you’ll want to freeze some, the unbaked method is absolutely the way to go. It’s like having a fantastic homemade freezer meal ready for any busy night.
Conclusion
Pizza Enchiladas have become more than just a recipe in my kitchen; they’re a symbol of playful, comforting cooking. They never fail to bring a smile to the table and solve the dinner dilemma with cheesy, saucy brilliance. I hope you give them a try and make them your own, adding your favorite toppings and sharing them with people you love. Happy cooking!