
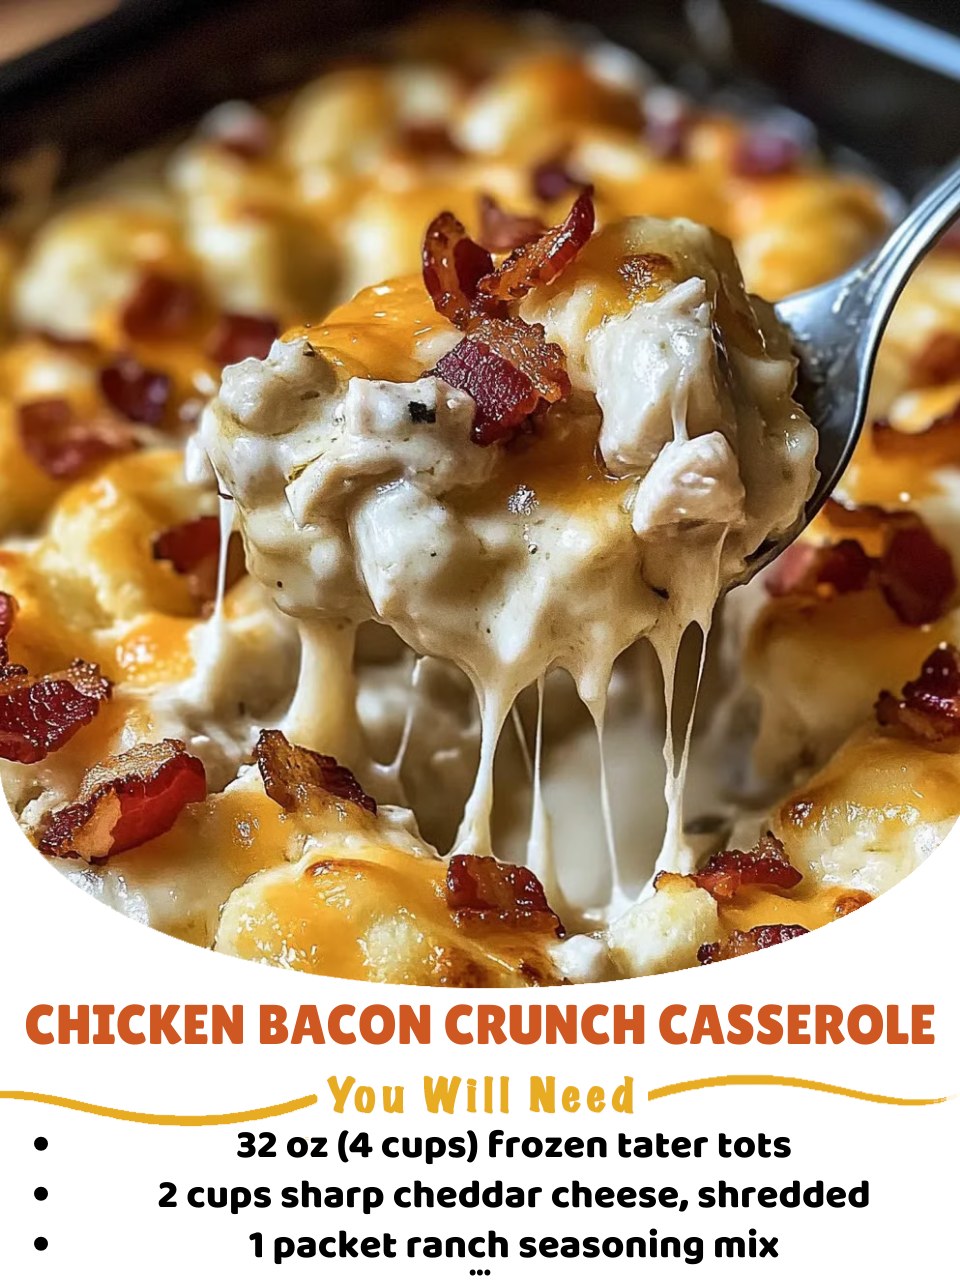
There’s a moment in every home cook’s life when you need a meal that feels like a hug, requires minimal fuss, and guarantees clean plates all around. For me, that moment came on a chaotic Wednesday, and the hero was this Chicken Bacon Crunch Casserole. As I pulled the golden, bubbling dish from my oven, the smell was pure magic—savory roasted chicken, smoky bacon, sharp cheddar, and that unmistakable, herbaceous punch of ranch seasoning all mingling together. The sound of the tater tots crisping into a perfect, crunchy topping was the symphony my tired soul needed. It was instant comfort in a 9×13 dish, and it’s been a beloved staple in my home ever since.
Why You’ll Love This Recipe
You will love this recipe because it’s the ultimate in easy, satisfying comfort food. It comes together with shockingly little effort, using ingredients you likely have on hand, yet it delivers a flavor and texture combination—creamy, cheesy, smoky, and crunchy—that feels special and indulgent. It’s the kind of dish that makes everyone, from kids to adults, light up when they see it on the table, and it frees you up from kitchen stress so you can actually enjoy the evening.
Ingredients
- 32 oz (about 4 cups) frozen tater tots
- 3 cups cooked chicken, shredded or diced (a store-bought rotisserie chicken is perfect here)
- 1 pound bacon, cooked until crisp and crumbled
- 2 cups sharp cheddar cheese, shredded (divided)
- 1 (10.5 oz) can cream of chicken soup
- 1 cup sour cream
- 1/2 cup whole milk
- 1 (1 oz) packet ranch seasoning mix (don’t skip this; it makes a huge difference)
- 1/2 teaspoon black pepper
- 1/4 cup thinly sliced green onions, for garnish (See the next page below to continue…)
Equipment Needed
- 9×13 inch baking dish
- Large mixing bowl
- Skillet for cooking bacon
- Measuring cups and spoons
- Spatula or spoon for mixing
- Aluminum foil
Step-by-Step Instructions
My process always starts with the bacon. I get my skillet nice and hot and cook the bacon until it’s perfectly crisp. I’ve found that baking it in the oven on a sheet pan is easier and less messy, but for this, I love the control of the skillet to get every piece just right. As it sizzles, that smoky aroma starts to fill the kitchen, setting the stage. Once it’s cooked, I drain it on paper towels and let it cool before crumbling it into big, meaty bits. While that’s happening, I’ll often shred the meat from a rotisserie chicken—it’s my biggest time-saver tip.
Next, in my large mixing bowl, I combine the creamy base. I add the cream of chicken soup, sour cream, milk, that all-important packet of ranch seasoning, and the black pepper. I whisk it all together until it’s completely smooth and that signature ranch color comes through. Then, I fold in the cooked chicken, about two-thirds of the crumbled bacon, and one cup of the shredded cheddar cheese. The mixture will be thick, creamy, and incredibly fragrant. Trust me, you’ll want to sneak a taste right now.
Now for the assembly, which is the easiest part. I lightly grease my 9×13 baking dish and spread the chicken and bacon mixture evenly across the bottom. I press it down gently with my spatula. Then comes the fun part: the tater tots. I take them straight from the freezer and arrange them in tight, neat rows over the entire surface. This isn’t just for looks; placing them close together ensures every bite gets that crunchy potato topping. I don’t thaw them first—they go on frozen. (See the next page below to continue…)
Finally, I sprinkle the remaining cup of cheddar cheese over the top of the tater tots, followed by the rest of the reserved bacon crumbles. This double layer of cheese and bacon on top creates the most beautiful, flavorful crust. I bake it, uncovered, in a preheated 375°F (190°C) oven for about 45-55 minutes. You’ll know it’s done when the cheese is melted and bubbly, the sauce is bubbling up around the edges, and the tater tots are a deep, golden brown and crisp. I let it sit for a full 10 minutes after baking—this rest time is crucial for the filling to set so you get perfect slices.
Pro Tips for Best Results
For the crispiest tater tot topping, give your oven a head start. I always preheat my oven for a full 20-30 minutes before baking to ensure it’s at a true, steady 375°F (190°C). Putting a cold casserole into an oven that’s still climbing in temperature can lead to a soggy bottom layer before the tots have a chance to crisp up properly. A hot, ready oven is your best friend for texture.
I’ve tried this with different creamy soups, and cream of chicken is the champion. Cream of mushroom works in a pinch, but the cream of chicken doubles down on that savory poultry flavor that pairs so well with the ranch and bacon. Also, use full-fat sour cream and whole milk if you can. I tested it once with low-fat versions, and the filling was a bit looser and less luxurious. The richness here is part of the point.
If you have an extra minute, take your tater tots out of the freezer and let them sit on the counter for about 10-15 minutes while you prep everything else. They don’t need to thaw, but just losing that deep-freeze chill helps them start crisping faster in the oven. I’ve found this little trick helps them get extra crunchy without overcooking the creamy filling underneath.
Common Mistakes to Avoid
The first time I made this, I was so eager I used raw, diced chicken breast mixed into the creamy filling. Don’t do what I did! The chicken releases too much water as it cooks, making the whole casserole soupy and preventing the tater tots from crisping. Always use pre-cooked chicken. A rotisserie chicken is ideal, or leftover baked or grilled chicken. It’s the single most important step for the right texture. (See the next page below to continue…)
Don’t skip the rest time after baking. I’ve burned my mouth more than once being impatient. When it comes out of the oven, the center is like molten lava, and it needs those 5-10 minutes to firm up. If you cut into it immediately, you’ll have a delicious but sloppy mess on your plate. Letting it rest ensures those beautiful, clean serving squares.
Be careful with added salt. Between the bacon, the cream of chicken soup, the ranch seasoning, and the cheese, there is more than enough sodium in this dish. I learned this the hard way by adding “just a pinch” to the filling. It was overwhelming. Season only with pepper. The ranch packet provides all the herby saltiness you need.
Finally, don’t cover the casserole with foil while baking. I tried this once thinking it would help the chicken heat through more evenly, but it steamed the tater tots into a soft, pale layer on top. You want that direct, dry oven heat to hit the tots and cheese to create the signature “crunch.” Bake it uncovered the entire time for the perfect golden result.
Serving Suggestions
I like serving this casserole straight from the dish with a very simple, bright side to cut through the richness. A basic green salad with a tangy vinaigrette is my absolute go-to. The crisp, acidic greens are the perfect counterpoint to the creamy, cheesy, savory casserole and make the whole meal feel balanced.
For a heartier, all-comfort-food meal, I’ll sometimes serve it with a side of steamed green beans or roasted broccoli. I’ll toss the broccoli in a little olive oil, garlic powder, and a sprinkle of Parmesan before roasting until it’s got some crispy edges. It’s another vehicle for that delicious casserole flavor and adds a welcome vegetable element.
Don’t forget the garnishes! Right before serving, I always scatter a handful of thinly sliced green onions over the top. The fresh, sharp bite they provide is incredible. Sometimes, I’ll even offer little bowls of extra sour cream, ranch dressing, or hot sauce on the side for those who want to add another creamy or spicy kick.
Variations & Customizations
This recipe is wonderfully adaptable. For a “Southwest” version, I’ve swapped the ranch seasoning for a taco seasoning packet. I’ll add a drained can of diced green chiles and a cup of frozen corn to the filling, and use a Mexican cheese blend. I’ll even swap the tater tots for frozen crispy crown potatoes for a different shape. It’s a whole new flavor profile with the same easy method.
If you’re not a bacon person (or are cooking for someone who isn’t), diced ham works beautifully. I’ve used about 2 cups of diced ham steak in place of the bacon, and it’s delicious. You could also make it vegetarian by using a plant-based “chicken” substitute, omitting the bacon, and using cream of mushroom soup. Add some sautéed mushrooms and spinach to the filling for heartiness.
For a lighter twist, I’ve used frozen cauliflower tots instead of potato tots. They still get crispy and provide that great topping texture, with a veggie boost. I also used a light sour cream and reduced-fat cheese in that version. It was still wonderfully satisfying, just a bit lighter on the calories while keeping all the fantastic flavor layers.
How to Store, Freeze & Reheat
To store leftovers, I let the casserole cool completely, then cover the baking dish tightly with plastic wrap or transfer portions to airtight containers. It keeps well in the fridge for 3-4 days. The tater tots will soften in the fridge, but that’s just the nature of leftovers.
Reheating is key to bringing back some of the magic. The microwave is quick but will make the tots soggy. My preferred method is to reheat individual portions in a toaster oven or regular oven at 375°F (190°C) for 10-15 minutes, until hot and the topping has re-crisped a bit. For a larger portion, I’ll cover it with foil and reheat for 20-25 minutes, then remove the foil for the last 5-10 minutes.
You can freeze the unbaked casserole for a fantastic future meal. Assemble it completely in a freezer-safe dish, but do not bake it. Wrap it tightly in a layer of plastic wrap and then a layer of foil. It will keep for up to 2 months. To cook, thaw it overnight in the fridge and then bake as directed, adding maybe 10 extra minutes since it will be cold. I don’t recommend freezing after baking, as the potato topping becomes very mushy and grainy upon reheating.
Conclusion
This Chicken Bacon Crunch Casserole is more than just dinner; it’s a reliable, joyous solution for busy days, potlucks, and anytime you need a guaranteed hit. It’s the delicious proof that simple ingredients, when combined with care and a little know-how, can create something truly memorable. I hope it finds a regular spot in your recipe rotation and brings as much comfort and delight to your table as it has to mine. Happy cooking