
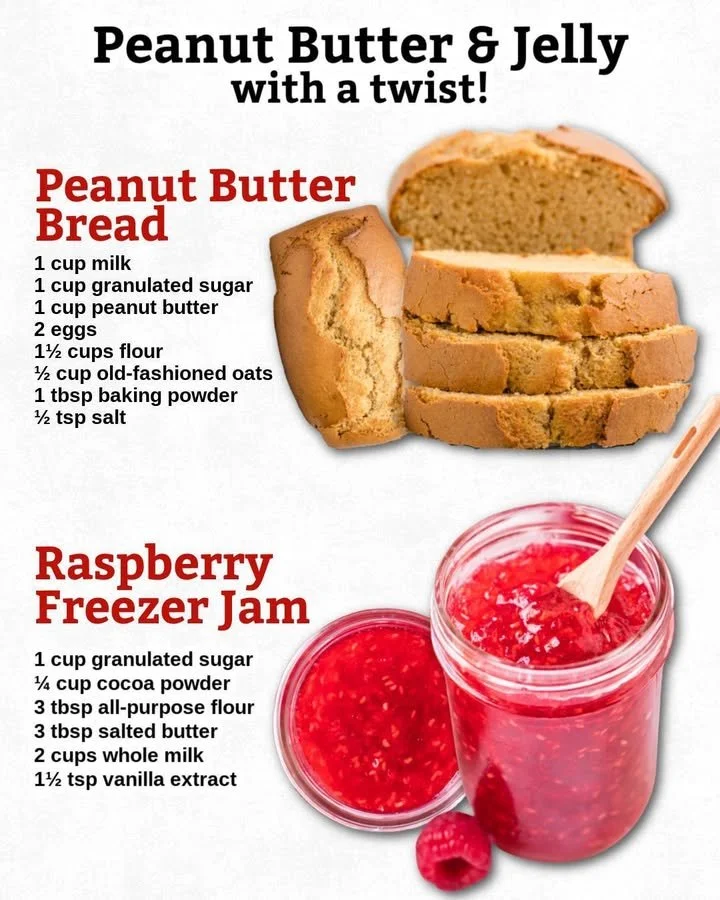
Next, gradually add the dry ingredients to the wet ingredients, stirring just until combined. Be careful not to overmix; a few lumps are perfectly fine! After that, pour half of the batter into your greased loaf pan, and then dollop half of the raspberry freezer jam on top. It’s tempting at this point to taste the jam, but hanging in there will be worth it! Spread the remaining batter over the jam and top with any leftover jam, swirling it gently with a knife for that rustic look.
Bake your loaf in the preheated oven for 50-60 minutes, or until a toothpick inserted into the center comes out clean. As it bakes, your kitchen will fill with an irresistible peanut butter fragrance that’s bound to make your mouth water. Once baked, let it cool in the pan for about 10 minutes before transferring it to a wire rack to cool completely.
Pro Tips for Best Results
I tested this recipe three ways: with crunchy peanut butter, honey, and substituting half the sugar with brown sugar. Each variation was delicious, but I found that creamy peanut butter yields the most tender bread. If you’re looking for a little more punch, a pinch of cinnamon can elevate the flavor profile beautifully! Just a hint is all you need.
Another tip I picked up along the way is to make sure all your ingredients are at room temperature before you start mixing. It helps the batter come together more smoothly, resulting in a lovely, even texture. The first time I skipped this step, my bread turned out a bit denser than I liked, which was a lesson learned!
Lastly, I always sprinkle a little flaky sea salt on top of the batter before it goes into the oven. The subtle saltiness really enhances the sweet and nutty flavors, creating a wonderful balance. Trust me, your taste buds will thank you!
Common Mistakes to Avoid
One of the most common mistakes I encountered while baking this bread was overmixing the batter. It’s easy to get carried away, especially when the mixture looks so inviting, but too much mixing leads to a dense texture. I learned that a few lumps in the batter are totally acceptable and will result in lighter bread. (See the next page below to continue…)
Another pitfall is not greasing the loaf pan adequately. There’s nothing worse than watching your beautiful loaf stick to the pan, which can ruin your carefully baked masterpiece. I now always opt for a generous coating of cooking spray or butter, and I even line the bottom with parchment paper for good measure.
Pay attention to the baking time as well; every oven is a little different. I recommend checking your loaves a few minutes before the minimum baking time to avoid over-baking. The bread should be golden brown on the outside and spring back when lightly touched. You’ll know it’s done when a toothpick comes out clean—or with just a few crumbs!