
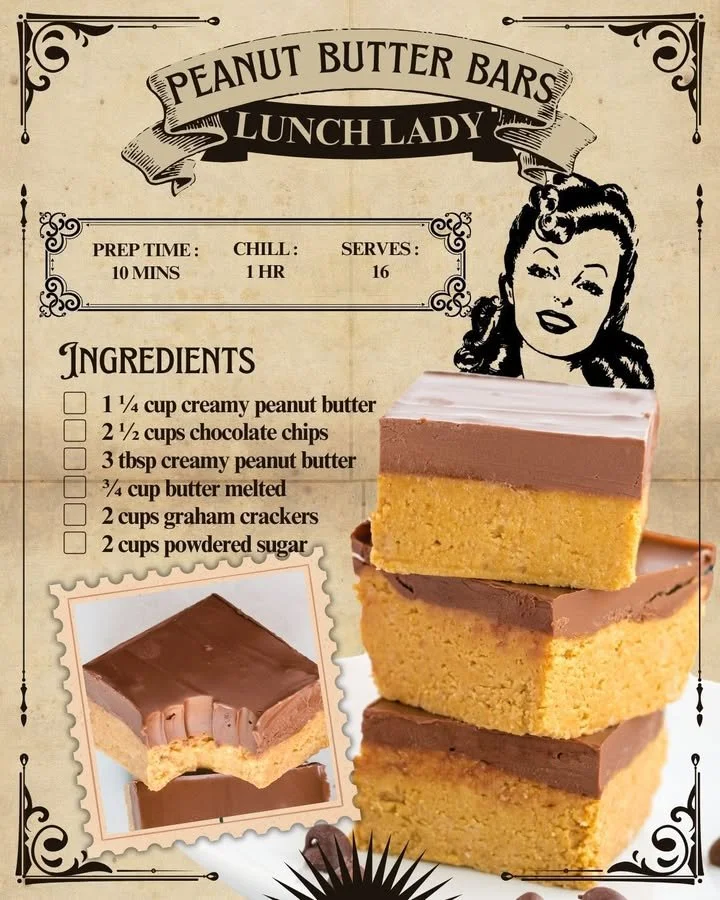
Ah, the nostalgic warmth of school lunches! One of my absolute favorites was the Lunch Lady Peanut Butter Bars. I remember the aroma wafting through the hallways and how everyone would eagerly line up for a taste. Today, I want to share my twist on this classic recipe, straight from my kitchen to yours. Trust me, these bars will bring back sweet memories while satisfying your current cravings!
Why You’ll Love This Recipe
These Lunch Lady Peanut Butter Bars are delightfully creamy, bursting with peanut flavor, and have just the right crunch from the oats. They’re perfect for a quick snack, a dessert, or even a fun lunchbox surprise. Plus, they come together with minimal fuss, making them a breeze to whip up. What’s not to love about that? (See the ingredients in the next page below…)
Ingredients
– 1 cup creamy peanut butter
– 1 cup granulated sugar
– 1 cup brown sugar, packed
– 1 teaspoon vanilla extract
– 2 large eggs
– 1 ¾ cups all-purpose flour
– 1 teaspoon baking powder
– ½ teaspoon baking soda
– ½ teaspoon salt
– 1 ½ cups old-fashioned oats
– 1 cup chocolate chips (optional)
Equipment Needed
– Large mixing bowl
– Electric mixer (or a whisk and some elbow grease!)
– 9×13 inch baking pan
– Parchment paper (for easy removal)
– Measuring cups and spoons
– Rubber spatula
– Cooling rack
Step-by-Step Instructions
First, I start by preheating my oven to 350°F (175°C). As the oven warms up, I grab my trusty mixing bowl and combine the creamy peanut butter, granulated sugar, brown sugar, and vanilla extract. Mixing it all together until it’s beautifully creamy and smooth fills my kitchen with an irresistible scent! Next, I add the eggs, one at a time, ensuring each one is fully incorporated before adding the other. The mixture should be glossy and thick at this point; it absolutely screams “delicious!” (See the next page below to continue steps…)
Now, in a separate bowl, I whisk together the flour, baking powder, baking soda, and salt. Once well combined, I gradually add this dry mixture to my peanut butter mixture. I love to take my time with this step, folding it gently so everything blends nicely. When that’s done, I carefully stir in the oats, and if I’m feeling indulgent, a cup of chocolate chips! This addition isn’t just about sweetness; the chocolate pairs beautifully with the rich peanut flavor.
Once everything is mixed, I line my baking pan with parchment paper (which makes cleanup a cinch!), and pour my delicious mixture into the prepared pan, spreading it evenly. The smell in my kitchen is already heavenly, and I can’t wait to get it baking! I pop the pan into the preheated oven and let it bake for about 20-25 minutes, or until a toothpick inserted in the center comes out clean. Be sure not to overbake; I’ve learned the hard way that we want these bars to stay soft and chewy!
After removing the pan from the oven, I let it cool on a wire rack, which has the added benefit of letting that beautiful aroma fill my home even longer. Once it’s cool, I lift the bars out using the parchment paper and cut them into squares. Each bite is a delightful mix of creamy, chewy, and crunchy perfection!
Pro Tips for Best Results
One of my favorite tricks is to let the peanut butter sit at room temperature for a bit before mixing. This makes it easier to blend and gives the bars an extra creamy texture. I tested this three ways: directly from the fridge, room temperature, and pre-heated. Room temperature is definitely my winner!
Another tip is to use good-quality peanut butter. It doesn’t have to be fancy, but avoid the no-stir types. When I used a natural peanut butter with just peanuts and salt, I found the flavor to be much richer and more satisfying than a sugary one. I’ve also baked these bars without adding chocolate chips, and while they’re delicious that way, the chocolate really elevates the treat!
Lastly, be cautious with your baking time. I always set my timer for a few minutes less than recommended, knowing every oven is different. I can’t tell you how many times I’ve overbaked treats, only to have them turn out dry! My golden rule is to pull them out when they look just slightly underbaked, allowing them to set perfectly as they cool.
Common Mistakes to Avoid
One mistake I made early on was to rush the mixing process. It’s so tempting to just dump everything together, but taking the time to mix your wet ingredients thoroughly is key! If you don’t incorporate the sugars fully, your bars can end up lumpy and unevenly sweet. I learned to beat those sugars and peanut butter well until the mixture is smooth and almost fluffy; it makes a big difference! (See the next page below to continue…)
Another common error is using too much flour. Baking is definitely a science, and too much can lead to a dry texture. I use the spoon-and-level method to measure my flour, gently spooning it into the measuring cup and leveling it with a knife for precision. Trust me, this small change has made my bars so much better!
Lastly, don’t forget to let them cool. I’ve been too impatient before, slicing into them while they were still warm, and they ended up falling apart. Patience may not be my strong suit, but I learned the hard way that giving them the proper time to set is essential for those lovely, clean squares.
Serving Suggestions
These peanut butter bars are quite versatile! I love to enjoy them with a tall glass of cold milk for that classic pairing that takes me right back to childhood. Alternatively, they make a fantastic dessert when served warm with a scoop of vanilla ice cream on top; the way the ice cream melts into the warm bars is simply heavenly!
Another idea is to pack them in lunchboxes as a sweet surprise for the little (or big!) kids in your life. I often cut them into smaller squares for a pop of sweetness during the day at work or school. They’re perfect for sharing during a picnic or a snack on the go, and let me tell you, they always draw rave reviews!
You can also jazz them up a bit by drizzling some melted chocolate over the top! A simple ganache or even a sprinkle of sea salt can elevate them for special occasions. I’ve served these bars at gatherings, and they vanish in no time!
Variations & Customizations
If you’re feeling creative, you can easily customize these bars to suit your taste! For a little crunch, try adding chopped nuts like pecans or walnuts. They add both texture and an extra flavor dimension that’s delightful. I especially love throwing in some peanut halves for a double peanut kick!
Another variation is to use different nut butters. I’ve made these with almond butter and even sunflower seed butter for a nut-free version. Each substitution brings its own unique flavor, and it’s amazing how versatile this recipe can be while still keeping that chewy texture we all love.
For those who enjoy a hint of spice, a teaspoon of cinnamon or even a touch of cocoa powder can be a lovely addition. I’ve experimented with chocolate peanut butter powder, which provided a rich chocolatey taste that pairs beautifully with the classic peanut flavor, making for a delicious twist!
How to Store, Freeze & Reheat
Once your bars have cooled completely, you can store them in an airtight container at room temperature for up to a week. That’s if they last that long! I usually find myself sneaking bites every day until they’re gone. If I ever have extras (which is rare), I like to put them in the fridge to keep them even fresher for longer.
For those days when you want to prepare ahead, these bars freeze beautifully! Simply wrap them individually in plastic wrap and then place them all in a freezer-safe bag. They can be frozen for up to three months. Just remember to let them thaw at room temperature for about 30 minutes, and they’ll be just as good as fresh!
When reheating, I recommend popping them in the microwave for about 10-15 seconds. This gives them that warm, gooey texture reminiscent of freshly baked bars. Perfect for those late-night cravings or a cozy snack during a chilly day!
Conclusion
I hope you enjoy making these Lunch Lady Peanut Butter Bars as much as I do! They’re full of nostalgia, comfort, and of course, delicious peanut butter goodness. I love sharing them with family and friends, as they always bring smiles and warm memories. Happy baking, and enjoy every bite!