
Another mistake is not properly measuring the ingredients, especially the cream cheese and powdered sugar. Since this cheesecake has a no-bake structure, balancing those elements is essential for next-level creaminess. I’ve had a batch turn out far too sweet before because I did not measure my powdered sugar accurately.
Additionally, forgetting to grease the springform pan can be a real nightmare. Trust me—the last thing you want is to see your gorgeous cheesecake crack or stick when you try to remove it. I learned this the hard way after one too many frustrating attempts! A little grease goes a long way in ensuring a smooth release.
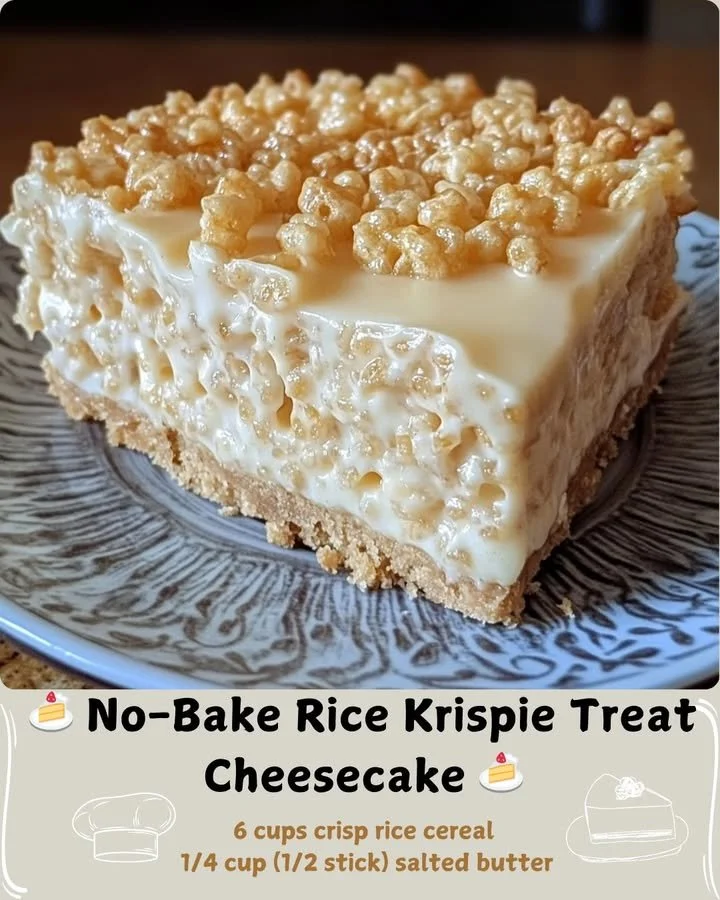
Lastly, be cautious with the amount of marshmallows you use in the crust. Too many can make it overly sweet or prevent it from setting correctly. The ratio should be just right—not too gooey and not too crumbly. Finding that sweet spot took some trials, but I promise it’s worth the effort!
Serving Suggestions
Serving this No-Bake Rice Krispie Treat Cheesecake is just as fun as making it! I love to slice it into generous wedges and plate it up with a dollop of whipped cream on the side for added flair. You can also drizzle some chocolate or caramel sauce over it for an even more indulgent treat. It’s always a hit at gatherings when I go the extra mile!
For a fun twist, I like to pair it with fresh berries. Strawberries, blueberries, or raspberries add a refreshing contrast to the sweetness of the cheesecake, making for a lovely presentation. I find that the tartness of the berries balances perfectly with the creamy, sweet cheesecake.
If I have any leftovers, I often serve it for breakfast the next day—it’s like indulging in dessert for the first meal! Just a slice and a cup of coffee can be the ultimate way to start a day. I promise you won’t regret it!
Variations & Customizations
This recipe is incredibly versatile! For a chocolatey twist, I sometimes add melted chocolate to the cheesecake filling, which creates a rich chocolate Rice Krispie Treat Cheesecake. It’s a simple swap that elevates the flavors and excites everyone who tries it. I’ve also experimented by using peanut butter instead of cream cheese, and it gives an entirely different, but equally delicious, vibe.
I also love the idea of adding crushed candies or cookies into the crust or topping. For example, crushed Oreos for a Cookies and Cream flavor is a huge hit at my parties. I simply replace a portion of the Rice Krispies with crushed Oreos, and it’s like getting two desserts for the price of one! Each variation adds a personal touch that keeps this recipe fresh and exciting.
Finally, for a fruity version, I’ve folded in some finely chopped fruits, like bananas or strawberries, into the cheesecake filling. The natural sweetness and texture of the fruit can add a delightful twist that complements the original flavors beautifully. It shows how adaptable this recipe can be while allowing for all sorts of culinary creativity!
How to Store, Freeze & Reheat
Storing your No-Bake Rice Krispie Treat Cheesecake is super simple! Just keep it in an airtight container in the refrigerator, where it should last about a week. I find that it becomes even more flavorful after a day or two as the flavors meld together. Just make sure to keep it covered so it doesn’t absorb any fridge odors!
If you want to freeze it, it’s best to slice it beforehand. I wrap each slice individually in plastic wrap and then place them in a freezer-safe container. This way, I can easily grab a slice whenever I need a sweet treat! Just make sure to consume it within a couple of months for the best taste and texture.
When it’s time to reheat, simply take it out of the freezer and let it thaw overnight in the fridge. I don’t recommend microwaving it; the texture might change, and you’ll want to maintain that creamy dreaminess. Simply letting it thaw will keep the magic intact!
Conclusion
I hope you find as much joy in making and savoring this No-Bake Rice Krispie Treat Cheesecake as I do. It’s such a fun and simple treat that brings a smile to everyone’s face. Whether you’re making it for a special occasion or just to satisfy a craving, I’m sure it will become a favorite in your kitchen too. Happy baking (or should I say, mixing), and enjoy every delicious bite!