
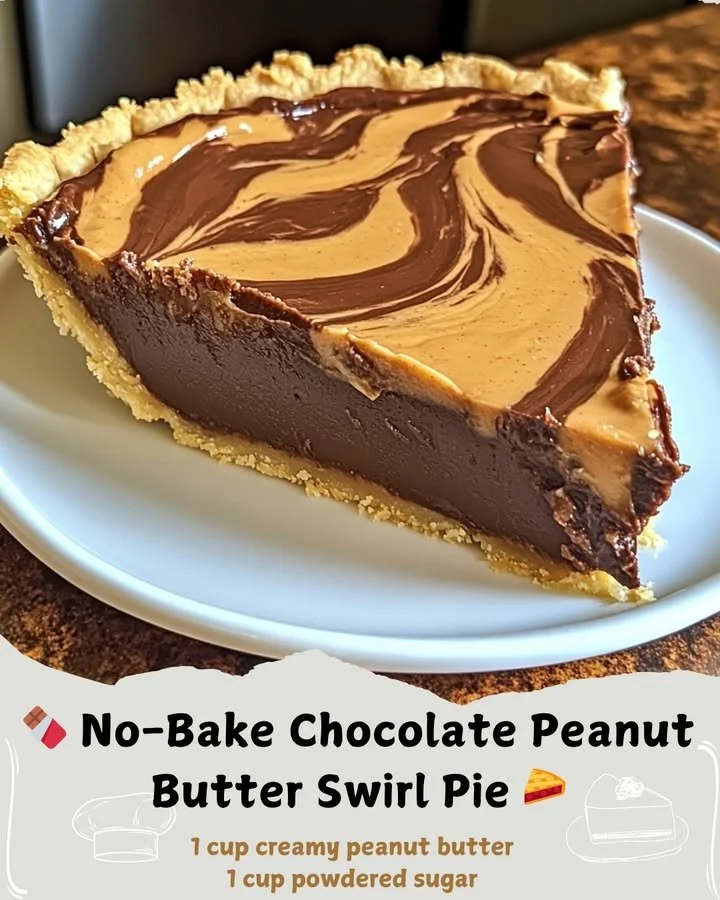
I’m excited to share one of my all-time favorite sweet treats with you: No-Bake Chocolate Peanut Butter Swirl Pie! There’s something truly magical about a dessert that comes together without ever needing to turn on the oven. This pie has a rich, creamy texture that is perfectly balanced with the delightful saltiness of peanut butter, making it a hit at any gathering. Let’s dive into this delicious recipe that is sure to satisfy your sweet tooth!
Why You’ll Love This Recipe
This No-Bake Chocolate Peanut Butter Swirl Pie is incredibly easy to make, and the best part? It can be prepped in just about 30 minutes! The combination of flavors and textures—from the creaminess of the filling to the crunchy graham cracker crust—is simply divine. Plus, it’s so rich and satisfying that a little slice goes a long way. Trust me; you’ll want to tuck this recipe away for your next party or family gathering. (See the ingredients in the next page below…)
Ingredients
– 1 ½ cups graham cracker crumbs
– ½ cup unsalted butter, melted
– ¼ cup granulated sugar
– 1 cup smooth peanut butter
– 8 oz cream cheese, softened
– 1 cup powdered sugar
– 1 teaspoon vanilla extract
– 1 ½ cups whipped topping
– 1 cup semisweet chocolate chips
– 1 tablespoon coconut oil (or vegetable oil)
Equipment Needed
– A 9-inch pie dish
– Mixing bowls
– Electric mixer
– Rubber spatula
– Microwave-safe bowl
– Measuring cups and spoons
– Plastic wrap
Step-by-Step Instructions
To start off, I mix the graham cracker crumbs, melted butter, and granulated sugar in a mixing bowl until well combined. It’s super satisfying to press the mixture into the bottom and up the sides of the pie dish using my fingers—it creates such a lovely crust! Once I have the crust packed tightly, I place it in the fridge to chill while I prepare the filling. (See the next page below to continue steps…)
Next, I grab another mixing bowl and combine the softened cream cheese, peanut butter, powdered sugar, and vanilla extract. Using my electric mixer, I whip it all together until it’s silky and smooth. Oh, the scent of peanut butter fills the kitchen! Once that’s nicely combined, I gently fold in the whipped topping, which brings an airy lightness to the filling.
Now for the fun part: I scoop half of the filling into the chilled graham cracker crust and spread it out evenly. Then, I melt the chocolate chips with the coconut oil in the microwave—about 30 seconds, stirring in between until everything is melted and glossy. I drizzle half of the melted chocolate over the peanut butter filling and take a toothpick to swirl it together gently. It looks almost too good to eat!
Finally, I repeat the filling process with the remaining peanut butter mixture, adding another layer of chocolate on top, and swirl again for that signature look. I cover my pie with plastic wrap and let it set in the refrigerator for at least four hours—if I can resist tasting it!
Pro Tips for Best Results
I tested this recipe three ways to find the perfect ratio of peanut butter to cream cheese. If you find the filling a bit too rich, you can always reduce the peanut butter slightly and see how that changes the flavor profile for you.
Make sure your cream cheese is at room temperature before mixing! Trust me, trying to mix cold cream cheese is a workout your arms don’t need. This ensures that everything mixes smoothly and gives you that fluffy texture we’re aiming for.
If you want to elevate this pie even further, consider garnishing it with chopped peanuts or more chocolate drizzles right before serving. Presentation can make a huge difference and adds that extra special touch!
Common Mistakes to Avoid
One common mistake I made was not chilling the crust long enough before adding the filling. I was so excited to dig in that I rushed the process, and ended up with a crust that crumbled everywhere! So, give it a solid 30 minutes in the fridge to really set. (See the next page below to continue…)
Another thing to note is measuring your ingredients precisely. I once grabbed a tablespoon instead of a teaspoon for the vanilla extract, and oh my, it was just too overpowering! That sweet, simple flavor is best when balanced, so keep your measuring tools handy.
Lastly, don’t skip the cooling time once the pie is assembled. I know the temptation to taste it right away is real, but letting it set allows the flavors to meld beautifully. Your patience will be rewarded!
Serving Suggestions
When it’s time to serve this delectable pie, I like to keep it simple. A dollop of whipped cream on each slice elevates the presentation and adds an extra layer of creaminess that pairs perfectly with the crunchy crust.
I also enjoy drizzling some extra melted chocolate over the top or alongside the plate for a chocolate lover’s dream. You can even sprinkle a few crushed peanuts for that perfect crunch factor!
For gatherings, I love to serve individual slices on cute dessert plates, ensuring everyone gets their own little piece of heaven. Just watch those smiles light up when they dig in!
Variations & Customizations
While I’m a sucker for the classic combination of chocolate and peanut butter, you can absolutely customize this pie to suit your tastes. If you’re feeling adventurous, try using almond butter instead of peanut butter for a different flavor twist!
Add some crushed Oreo cookies to the crust for a chocolatey base that will take the pie to new levels of deliciousness. You can also experiment with different chocolate types—dark chocolate or even white chocolate could add an interesting flair.
For the health-conscious dessert lovers, consider using Greek yogurt instead of cream cheese along with a natural sweetener in place of powdered sugar. You’ll still get that luscious filling, but with a bit more protein and a lighter twist!
How to Store, Freeze & Reheat
Storing leftovers (if there are any!) is super easy. Just cover the pie with plastic wrap or place it in an airtight container, and it’ll stay fresh in the fridge for up to five days. I promise, it’s just as delicious on the last day as it is on the first!
If you want to prepare this pie ahead of time, freeze it before setting. Just cover it in plastic wrap and foil, and you can keep it in the freezer for up to two months. When you’re ready to indulge, let it thaw in the refrigerator overnight for the best texture.
Reheating isn’t necessary since it’s served cold, but if you prefer a warm treat, you can slice a piece and pop it in the microwave for about 10-15 seconds. The chocolate will soften, and you’ll create an entirely different experience with that warm, gooey goodness!
Conclusion
Creating my No-Bake Chocolate Peanut Butter Swirl Pie has been a delightful journey filled with flavor and fun. I hope you give this recipe a try and enjoy it as much as I do! There’s nothing quite like the joy of sharing this creamy delight with family and friends, and I can’t wait to hear how it turns out for you. Happy baking, or should I say no-baking? Enjoy!