
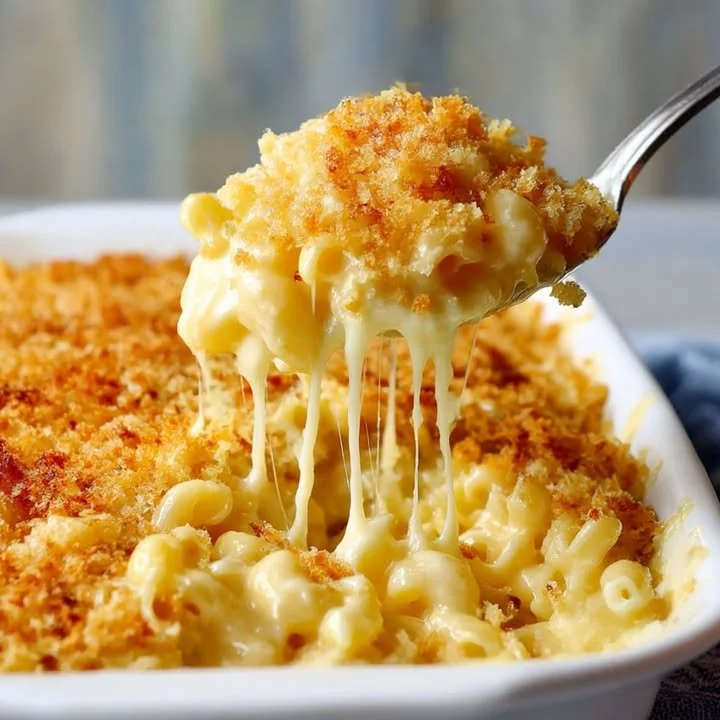
There’s something incredibly comforting about a warm, gooey dish of baked mac and cheese. It’s one of those recipes that brings back memories of childhood, family gatherings, and cozy nights in. I often find myself craving this classic comfort food, especially when I want to whip something up that feels indulgent yet satisfying. In my kitchen, I’ve perfected a version that warms my heart every time I make it—the best homemade baked mac and cheese that I can’t wait to share with you!
Why You’ll Love This Recipe
What sets this mac and cheese apart is the creamy texture combined with a crispy, golden topping. I’ve experimented with various cheeses, pasta shapes, and spices, and I’ve landed on the perfect combination that makes every bite heavenly. Plus, it’s easy to prepare and always a hit with family and friends. You’ll love how the cheese bubbles and the aroma fills your home, making it a go-to for any occasion. (See the ingredients in the next page below…)
Ingredients
– 8 ounces elbow macaroni
– 4 tablespoons unsalted butter
– ¼ cup all-purpose flour
– 4 cups whole milk
– 3 cups shredded cheddar cheese
– 1 cup shredded mozzarella cheese
– 1 teaspoon garlic powder
– 1 teaspoon onion powder
– ½ teaspoon paprika
– Salt and pepper to taste
– ½ cup breadcrumbs (optional for topping)
Equipment Needed
– Large pot for boiling pasta
– 9×13-inch baking dish
– Saucepan for cheese sauce
– Whisk
– Measuring cups and spoons
– Mixing spoon
– Oven mitts
Step-by-Step Instructions
First, preheat your oven to 350°F (175°C). Begin by cooking the elbow macaroni in a large pot of salted boiling water until it’s just al dente. This usually takes around 6 to 8 minutes, but be sure to check the package instructions. While the pasta is cooking, I can smell the delightful aroma wafting through my kitchen, which only heightens the anticipation. Once the pasta is done, drain it and set it aside. Now, let’s make that creamy cheese sauce! (See the next page below to continue steps…)
In a saucepan, melt the butter over medium heat. Then, whisk in the flour until it forms a paste, cooking it for about a minute. Slowly pour in the milk while continuously whisking to avoid lumps. Once it comes to a simmer and thickens, remove it from the heat and stir in the cheddar and mozzarella cheeses until they melt into a beautiful, silky sauce. I can already envision how amazing this will taste! Season it with garlic powder, onion powder, paprika, salt, and pepper to your liking.
Next, combine the cooked pasta with the cheese sauce in the baking dish. Mix everything together gently, ensuring the mac is well-coated in that luscious sauce. If desired, sprinkle breadcrumbs over the top for that irresistible crunchy layer. Cover the dish with foil and pop it into your preheated oven for about 20 minutes. This part is magical, as the cheese becomes even more melty and the edges start bubbling. Then, remove the foil and bake for an additional 10-15 minutes until it’s golden and bubbly.
Once it’s out of the oven, let it sit for about 5 minutes before diving in. As I scoop out a generous portion, I can’t resist inhaling the heavenly scent. The first bite is always the best—creamy, cheesy goodness, with just a hint of crispness from the topping. Truly, it’s comfort in a bowl!
Pro Tips for Best Results
I tested this three ways, adjusting the cheese ratios, and I found that a mix of sharp cheddar and mozzarella gives the best flavor and texture. The sharpness provides that delightful tang, while mozzarella adds creaminess—trust me, it’s a game-changer! Don’t skip the seasonings! They really elevate the dish, bringing out the richness of the cheese. I recommend tasting your cheese sauce before mixing it with the pasta. You should adjust the seasoning according to your preference—the cheese type can make a difference!
Another tip I learned from experience is to undercook the pasta slightly before baking. Since it will continue to cook in the oven, this step helps prevent that dreaded mushy texture. Keeping the pasta firm allows it to hold its shape while soaking up all that cheesy goodness. If you’re feeling adventurous, adding a splash of hot sauce or Dijon mustard can bring a lovely depth of flavor. I often swap out the spices for a hint of heat, and it always turns out great!
Lastly, don’t rush the cooling time after baking. It might be tempting to dive in right away, but giving it a few minutes helps the sauce thicken up a bit and makes the dish easier to serve. Plus, it enhances the flavors—patience is definitely a virtue when it comes to baked mac and cheese!
Common Mistakes to Avoid
One of the most common mistakes I’ve encountered with baked mac and cheese is not using enough cheese! I learned the hard way that skimping on cheese results in a bland dish—so don’t be shy! Go for high-quality cheese, and remember: mac and cheese is all about that ooey-gooey cheese explosion. (See the next page below to continue…)
Another mistake is overcooking the pasta. As I mentioned, it should be only al dente. If you cook it all the way through, it can turn mushy after baking, and no one wants that! I’ve had my fair share of sad mac and cheese experiments that went wrong this way, so trust me on this: stick to al dente!
Using the wrong dish size is another trap that can lead to either dry or undercooked mac and cheese. A 9×13-inch baking dish is the ideal size for even cooking and browning. If your dish is too small, it can trap steam and create a soggy mess! Lastly, if you skip the resting time after baking, you might end up with a soupy serving that won’t stay together. Allowing it to sit gives it the chance to set up nicely so you can enjoy creamy, perfectly portioned goodness!
Serving Suggestions
I love to serve my baked mac and cheese with a fresh side salad to balance the richness of the dish. A simple mix of arugula, cherry tomatoes, and a zesty vinaigrette does wonders. The bright acidity from the dressing cuts through the creaminess, creating a delicious contrast! Another great pairing is grilled veggies or roasted broccoli. Adding these sides enhances your meal while keeping it healthy.
If I’m entertaining, I sometimes create a mac and cheese bar. I prepare a base and offer toppings such as crispy bacon, caramelized onions, sliced jalapeños, and even truffle oil. It’s a fun way for guests to customize their portions, and it always sparks conversation around the table! On cozy nights in, sometimes all I want is just some good mac and cheese served straight from the baking dish. I grab a spoon, settle onto the couch, and enjoy every creamy bite.
For a heartier meal, I’ve also served mac and cheese alongside fried chicken or meatloaf. The comforting cheese pairs beautifully with savory dishes, making it a dish that brings everyone together. Trust me, wherever you serve it, mac and cheese will always steal the show!
Variations & Customizations
The beauty of baked mac and cheese is that it’s incredibly versatile! I often switch things up by using different types of cheese, such as gouda or pepper jack for a smoky flavor. Each cheese brings its own character, and it’s fun to experiment with combinations. You can also toss in some cooked bacon or ham for a meaty twist if that’s your vibe. Just be sure to adjust the seasonings accordingly!
If you want to take it up a notch, consider adding veggies such as spinach, broccoli, or roasted red peppers. These add nutrition and vibrant color, making the dish even more enticing. I’ve made a habit of sneaking in frozen peas or sautéed mushrooms just to keep it interesting. Plus, they complement the cheese perfectly!
For those who enjoy a little spice, a dash of cayenne pepper, or some diced green chiles can elevate the dish to a whole new level. I’ve had friends rave about how a bit of heat transformed their experience. Don’t hesitate to get creative with herbs like thyme or parsley for an aromatic touch, bringing freshness to every creamy bite!
How to Store, Freeze & Reheat
Storing leftovers is a breeze! I recommend placing uneaten mac and cheese in an airtight container in the fridge, where it’ll stay good for about 3 to 5 days. When reheating, a quick warm-up in the microwave usually does the trick, but I love placing it in the oven to ensure that crust stays crisp. Just cover it with foil to prevent drying out, and warm it at 350°F (175°C) until heated through.
For longer-term storage, you can freeze baked mac and cheese as well! After it cools, transfer it to a freezer-safe container or wrap it tightly in plastic wrap and foil. It can last for up to 3 months in the freezer, making it an excellent make-ahead meal. When you’re ready to enjoy it again, simply thaw it overnight in the fridge and reheat it in the oven.
One tip I learned through trial and error is to add a splash of milk or some extra cheese to the pasta before reheating. Sometimes, leftovers can dry out a bit, and this little trick gives it that creamy texture again. It’s a good way to refresh the dish while enjoying an effortless meal!
Conclusion
In my kitchen, this baked mac and cheese recipe has become a cherished staple. It’s easy to make and even easier to love. Whether it’s for a weeknight dinner, a gathering, or a cozy night in, this dish always warms my heart and fills my belly. I hope you enjoy making it as much as I have. Happy cooking, and may your kitchen always be filled with cheesy goodness!