
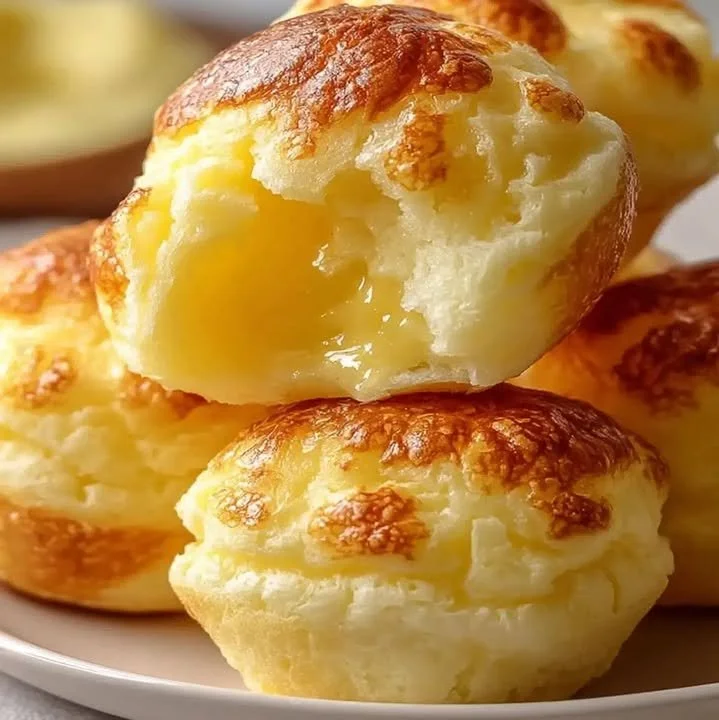
I have a special soft spot in my heart for sweets that bring a little bit of magic to my kitchen. Nun’s Puffs, with their delightful puffy pastry-like appearance and rich vanilla flavor, are one of those treats that make me feel like I’m indulging in something truly special. Whether it’s for a cozy afternoon snack or a charming dessert for guests, these little bites are bound to put a smile on anyone’s face.
Why You’ll Love This Recipe
These delightful treats are not only incredibly easy to make, but they are also light, airy, and simply delicious! With a creamy center and a wonderfully chewy texture, Nun’s Puffs are the perfect little indulgence. Plus, they are so versatile – you can serve them plain or dress them up with dustings of powdered sugar or drizzles of chocolate. The aroma that fills my kitchen while they bake is something I just can’t put into words. Sweet, comforting, and oh-so-inviting. (See the ingredients in the next page below…)
Ingredients
– 1 cup water
– 1/2 cup unsalted butter
– 1 cup all-purpose flour
– 1/4 teaspoon salt
– 4 large eggs
– 1 teaspoon vanilla extract
– 1/2 cup shredded cheese (optional)
– Powdered sugar (for dusting)
Equipment Needed
– Medium saucepan
– Mixing bowl
– Whisk
– Baking sheet
– Parchment paper
– Pastry bag (or spoon)
Step-by-Step Instructions
First, start by preheating your oven to 400°F (200°C). In a medium saucepan, combine the water and butter, bringing it to a boil. Once the butter has melted and the water is bubbling, reduce the heat, and add the flour and salt, stirring vigorously until a smooth dough forms. This aroma already makes my mouth water! Allow this dough to cool for a few minutes before we move on to the next step. (See the next page below to continue steps…)
Next, I add the eggs one at a time, whisking vigorously after each addition until the mixture is smooth and glossy. The dough should be quite thick, and this is where the magic starts to happen. Then, stir in the vanilla extract and cheese, if you’ve decided to add that cheesy goodness for some extra flavor. Using a pastry bag or a spoon, I drop generous tablespoons of the mixture onto a lined baking sheet, making sure to leave some space between them since these puffs will rise beautifully.
Now, it’s time to bake these heavenly treats! Place the baking sheet in your preheated oven and let them bake for about 20-25 minutes, or until they are golden brown and puffed up high. The smell wafting through the kitchen is an experience in itself! Once they’re done, resist the temptation to open the oven door immediately; let them cool slightly before devouring—though I often sneak a warm one right away.
Lastly, as you plate them up, you can dust a little powdered sugar over the top for that elegant finish. It’s a simple touch that makes all the difference, and trust me, it tastes as good as it looks!
Pro Tips for Best Results
In my kitchen trials, I found that the addition of cheese adds a unique twist that takes these puffs to the next level. A sharp cheddar or even a sprinkle of feta can create a savory option that surprises your taste buds! I’ve also experimented with the flour—using a gluten-free blend resulted in a puffy treat that everyone enjoyed, so don’t hesitate to try that if you need a gluten-free option.
Another tip from my kitchen: don’t be shy with whisking the eggs into the dough. The more air you incorporate, the bigger and fluffier they’ll turn out. I’ve noticed a substantial difference in texture just by being a bit more diligent during this step!
And lastly, timing is key when baking. I once tried to take them out a few minutes early, thinking they looked done, only to find they deflated quickly after. Give them the full time to bake for the perfect soaring shape and soft texture.
Common Mistakes to Avoid
One of the most common mistakes I made during my first attempts was taking the puffs out of the oven too early. It’s tempting to peek and see how they’re rising, but this can let the steam escape and result in flat puffs. I learned the hard way that patience is essential—trust the timing and let them bake! (See the next page below to continue…)
Another mistake is not allowing the dough to cool before adding the eggs. I rushed this step a couple of times, and the heat from the dough cooked the eggs prematurely, leading to a dense mixture rather than a light, airy one. Give it a few moments; waiting is worth it!
Also, be sure to keep an eye on your oven’s actual temperature. Ovens can be tricky, and an incorrect temperature can drastically affect baking. I invested in an oven thermometer to ensure that my pastries come out just right, and it’s been a game-changer.
Lastly, don’t forget to space the puffs adequately on the baking sheet! I once crowded them, thinking they would stay small, only to find a massive gooey mess of puffs stuck together. Give them room to grow!
Serving Suggestions
Nun’s Puffs make a delightful addition to any tea party or brunch gathering. I love serving them alongside a selection of jams, fresh fruits, and whipped cream. It creates a lovely spread where everyone can pick and choose their favorites!
For a simple dessert option, I often pair them with a scoop of vanilla ice cream and a drizzle of chocolate sauce. The warm, fluffy puffs combined with that cold creaminess is quite a heavenly experience.
And don’t forget about a cozy night in! I enjoy snuggling up on the couch with a few of these puffs and a good book, with a steaming cup of tea by my side. It’s the perfect mix of comfort and nostalgia that always brightens my evening.
Variations & Customizations
The beauty of Nun’s Puffs is that they’re incredibly versatile! Besides the cheese option, you can infuse different flavors directly into the dough. For instance, a hint of lemon zest or almond extract can bring a refreshing twist that I adore, especially in springtime.
If I’m feeling adventurous, I occasionally whip up a batch with a hint of matcha powder mixed into the dough. It’s not only visually stunning but also adds an earthy flavor that complements the sweetness beautifully.
Finally, consider topping the puffs with various glazes. A simple chocolate ganache is divine, but a vanilla glaze or a dusting of cocoa powder takes these soft bites to a whole new level. It’s all about what flavors make your heart sing!
How to Store, Freeze & Reheat
To store leftover Nun’s Puffs, I place them in an airtight container at room temperature. They’re best enjoyed fresh, but if you’ve got leftovers, they can last for a couple of days. Just be sure to enjoy them within that timeframe to savor their airy texture!
If you want to make these in advance, freezing is a fantastic option. After preparing the puffs, allow them to cool completely, then place them in a freezer-safe ziplock bag. They can last up to a month this way, and any day can turn into a “Nun’s Puff Day” with the right planning!
When you’re ready to enjoy your frozen treats, simply place them in a preheated oven at 350°F (175°C) for about 10-15 minutes until warmed through. The aroma that fills my home during reheating is simply irresistible, and they taste almost as good as fresh out of the oven!
Conclusion
Baking Nun’s Puffs has become a joyful tradition in my kitchen, and I hope you’ll enjoy them just as much. With simple ingredients and a bit of love, you can create these delightful treats that bring warmth and happiness to any occasion. So roll up your sleeves, unleash your inner baker, and let the deliciousness unfold! Enjoy every bite!