
Another error is using the wrong pumpkin. I mentioned it before, but it’s worth repeating: pumpkin pie filling is a completely different product. It’s pre-sweetened and spiced. If you use it here, your mixture will be far too sweet, the spice balance will be off, and the texture can become gloppy. The label should say “100% Pure Pumpkin Puree” and nothing else. Trust me, the difference in the final product is night and day.
Do not skip the long initial chill of the mixture in the bowl. I was impatient once and tried to roll the balls after just 45 minutes of chilling. The dough was so sticky it coated my hands like glue, and I had to add nearly a quarter cup more graham cracker crumbs to salvage it, which threw off the perfect creamy-to-crumb ratio. The mixture must be firm to the touch before you even think about rolling.
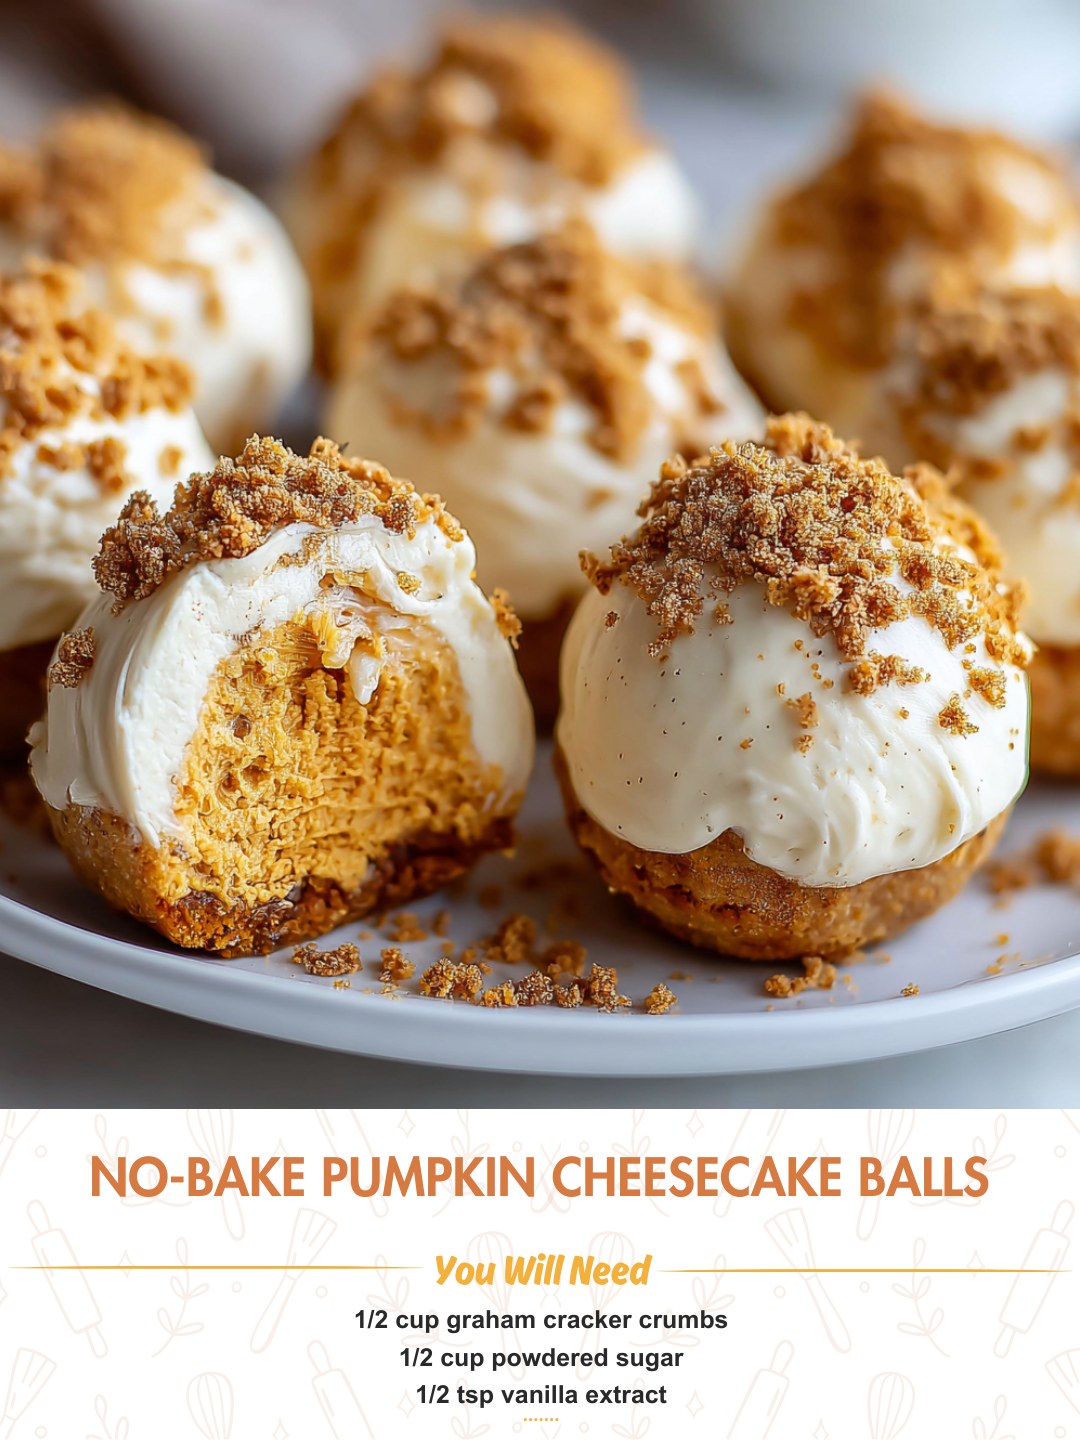
Finally, avoid rolling the balls too large. They are rich! A one-tablespoon portion is perfect. If you make them too big, they can be overwhelming, and they won’t have that delightful pop-in-your-mouth appeal. They also might not set as firmly in the center. I made my first batch golf-ball sized, and while delicious, they were a mess to eat and didn’t hold their shape as well. Stick to a modest, bite-sized sphere for the best experience.
Serving Suggestions
I love serving these on a elegant platter arranged in a spiral or clustered on a cake stand lined with autumn leaves or a cute napkin. For a simple yet stunning touch, I sometimes dust them lightly with a bit of extra powdered sugar or a sprinkle of cinnamon right before serving. They are the perfect finger dessert for a Halloween party, Thanksgiving appetizer spread, or a Friendsgiving dessert table where people want to sample a little of everything.
For a more composed dessert, I’ll place two or three balls in a small dessert cup or shot glass with a dollop of whipped cream and a drizzle of caramel sauce. It instantly elevates them to a restaurant-style presentation with zero extra work. They also pair wonderfully with a hot drink; serving them alongside a mug of spiced apple cider, strong coffee, or a chai tea latte makes for the coziest afternoon treat.
If I’m bringing them to a gathering, I transport them in a single layer in a container with a tight-fitting lid, keeping them chilled with a small ice pack until serving. I always bring a little extra of whatever coating I used (like extra chopped pecans) in a baggie to refresh any that might have lost a bit in transit. They are always one of the first things to disappear from any potluck table.
Variations & Customizations
The coating is where you can really have fun. While toasted pecans are my favorite, rolling them in crushed gingersnap cookies instead of graham crackers is a phenomenal variation that adds a spicy kick. For a chocolatey twist, you can roll them in cocoa powder, crushed chocolate wafer cookies, or dip them halfway in melted dark or white chocolate. I’ve even seen a version rolled in toasted coconut flakes for a tropical twist on the pumpkin flavor.
You can play with the inner spice profile, too. If you love a stronger ginger note, add 1/4 teaspoon of ground ginger to the mix. For a more complex warmth, a tiny pinch of cardamom or allspice is lovely. If you’re a maple fanatic, you can replace the vanilla extract with pure maple extract, and even use maple sugar in place of some of the powdered sugar for a deeper flavor.
For a lighter version, you can use Neufchâtel cheese (the 1/3 less fat cream cheese), but be prepared for a slightly softer final product that may require a longer chill. I’ve also successfully made these dairy-free by using a high-quality, firm vegan cream cheese alternative. The flavor is slightly different but still delicious, and it makes the treat accessible to more friends.
How to Store, Freeze & Reheat
Storing these is straightforward. Once set, I layer them in an airtight container with parchment paper between layers to prevent sticking. They keep beautifully in the refrigerator for up to 5 days. The flavors actually meld and improve after a day. If you’ve used a nut or crumb coating, it may soften slightly over time, but the taste remains fantastic. Keep them chilled until right before serving for the best texture.
These freeze exceptionally well, making them a fantastic make-ahead dessert. I place the fully coated and set balls in a single layer on a parchment-lined baking sheet and freeze until solid (about 2 hours). Then, I transfer them to a freezer-safe bag or container. They will keep for up to 2 months. This is perfect for getting a head start on holiday baking or always having a treat on hand.
There’s no need to reheat these—they are meant to be enjoyed cold. To serve frozen balls, I simply transfer the desired number from the freezer to the refrigerator and let them thaw for about 1-2 hours. They should be served chilled. Letting them sit at room temperature for more than 20-30 minutes can make them too soft, especially if your kitchen is warm.
Conclusion
These No-Bake Pumpkin Cheesecake Balls are more than just a recipe to me; they’re my little shortcut to autumn joy, a testament to the fact that incredible desserts don’t have to be complicated. They’ve saved me on busy holidays, delighted my guests, and satisfied my pumpkin spice cravings in minutes. I hope this recipe brings a touch of easy, delicious magic to your kitchen and becomes a cherished seasonal tradition for you, too. Now, go roll up some happiness