
Rushing the setting process is a sure path to frustration. I was once in a huge hurry and tried to speed-chill my fudge in the freezer. While it set quickly, it developed a strange, crumbly texture and condensed ice crystals on top that ruined the smooth surface. The slow, gradual chill in the refrigerator is non-negotiable for that signature creamy, dense fudge texture. Plan ahead and give it the full time it needs—it’s worth the wait.
Over-stirring after adding the candy melts can cost you the beautiful marbled effect. I wanted a perfectly uniform pink once and stirred and stirred. The result was a flat, single-color fudge that lost its whimsical, cotton-candy-cloud appearance. Now, I fold just until the candy melts are almost melted, and I deliberately leave a few streaks. This gives you that gorgeous, swirled look that makes people say “wow” before they even take a bite.
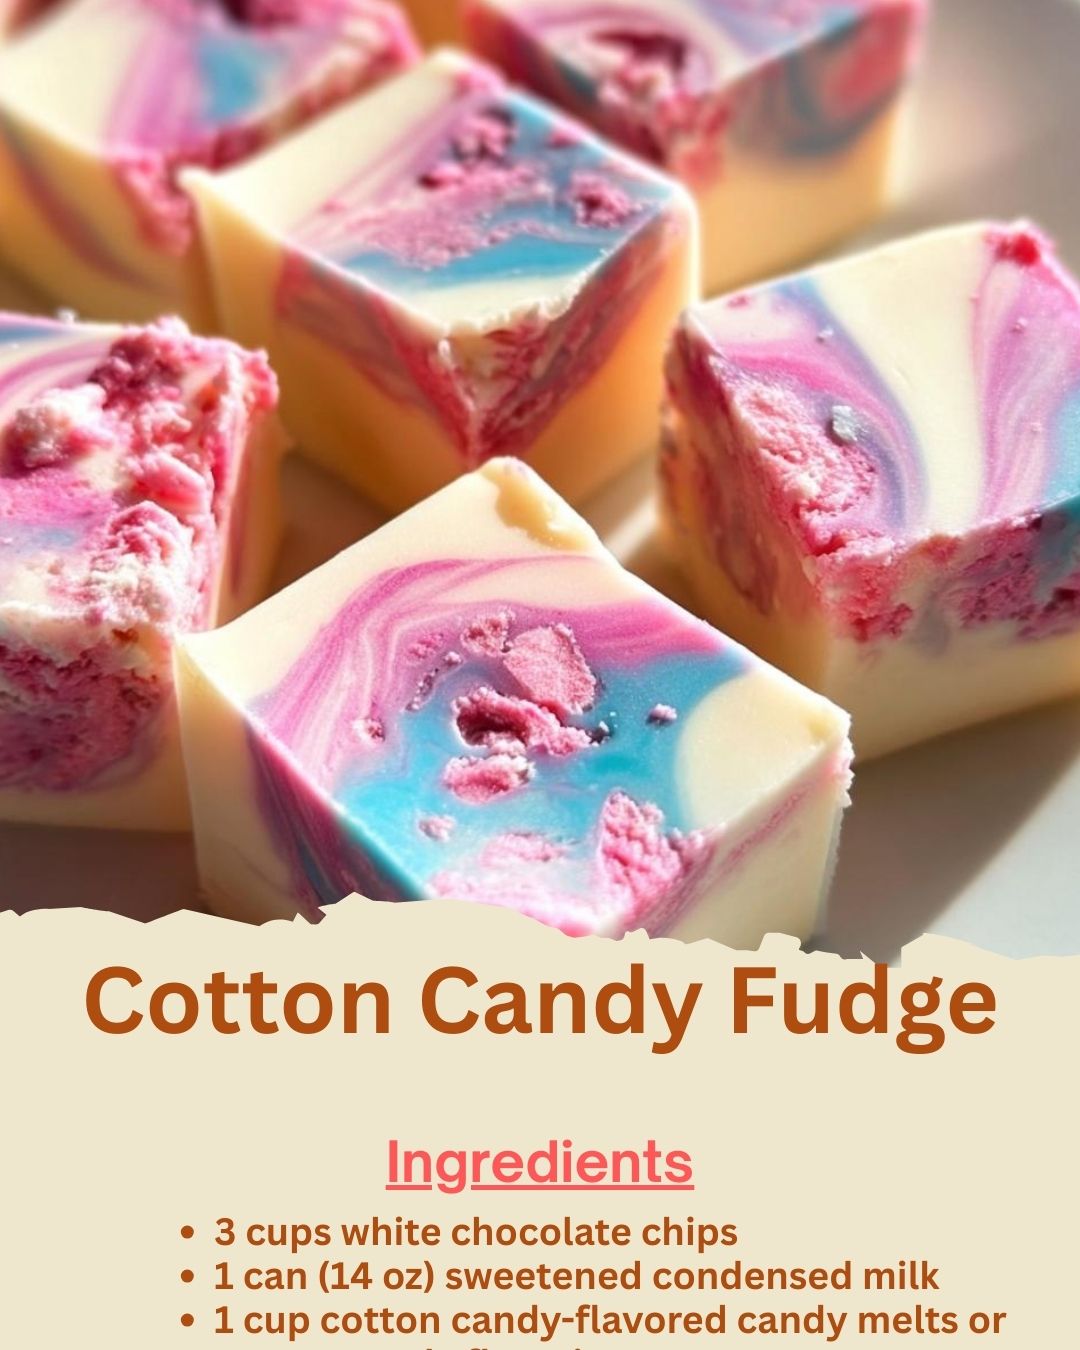
Using the wrong pan size will ruin the texture. I once used a 9×13 pan because it was all I had clean. The fudge layer was so thin that it set into a hard, brittle sheet instead of a thick, creamy square. An 8×8 pan is essential for the proper depth. If you only have a 9×9, that will work, but your pieces will be slightly thinner. The thickness is part of what makes each bite so satisfyingly rich.
Serving Suggestions
I love serving this fudge cut into small, bite-sized squares on a bright, colorful platter. For a child’s party, I might arrange them in the shape of a cloud or a rainbow. The pastel colors are decoration enough, but you can also place the platter next to a bowl of fresh popcorn or pretzel rods for a sweet-and-salty carnival-style snack table. It always disappears first!
For a more elegant presentation at a baby shower or bridal shower, I cut them into slightly larger rectangles and place each piece in a pastel paper candy cup. I then arrange them on a tiered stand alongside other treats. A light dusting of edible glitter on top adds a touch of sophistication to the whimsy. It pairs beautifully with a signature pink lemonade or a prosecco cocktail for the adults.
If I’m gifting it, I stack the squares in a clear cellophane bag tied with a silky ribbon, or I layer them in a small, pretty cardboard box lined with parchment. I always include a note that says “Best enjoyed with a sense of wonder!” It makes for a truly memorable and personal gift that’s much more special than store-bought sweets.
Variations & Customizations
You can easily create a “unicorn” version of this fudge by dividing the white chocolate base into three parts after melting. Leave one plain white, color one pink, and one purple or blue with gel food coloring. Layer them in the pan and swirl gently with a knife for a stunning, multi-colored effect. You can use a vanilla or cream soda flavoring oil for this version, and it’s always a huge hit.
For a fun texture contrast, try mixing in add-ins after you’ve combined everything. I’ve folded in 1/2 cup of crushed waffle cone pieces for a “fairground” vibe, and it added a wonderful crunch. You could also use mini marshmallows, colorful mini M&Ms, or even a handful of freeze-dried raspberries, crushed into powder, for a tangy twist. Just fold them in right before you pour the fudge into the pan.
If you’re a chocolate lover, you can create a marble effect. Prepare the cotton candy fudge as directed, but before pouring, remove about a third of the mixture to a separate bowl. Melt 1/2 cup of semi-sweet chocolate chips and stir it into the removed portion. Pour the pink mixture into the pan, then dollop the chocolate mixture on top and swirl with a knife. It creates a beautiful and delicious chocolate-cotton candy combination.
How to Store, Freeze & Reheat
Storing this fudge is simple. Once completely set and cut, I store the squares in an airtight container in the refrigerator. They will keep their perfect texture and flavor for up to two weeks. You can layer them between sheets of parchment paper to prevent sticking. I do not recommend leaving them at room temperature for more than a day, especially in warm weather, as they can become too soft and lose their shape.
This fudge freezes exceptionally well, which I do all the time for make-ahead parties. Place the cut squares in a single layer on a parchment-lined tray and freeze until solid (about an hour). Then, transfer them to a heavy-duty freezer bag or airtight container. They will keep for up to 3 months. This method prevents them from sticking together in one big block. It’s so convenient to have a stash of party-ready treats!
To serve after freezing or refrigerating, I simply let the squares sit at room temperature for 15-20 minutes before serving. This takes the chill off and allows the creamy texture to soften to its ideal state. Do not try to microwave it to soften it, as it will melt into a puddle. The slow thaw is the only way to preserve that perfect, smooth, sliceable consistency. If you’ve frozen it, you can thaw it overnight in the fridge and then bring it to room temperature.
Conclusion
Making this Cotton Candy Fudge is like capturing a little bit of magic in a pan. It’s a project that fills the kitchen with sweetness and ends with a treat that brings out the kid in everyone. I hope this recipe adds a splash of color and a heap of joy to your next celebration, just as it has to mine. Now, go find those candy melts and get ready to make something truly enchanting. Happy fudge-making