
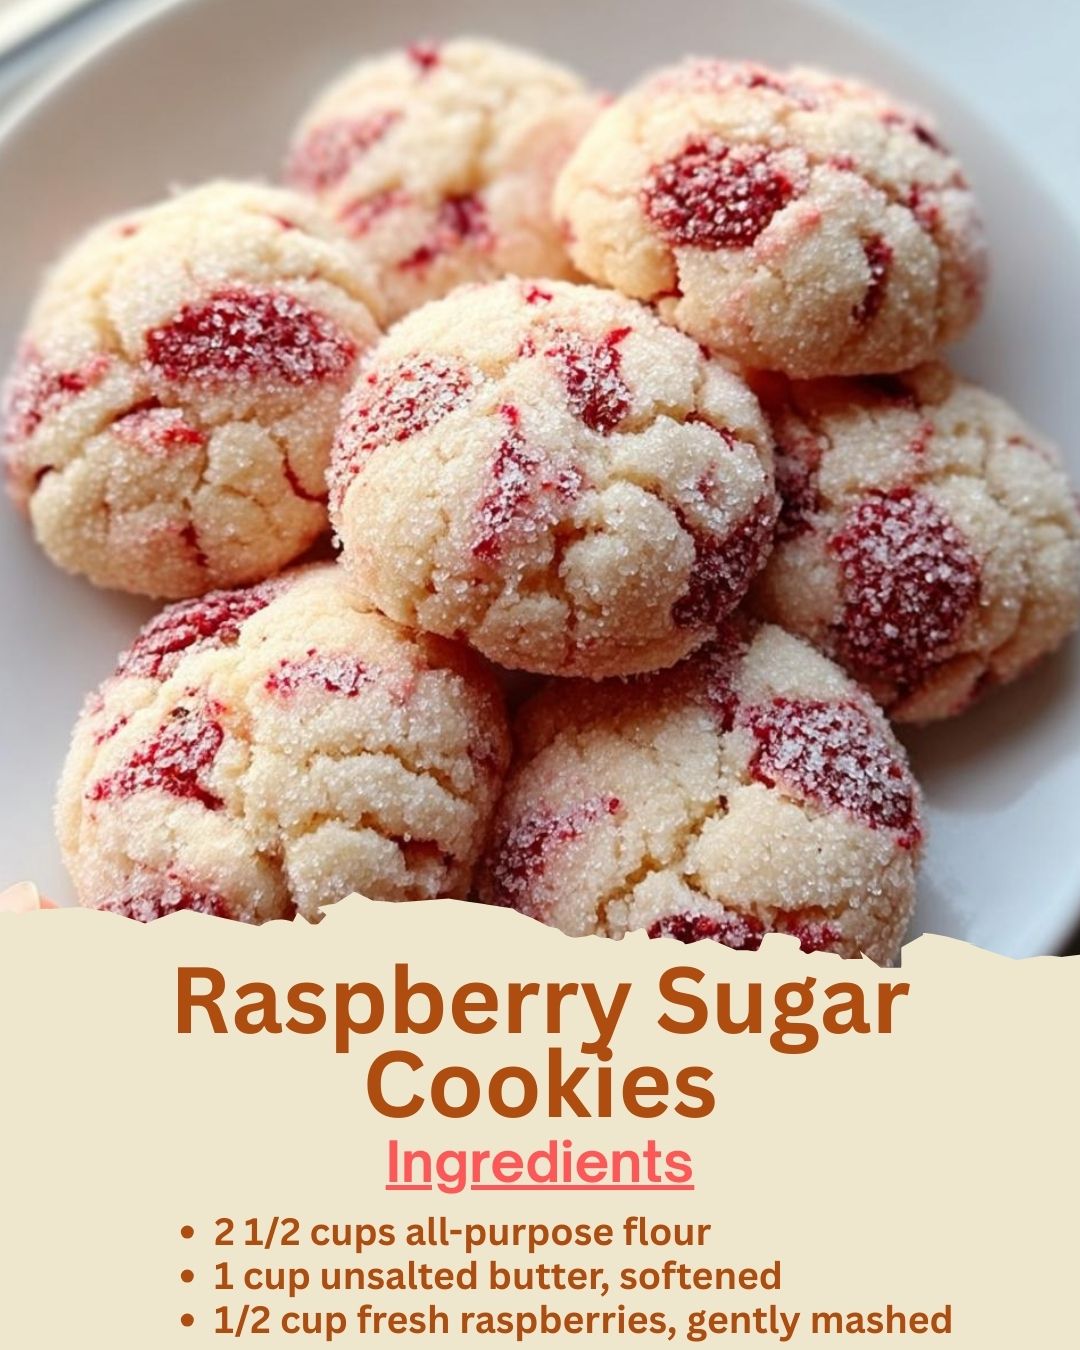
I was inspired to create these Raspberry Sugar Cookies on a summer afternoon with a pint of gorgeous, ripe raspberries begging to be used. As I gently mashed the berries into the buttery dough, streaks of vibrant pink and magenta swirled together, and my kitchen smelled like sweet fruit and vanilla. The moment they came out of the oven, they were soft, slightly crisp at the edges, with little pockets of jammy raspberry bursting through. That first warm bite was pure bliss—a buttery sugar cookie with a bright, tangy surprise in every mouthful. They’re my favorite way to capture the essence of summer in a cookie jar.
Why You’ll Love This Recipe
You will absolutely fall in love with this recipe because it takes the classic sugar cookie and gives it a stunning, fruity twist that feels both elegant and playful. The process of swirling fresh raspberries into the dough is incredibly satisfying, and the result is a cookie that’s beautiful to look at and even better to eat. They’re soft, buttery, and have these wonderful little bursts of tart raspberry that cut through the sweetness perfectly. It’s a simple recipe that feels special, making it perfect for afternoon tea, gifting, or just treating yourself.
Ingredients
- 2 1/2 cups all-purpose flour
- 1 cup (2 sticks) unsalted butter, softened
- 3/4 cup granulated sugar, plus extra for rolling
- 1 large egg, at room temperature
- 1/2 cup fresh raspberries, gently mashed (about 1 small pint)
- 1 teaspoon pure vanilla extract
- 1/2 teaspoon baking powder
- 1/4 teaspoon salt (See the next page below to continue…)
Equipment Needed
- Stand mixer or handheld electric mixer
- Medium and large mixing bowls
- Measuring cups and spoons
- Fork for mashing raspberries
- Rubber spatula
- Baking sheets
- Parchment paper or silicone baking mats
- Wire cooling rack
Step-by-Step Instructions
Let’s start with the most important foundation: creaming the butter and sugar. I cannot emphasize enough how crucial it is to have your butter perfectly softened. It should be cool to the touch but yield easily when you press it. I beat the butter and 3/4 cup of sugar together on medium-high speed for a full three minutes. I once tried to shortcut this, and my cookies spread too thin and were greasy. You’re looking for the mixture to become pale, fluffy, and almost like a light frosting. This creates the airy texture we want. Then, I beat in the egg and vanilla until just combined.
While the mixer is running, I prepare my dry ingredients and my star ingredient: the raspberries. In a separate bowl, I whisk together the flour, baking powder, and salt. For the berries, I take my fresh raspberries and gently mash them with a fork in a small bowl. You don’t want a puree—just a chunky mash with plenty of texture and juice. I’ve tried using frozen raspberries here, but they release too much water and make the dough soggy. Trust me, fresh is the way to go for the best flavor and color swirl.
Now, with the mixer on low, I gradually add the dry ingredients to the butter mixture. I add the flour in three parts, mixing just until each addition disappears. The moment the last bit of flour is incorporated, I stop the mixer. Overmixing develops gluten, which leads to tough cookies. This is when I add the magic. I drop spoonfuls of the mashed raspberries onto the dough and use my rubber spatula to gently fold them in. I fold just 4-5 times—you want dramatic streaks and pockets, not a uniformly pink dough. It’s messy and beautiful. (See the next page below to continue…)
For baking, I preheat my oven to 350°F and line my sheets with parchment paper. I scoop the dough (it will be soft and slightly sticky) and roll each portion into a ball. I then roll each ball in a small dish of granulated sugar for that classic sparkling, crunchy exterior. I place them about 2 inches apart on the sheet, as they will spread. I bake for 12-14 minutes. The trick is to pull them out when the edges are just set and lightly golden, but the centers still look soft. They will finish setting as they cool on the wire rack.
Pro Tips for Best Results
My number one tip is to handle the dough with a light touch after adding the raspberries. I tested folding three different ways: vigorous mixing, gentle folding, and barely mixing at all. Gentle folding for just a few turns is the winner. Overmixing will turn your dough an even pink color (which is still pretty) and can make the cookies denser because the berry juice gets over-incorporated into the flour. You want those bold, beautiful swirls and jammy pockets—it makes every cookie unique.
Chilling the dough is a step I highly recommend for control. After I scoop and roll the dough balls in sugar, I place the whole baking sheet in the freezer for 15 minutes before baking. I’ve tried baking them right away, and they tend to spread more and the berry juices can bleed out more. That brief chill helps the cookies hold their shape, resulting in a thicker, softer cookie with a better-defined swirl pattern. It’s a small pause that makes a big difference in the final presentation.
Use a light-colored baking sheet lined with parchment. I made a batch on a dark, non-stick pan once, and the bottoms browned too quickly while the centers were underdone. The parchment paper is non-negotiable—it prevents sticking and ensures even baking. Also, be prepared for a little variation in bake time. Because the raspberry pockets have different moisture levels, some cookies might need a minute more or less. I always check them at the 12-minute mark and go from there.
Common Mistakes to Avoid
The first mistake I made was using frozen raspberries without thawing and draining them. It was a disaster. They released so much liquid that my dough became a wet, sticky mess, and the cookies baked into flat, cakey puddles instead of soft, chewy discs. Fresh raspberries are essential. If you must use frozen, thaw them completely in a strainer over a bowl, press out all the excess liquid, and pat them very dry before mashing. Even then, the color and flavor won’t be as bright. (See the next page below to continue…)
Another common error is not creaming the butter and sugar long enough. I was impatient and mixed them for maybe a minute. The resulting cookies were flat, greasy, and dense. They lacked that airy, tender crumb that defines a great sugar cookie. Now, I set a timer for a full three minutes and watch the mixture transform. Trust me, this one step is the foundation of the entire cookie’s texture. Do not rush it.
Adding the raspberries too early is a recipe for purple-gray dough. I once mashed the berries right into the butter mixture before adding the flour. The acid in the berries began to react with the dairy and the dough took on an unappealing color. By folding them in at the very end, after the flour is mixed, you protect the vibrant pink and red hues. The flour coats the berry pieces, helping them stay suspended and colorful.
Overbaking is the quickest way to lose the magic. These cookies continue to bake on the hot sheet after you pull them out. I used to wait for the tops to turn golden, but by then, they were overdone and the raspberry bits became bitter. Now, I look for a set edge and a puffy, soft center that looks just slightly underbaked. They will deflate and set perfectly as they cool on the rack. Taking them out at the right moment guarantees that dreamy, soft-baked texture with perfect berry pockets.
Serving Suggestions
I love serving these cookies slightly warm with a cold glass of milk or a cup of herbal tea. The warmth makes the raspberry pockets even more jam-like and luxurious. For a truly elegant afternoon treat, I arrange them on a vintage plate with a few fresh raspberries and a dusting of powdered sugar. It looks like it came straight from a bakery window and always impresses guests.
For a dessert presentation, I sometimes sandwich a small scoop of vanilla bean ice cream between two cooled cookies. The contrast of the cold, creamy ice cream with the soft, buttery cookie and tart raspberry is absolute heaven. It’s a simple way to turn these cookies into a stunning, restaurant-quality dessert that takes only minutes to assemble.
If I’m packing them as a gift, I layer them carefully in a pretty tin between sheets of parchment paper. I might tie the tin with a pink ribbon and include a small bag of whole raspberries on the side. They also make wonderful additions to cookie swap boxes because they’re so unique and visually striking. I always get asked for the recipe!
Variations & Customizations
You can easily play with different berries in this recipe. I’ve had great success with mashed blackberries for a deeper, jammy flavor, and with chopped strawberries (pat them very dry first). Each berry brings its own level of tartness and color. For a mixed berry version, I’ll use a quarter cup each of mashed raspberries and blackberries—it creates a gorgeous marbled effect and a complex berry flavor.
For a citrus twist, add the zest of one lemon or orange to the butter and sugar when creaming. The citrus zest brightens the entire cookie and complements the raspberries beautifully. You could even add a simple lemon glaze drizzle after they cool (just mix powdered sugar with a little lemon juice). This variation is incredibly refreshing and perfect for spring.
If you want to add some texture, fold in a handful of white chocolate chips or chopped almonds along with the raspberries. The white chocolate pairs wonderfully with the tart fruit, and the almonds add a lovely crunch. Just be mindful not to overfill the dough, or it might not hold together as well. About a half-cup of add-ins is perfect.
How to Store, Freeze & Reheat
To keep them fresh, I store the completely cooled cookies in an airtight container at room temperature. They stay perfectly soft and chewy for up to 4 days. I place a piece of plain bread in the container with them; the cookies draw moisture from the bread, which keeps them from drying out. It’s an old baker’s trick that works like a charm! Do not store them in the fridge, as it will dry them out and can make them stale faster.
These cookies freeze beautifully. You can freeze the baked cookies for up to 3 months. Let them cool completely, then pack them in a freezer-safe bag or container with parchment between layers. Thaw at room temperature for an hour. Even better, you can freeze the unbaked dough balls. After rolling in sugar, place them on a tray, freeze solid, then transfer to a bag. You can bake them straight from frozen, just add 1-2 minutes to the baking time. This means you can have warm, fresh cookies anytime!
Reheating is simple and brings back that fresh-from-the-oven magic. My favorite method is to place a cookie on a microwave-safe plate and heat it for just 5-8 seconds. It revives the soft, chewy texture and makes the raspberry aroma bloom again. You can also warm a whole batch in a 300°F oven for about 5 minutes. This method is best if you want to restore a slight crispness to the sugared edges.
Conclusion
Baking these Raspberry Sugar Cookies is such a joyful, colorful process that turns simple ingredients into little works of art. They’ve become my signature cookie for sunny days and happy occasions, never failing to bring a smile. I hope this recipe fills your kitchen with the sweet smell of berries and butter and brings as much happiness to your table as it has to mine. Now, go grab those fresh raspberries and get ready to make something wonderfully delicious. Happy baking!