
Another thing to keep in mind is baking time. Every oven is a little different, and while I find that 25-30 minutes works for me, keep an eye out from the 20-minute mark. You want that perfect set; too long, and they will dry out or become too firm. The jiggle test is key here—if it wobbles slightly in the center, that’s your cue to take it out!
Finally, resist the urge to cut the bars too soon after chilling. It can be tempting to dive in, but letting them sit for the recommended cooling time ensures that you get firm, well-defined squares. Cutting too early results in messy, soft edges, which, though still delicious, won’t have the neat presentation you’re after.
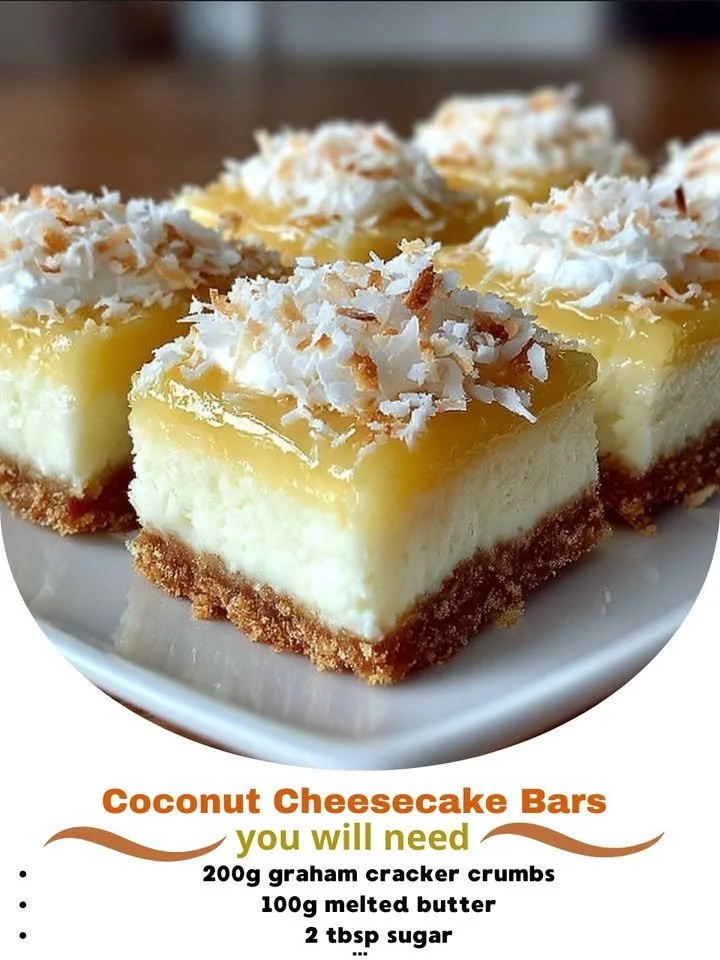
Serving Suggestions
These Coconut Cheesecake Bars are delightful on their own, but I love to elevate the presentation with a few simple serving ideas! Serve them chilled straight from the fridge for that perfect bite of creamy goodness. If you want to be a little extra, I like to drizzle a homemade coconut cream over them or serve them with a scoop of vanilla ice cream on the side—heavenly!
For gatherings, try garnishing with fresh mint leaves or edible flowers for a pop of color and a touch of elegance. It’s such a simple way to make them feel special, and the freshness balances wonderfully with the rich cheesecake.
And don’t forget about pairing these bars with a refreshing beverage! A crisp glass of iced tea or a tropical smoothie would complement the flavors beautifully, making for a delightful afternoon treat or dessert at a summer BBQ.
Variations & Customizations
While I adore the classic Coconut Cheesecake Bars, there’s room for variation! For a chocolate twist, you can fold in some mini chocolate chips or drizzle melted chocolate over the top before serving. This adds a fun contrast both in flavor and appearance that’s always a hit.
If you’re looking for a fruitier alternative, consider adding fresh or canned pineapple chunks into the cheesecake batter. The tanginess of pineapple pairs beautifully with coconut, enhancing that tropical vibe. Just be sure to drain excess juice to avoid adding too much liquid.
Lastly, for those with dietary restrictions, it’s easy to customize these bars. You can swap regular cream cheese with a dairy-free alternative, and use gluten-free graham crackers for the crust. You can make these delicious bars a bit healthier while still keeping all the creamy goodness!
How to Store, Freeze & Reheat
These Coconut Cheesecake Bars store beautifully! Just keep them covered in the fridge for up to a week. I like to use an airtight container or cover the pan tightly with plastic wrap. If you’re anything like me, they might not last that long, but it’s good to know they’re safe for a little while!
If you want to make these bars ahead of time, they freeze wonderfully too. Just wrap slices individually in plastic wrap, then place them in a freezer-safe bag. They’ll keep for about three months, so you can enjoy a little taste of summer no matter the season! When you’re ready to enjoy them, just thaw them in the fridge overnight.
Reheating isn’t necessary, but if you would like a slightly softer texture, you can microwave a piece for around 10-15 seconds. Enjoying them chilled is still my favorite way to savor these bars, but warm can be delightful too!
Conclusion
I hope you’re as excited as I am to try making these Coconut Cheesecake Bars in your kitchen! They’re a delightful treat that captures the essence of tropical indulgence with every creamy bite. Whether it’s a special occasion or just a sweet moment for yourself, these bars are sure to impress. Enjoy every bit, and happy baking!