
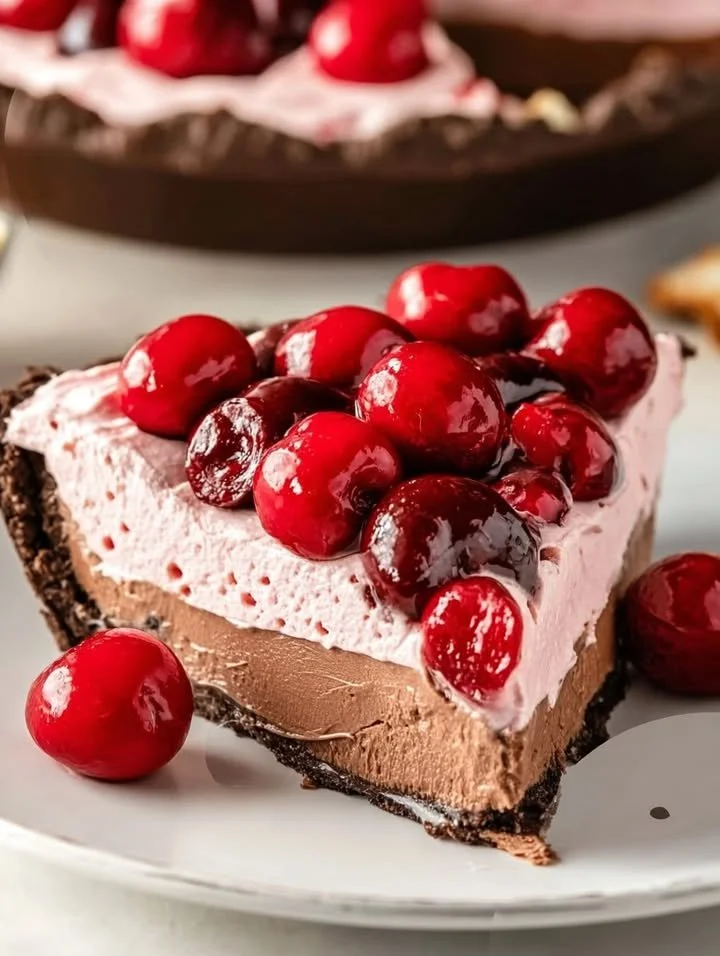
I absolutely adore the combination of chocolate and cherries, and when I decided to create a Chocolate Cherry Pie, I knew I was in for a treat! This dessert has become a staple in my kitchen, bringing a delightful mix of flavors and textures that wow my friends and family every time I serve it. The sweet-sour burst of the cherries paired with rich chocolate makes this pie so irresistible that it’s hard to have just one slice.
Why You’ll Love This Recipe
Not only is this Chocolate Cherry Pie delicious, but it’s also easy enough for anyone to tackle! The flaky crust, the luscious chocolate filling, and the juicy cherries come together in a way that’s sure to impress. Plus, the smell of it baking in the oven will have everyone rushing to the kitchen! I love sharing this pie at gatherings—it’s perfect for a family dinner or a picnic treat. Trust me, you’re going to want to make this one again and again. (See the ingredients in the next page below…)
Ingredients
– 1 pre-made pie crust
– 2 cups fresh or frozen cherries, pitted
– 1 cup semi-sweet chocolate chips
– 1/2 cup granulated sugar
– 2 tablespoons cornstarch
– 1 teaspoon vanilla extract
– 1 tablespoon lemon juice
– 1/4 teaspoon salt
– 1 egg (for egg wash)
Equipment Needed
– 9-inch pie dish
– Mixing bowls
– Saucepan
– Whisk
– Measuring cups and spoons
– Pastry brush
– Optional: Parchment paper and pie weights (for blind baking)
Step-by-Step Instructions
To start, preheat your oven to 350°F (175°C). If you’re using a store-bought pie crust, I recommend blind baking it for about 10 minutes to keep it from getting soggy later. I sometimes line my pie crust with parchment paper and use weights to keep it in place. While the crust cools, I prepare the cherry filling. In a saucepan over medium heat, combine the cherries, sugar, cornstarch, lemon juice, and salt. Cook until the mixture starts to bubble and thicken, about 5 to 7 minutes. Stir in the chocolate chips and vanilla extract until everything is evenly combined and the chocolate is melted. Now, isn’t that a lovely sight? You can practically smell the deliciousness! (See the next page below to continue steps…)
Now that the filling is ready, pour it into the cooled pie crust. Make sure to spread it out evenly. At this stage, if you’d like to add a decorative touch, feel free to use another pie crust to create a lattice top. (That’s my favorite!) Just make sure to adjust the baking time, as it might take a little longer. After you arrange the top crust, brush it lightly with the egg wash to give it that beautiful golden finish. Bake in the preheated oven for 25-30 minutes, or until the crust is golden brown and bubbly. Once it’s out of the oven, let it cool for at least an hour. I know it’s hard to wait, but this step is crucial for the filling to set properly.
Pro Tips for Best Results
I’ve tested this Chocolate Cherry Pie a few different ways, and I’ve found that using fresh cherries really enhances the flavor—if you can find them in season, grab a bunch! Alternatively, frozen cherries can still do the trick; just be sure to thaw and drain them first to avoid excess moisture. I also like to add a pinch of cinnamon to the chocolate filling for an extra layer of warmth, which surprisingly complements the cherries beautifully.
If you’re worried about the crust becoming too tough, don’t overwork the dough. I always mix it just until the ingredients come together, which helps keep it flaky and tender. And remember, a little chill time in the fridge for the pie crust before baking can make all the difference!
Finally, I always serve my pie with a scope of vanilla ice cream on the side. The ice cream melts slightly and creates a delicious sauce with the warm pie, elevating the experience to pure bliss.
Common Mistakes to Avoid
One mistake I’ve made in the past is using too much filling. While the idea of a mound of filling sounds tempting, it can make the pie overflow while it’s baking. I recommend keeping the filling level just below the edge of the crust for best results. This way, you won’t have a mess in your oven! (See the next page below to continue…)
Another common pitfall is not giving the pie enough cooling time. I know it’s hard to resist that warm slice, but if you dig in too soon, you’ll end up with a gooey mess rather than nicely formed slices. Trust me; it’s worth the wait!
Lastly, I’ve learned that not all pie crusts are created equal. Opt for a good quality crust (store-bought is perfectly fine) or take the time to make your own if you feel adventurous. My first attempts at homemade crusts were mediocre at best, but once I found a reliable recipe, my pie game changed!
Serving Suggestions
When the pie is finally cooled, I like to cut it into generous slices—everyone deserves a hearty helpin’! I often serve it with a dollop of fresh whipped cream or a scoop of vanilla ice cream. On special occasions, I might even drizzle some chocolate sauce on top. The contrast of warm pie with cold toppings is simply heavenly!
If you’re feeling fancy, plate the pie with a sprinkle of powdered sugar and a few fresh cherries for that extra “wow” factor. It’s a simple touch that elevates the whole presentation. And let’s be honest, we eat with our eyes first!
For a fun twist, I sometimes serve this pie alongside a glass of cherry-infused lemonade or even a rich espresso. The balance of sweet and bitter drinks pairs beautifully with the flavors in the pie. It’s all about creating a delightful experience at the dining table!
Variations & Customizations
If you’re a fan of nuts, you can easily add crushed walnuts or almonds into the chocolate filling for added crunch. It not only gives a wonderful texture but also complements the chocolate and cherries nicely. Just remember to chop them up finely to ensure they blend seamlessly!
For those who love a bit of spice, I’ve experimented with adding a dash of cayenne pepper to the filling. Although it sounds unusual, it creates an amazing depth of flavor and adds a subtle warmth that surprises everyone who takes a bite. Just be careful not to overdo it—a little goes a long way!
If you want to make this pie a bit healthier, consider using a graham cracker crust instead of the traditional one. The nutty flavors from the crackers work incredibly well with chocolate and cherries. Plus, it simplifies the process, which is always a win in my book!
How to Store, Freeze & Reheat
After enjoying your pie, you can store it covered in the fridge for up to 5 days. If you want to keep it longer, I suggest wrapping individual slices in plastic wrap and placing them in an airtight container for even easier access to that leftover treat later. It’s handy for those late-night chocolate cravings!
If you decide to freeze the pie, it’s best to do so before baking. Just wrap it tightly in plastic wrap and foil to protect it from freezer burn. When you’re ready to bake it, there’s no need to thaw; pop it straight into the oven, adding a few extra minutes to the baking time.
When it comes to reheating, the best method is to use the oven. Just cover the pie with foil and warm it at 350°F (175°C) for about 15-20 minutes, until heated through. I’ve found that reheating it this way keeps the crust nice and flaky, which is what we all want, right?
Conclusion
Making this Chocolate Cherry Pie has become one of my favorite baking adventures, and I hope it brings as much joy to your kitchen as it has to mine. The process is infused with love, and the end result is a comforting, show-stopping dessert that everyone will adore. So grab your ingredients, gather your loved ones, and enjoy every moment spent creating this luscious treat. Happy baking!