
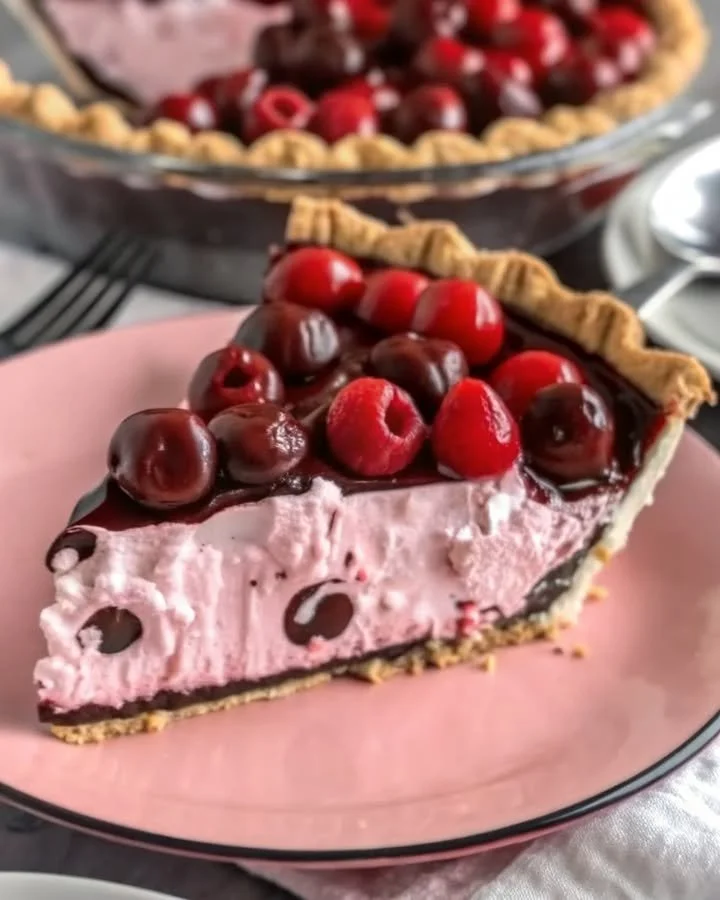
I’m thrilled to share one of my absolute favorite recipes that combines two luscious flavors: chocolate and cherries. There’s something so comforting about the sweetness of cherries mingling with rich chocolate, and when baked into a pie, it’s pure bliss. Trust me, once you try this Chocolate Cherry Pie, it’ll become a staple in your kitchen, just like it has in mine!
Why You’ll Love This Recipe
This recipe is not only delicious, but it’s also incredibly easy to whip up. The combination of the flaky pie crust, tart cherry filling, and creamy chocolate layer creates an unforgettable dessert that will impress anyone who takes a bite. Plus, it’s perfect for any season, whether it’s a summer barbecue or a cozy autumn dinner. You’ll love how it fills your kitchen with an inviting aroma while it bakes. (See the ingredients in the next page below…)
Ingredients
- 1 pre-made pie crust (or homemade if you’re feeling ambitious!)
- 2 cups fresh or frozen cherries, pitted
- 1 cup granulated sugar
- 3 tablespoons cornstarch
- 1/4 teaspoon salt
- 1 tablespoon lemon juice
- 1 cup semi-sweet chocolate chips
- 2 tablespoons unsalted butter
- 1 teaspoon vanilla extract
- Whipped cream or ice cream for serving (optional)
Equipment Needed
- Pie dish
- Mixing bowl
- Saucepan
- Whisk
- Spoon for mixing
- Baking sheet (to catch drips)
- Knife (for slicing)
Step-by-Step Instructions
Let’s get started on making this scrumptious Chocolate Cherry Pie! First, I recommend preheating your oven to 375°F (190°C) so it’s nice and hot when we’re ready to bake. Begin by preparing the cherry filling. In a medium-sized saucepan, combine your cherries, sugar, cornstarch, salt, and lemon juice. Cook this mixture over medium heat, stirring gently until it starts to thicken and bubble — you’ll see the beautiful cherry juices mingling with the sugar! Once thickened, remove from heat and let it cool slightly. (See the next page below to continue steps…)
Next, melt the chocolate chips and butter together. I usually do this in a microwave in 30-second intervals, stirring in between to ensure it doesn’t burn. Once melted and smooth, mix in the vanilla extract for that extra flavor kick. Now, it’s time to assemble! Layer half of the chocolate mixture on the bottom of your pie crust, followed by the cherry filling, and then top it with the remaining chocolate. Talk about decadent!
Now, carefully place your pie in the preheated oven. Bake for about 30-40 minutes, or until the chocolate has set and the crust is golden brown. Once it’s out of the oven, allow the pie to cool completely on a wire rack before slicing. Your kitchen will smell heavenly, and the anticipation will be almost unbearable!
Pro Tips for Best Results
If you want that perfect flaky crust, I suggest chilling your pie crust in the fridge for at least 30 minutes before using it. This will help ensure it doesn’t shrink while baking. I tested this three ways, and the chilled crust always came out with the best texture.
Also, feel free to experiment with the types of chocolate you use. I’ve found that dark chocolate looks beautiful when melted and adds a lovely richness to the pie. Don’t be afraid to combine different chocolate varieties for a fun flavor twist!
Lastly, drizzle some extra melted chocolate on top before serving. It adds a gourmet touch and will make your friends and family swoon. Trust me; it’s worth the extra step!
Common Mistakes to Avoid
One mistake I made early on was not properly pitting my cherries. Trust me, you don’t want to bite down on a cherry pit while enjoying your pie! If you’re using fresh cherries, take the time to pit them thoroughly. If you’re pressed for time, frozen cherries are a great shortcut! (See the next page below to continue…)
Another pitfall is overcooking the cherry filling. Remember it will continue to set while cooling, so remove it from the heat once it starts to thicken. If you cook it for too long, you might lose that lovely, juicy consistency.
Additionally, don’t forget to let the pie cool completely before slicing. I know it’s tempting to dig in right away, but if you slice it too soon, the filling can ooze out and make a mess. I learned this the hard way, and now I always wait!
Finally, please ensure your oven temperature is accurate. An oven thermometer can be a great investment. Every oven is different, and an inaccurate temperature can lead to an undercooked crust or burnt filling!
Serving Suggestions
When it comes to serving this Chocolate Cherry Pie, the options are endless. I love serving it with a generous dollop of freshly whipped cream; it perfectly balances the sweetness of the chocolate and the tartness of the cherries. If you’re an ice cream fan, a scoop of vanilla or cherry ice cream on top takes this dessert to a whole new level of indulgence!
For gatherings, I like to slice the pie into small wedges. This way, everyone can enjoy a piece without feeling too stuffed after a meal. It’s an impressive centerpiece for any dessert table and sure to get people talking!
Finally, don’t forget to pair it with a hot cup of coffee or tea. The rich flavors of the pie really shine when complemented by a warm beverage, making it a perfect way to end a meal or to enjoy during a cozy evening at home.
Variations & Customizations
If you’re looking to mix things up, consider adding some spices like cinnamon or nutmeg to the cherry filling. It brings a warm, cozy flavor that complements the chocolate beautifully. I tried this once during the fall, and it was a hit in my kitchen!
Another variation I love is to incorporate nuts, such as finely chopped almonds or walnuts, into the chocolate layer. They add a delightful crunch and contrast with the smooth chocolate and juicy cherries.
Lastly, if you have a preference for dark or white chocolate, feel free to switch it up. A white chocolate layer with cherries feels elegant and light, while dark chocolate creates a richer pie. Your taste buds will thank you for experimenting!
How to Store, Freeze & Reheat
If you have leftovers (which is rare in my house!), you can store the pie in the refrigerator, wrapped well in plastic wrap. It will stay fresh for up to 3 days. Just make sure to let it come to room temperature before serving for the best flavor!
For longer storage, this pie freezes wonderfully. Just wrap individual slices or the whole pie in plastic wrap, followed by aluminum foil, to prevent freezer burn. When you’re in the mood for a slice, simply defrost it overnight in the fridge.
When reheating, I recommend placing the slices back in a warm oven for about 10 minutes to revive the flaky crust while allowing the chocolate to soften. The aroma will bring back memories of that first heavenly bite!
Conclusion
In closing, I hope you give this Chocolate Cherry Pie a try in your own kitchen! It has a special way of bringing people together around the table, sharing delicious food, and creating memories. Whether for a holiday gathering, a special celebration, or just because, this pie is bound to become a cherished recipe in your home, just like it has in mine. Happy baking!