
Another issue I’ve faced is dipping the balls in chocolate when they’re too warm. The warm cheesecake can cause the chocolate to seize, making it difficult to get a nice coating. Ensure that they’re nice and chilled from the fridge before you dip.
And finally, I’ve made the mistake of forgetting the garnish! Those extra crushed Butterfinger pieces not only feel like a nice finish for looks; they also add that extra crunch and flavor pop that makes these bites so delightful. Don’t skip it!
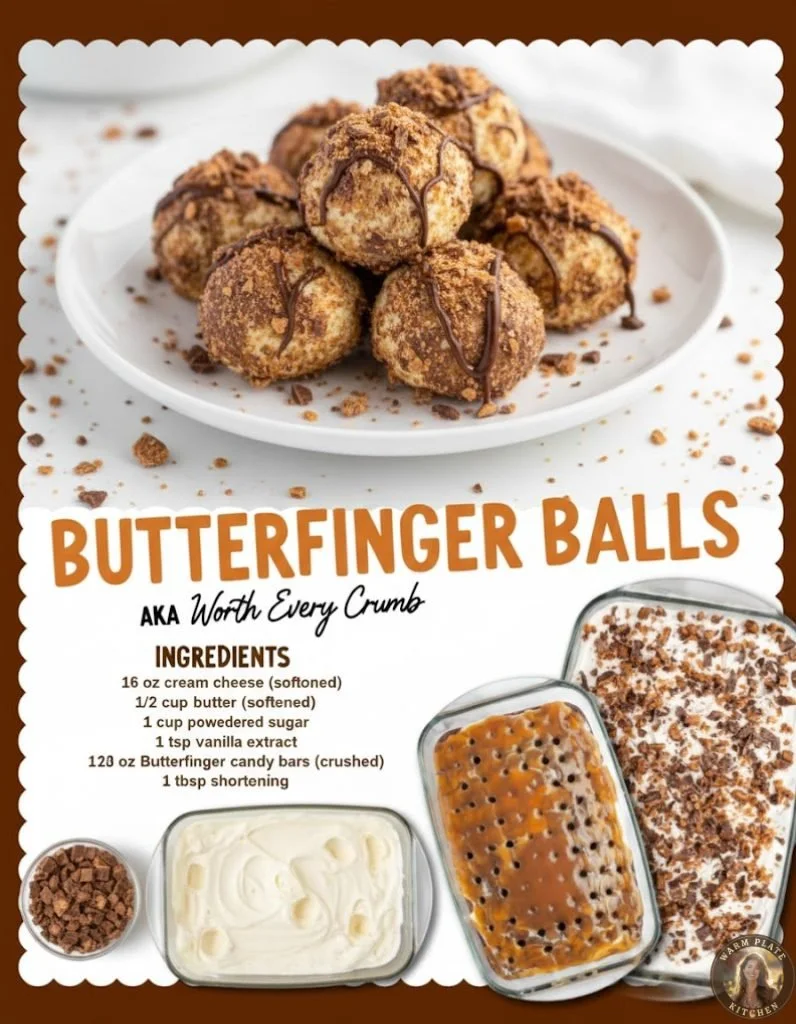
Serving Suggestions
These Butterfinger Cheesecake Balls are delightful at room temperature, making them perfect for parties! I love arranging them on a cute platter and drizzling some leftover chocolate over the top while they’re still festive and pretty. They’re great for an afternoon snack or dessert after dinner.
If you’re looking to impress guests, consider serving them with a side of whipped cream and drizzled chocolate sauce. This creates a lovely presentation and adds a touch of luxury to your treat.
Lastly, they pair beautifully with a hot cup of coffee or cocoa! I find that the rich flavors of chocolate and cream cheese balance perfectly with a warm beverage, making it a cozy evening snack.
Variations & Customizations
If you want to mix things up, try adding different flavors to your cheesecake mixture! For a peanut butter twist, you could replace some of the cream cheese with peanut butter, which pairs wonderfully with the Butterfinger taste.
I’ve also experimented with different candy coatings. Instead of chocolate, why not try butterscotch chips for a different flavor profile? You can even use white chocolate, just make sure to adjust the sweetness, as white chocolate is usually sweeter than semisweet or dark chocolate.
And for those who aren’t huge Butterfinger fans (gasp!), you can customize these by using other crushed candy bars. Snickers or Reese’s Pieces work wonderfully too and can create a whole new experience with the same fun format!
How to Store, Freeze & Reheat
To store these delicious treats, keep them in an airtight container in the fridge. They’re good for up to a week, but I can bet they won’t last that long once you share them with friends or family!
If you want to freeze them, make sure to freeze them in a single layer on a baking sheet first. Once frozen, you can transfer them to a freezer-safe container. They can last in the freezer for about a month. Just remember to let them thaw in the fridge before enjoying; it helps retain their luscious texture.
Reheating isn’t necessary for these cheesecake balls, but if you prefer them warm, a few seconds in the microwave should do the trick. Just be cautious not to overdo it; you don’t want melted chocolate running everywhere!
Conclusion
I hope you’re as excited to make these Butterfinger Cheesecake Balls as I was when I first concocted this delightful little dessert! With just a handful of ingredients and a pinch of love, you can create a treat that brings back cherished childhood memories while also delighting the taste buds of anyone lucky enough to enjoy them. Happy baking, and enjoy those sweet moments!