
Next, I melt the dark chocolate until it’s completely smooth and glossy. I usually use the microwave in short 20-second intervals, stirring after each one to prevent the chocolate from burning. Once it’s fully melted, I let it cool for a few minutes. I’ve learned the hard way that pouring very hot chocolate directly onto the eggs can cause them to cook slightly, so allowing it to cool briefly makes a big difference.
Then I add the cottage cheese and eggs to my blender and blend until the mixture becomes completely smooth and creamy. After that, I slowly pour in the melted chocolate while blending until everything is fully combined. The batter becomes silky, rich, and beautifully chocolatey. I pour it into the prepared pan and gently tap it on the counter to remove any large air bubbles before baking.
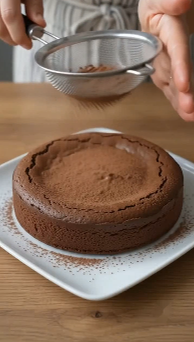
Finally, I bake the cake for 30 to 35 minutes, until the edges are set and the center has just a slight wobble. It continues to firm up as it cools, creating a wonderfully fudgy texture. I always let the cake cool completely before slicing because that’s when the chocolate flavor deepens and the texture becomes even creamier.
Pro Tips for Best Results
I tested this recipe using both full-fat and low-fat cottage cheese, and the full-fat version consistently produced the richest and creamiest texture. If possible, I always recommend using full-fat cottage cheese.
Another thing I’ve learned is to blend the cottage cheese really well. The smoother the mixture, the smoother your finished cake will be. I usually blend for at least a minute to remove every little curd.
Don’t rush the cooling process. The cake may seem soft when it first comes out of the oven, but it firms up beautifully as it cools. Trust me, waiting is worth it.
Common Mistakes to Avoid
The biggest mistake I made the first time was adding hot melted chocolate directly to the eggs. The heat caused tiny bits of cooked egg to form, so now I always let the chocolate cool slightly before mixing. (See the next page below to continue…)