
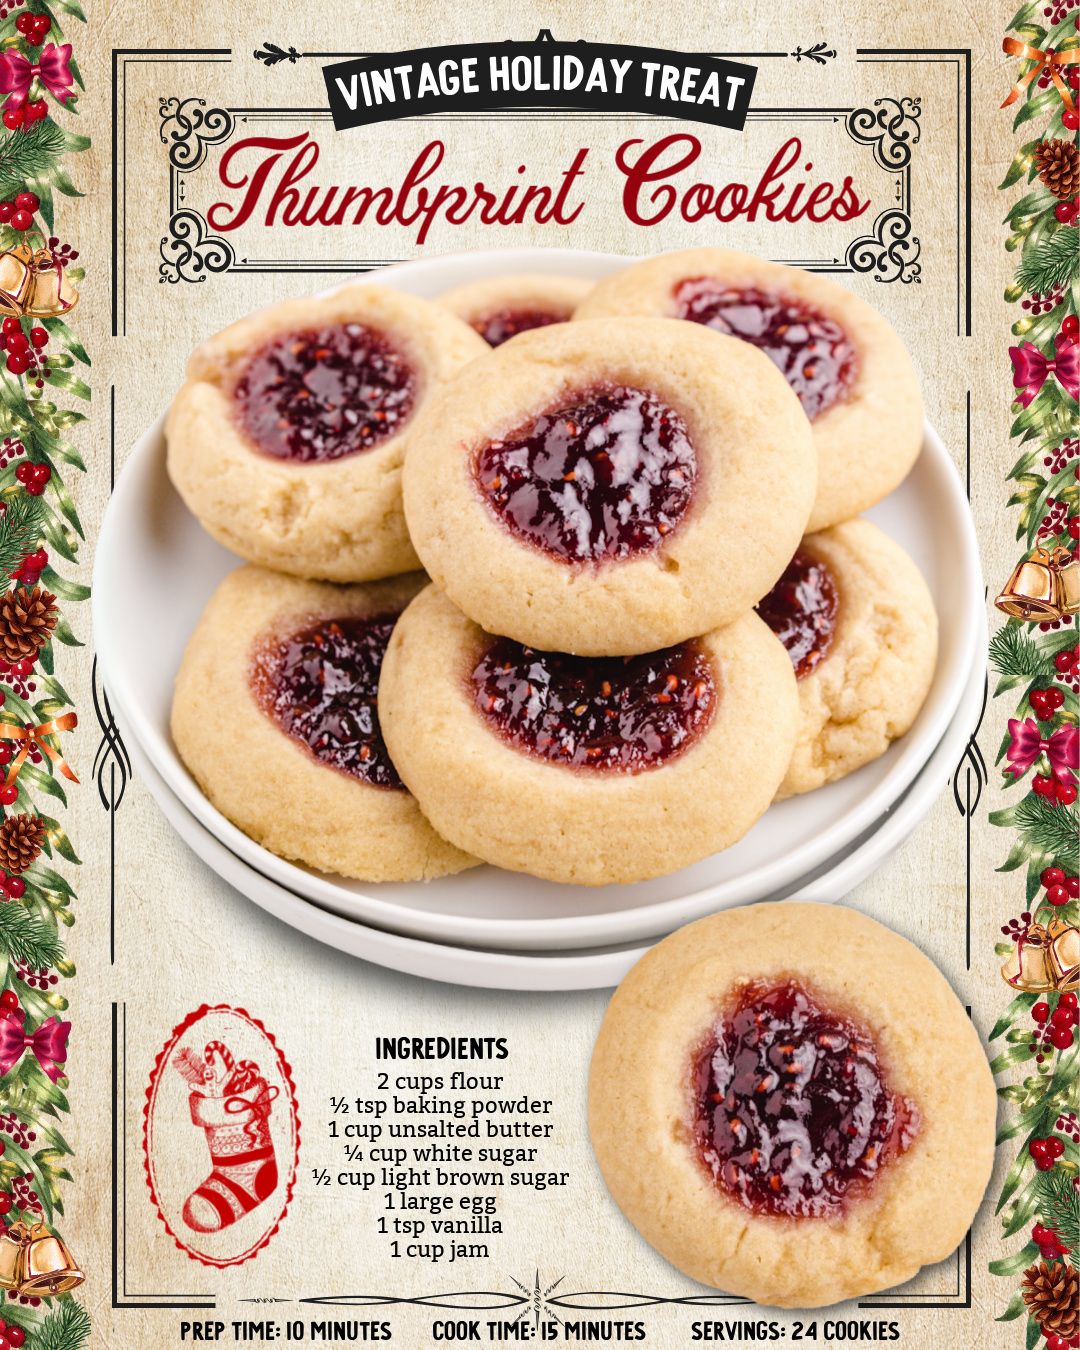
The first time I made Thumbprint Cookies, I was trying to capture the taste of my grandmother’s holiday tin. The process was simple: a buttery dough, rolled into balls and indented with my thumb. As they baked, my kitchen filled with the warm, vanilla-scented perfume of melting butter and caramelizing sugar. When I pulled the golden cookies from the oven, their centers were perfect little wells, just begging to be filled. I spooned in dollops of vibrant raspberry jam, and the red against the pale cookie looked like edible jewels. That first bite—the tender, crumbly cookie giving way to the sweet, tangy jam—wasn’t just a taste; it was a memory, warm from the oven.
Why You’ll Love This Recipe
You will adore this recipe because it is the perfect intersection of elegant and easy. The ingredient list is blissfully short, the method is forgiving, and the results look like you spent hours in the kitchen. They are wonderfully versatile, acting as a blank canvas for your favorite jam, curd, or chocolate. With their delicate texture and beautiful presentation, these cookies feel special enough for a holiday cookie swap but are simple enough to whip up on a cozy afternoon with a cup of tea. They are classic, comforting, and utterly irresistible.
Ingredients
- 1 cup (2 sticks) unsalted butter, softened at room temperature
- 1 cup white granulated sugar
- 1 large egg, at room temperature
- 1 teaspoon pure vanilla extract
- 2 cups all-purpose flour
- Approximately 1/2 cup of your favorite jam or preserves (raspberry, apricot, and strawberry are classics)
- Optional: coarse sugar for rolling
Let’s talk about these simple stars. The quality of your butter is paramount here. Use a good, real unsalted butter—it’s the primary flavor. Having it properly softened is not a suggestion; it’s the law for this dough. If it’s too cold, your dough will be crumbly; if it’s melted, it will be greasy. I leave mine out for a good hour before starting. The vanilla extract is also key—use the real stuff. That imitation vanilla can’t replicate the warm, complex depth that pure vanilla brings to such a simple cookie. It makes a huge difference. For the jam, choose one thick and flavorful; runny jelly will bubble over and burn.(See the next page below to continue…)
Equipment Needed
- Electric hand mixer or stand mixer
- Two baking sheets
- Parchment paper or silicone baking mats
- Mixing bowls
- A small spoon or a 1/4 teaspoon measuring spoon for filling
- A small dish of water (for your thumb!)
Step-by-Step Instructions
We start by creaming the butter and sugar, and this is where the cookie’s texture is born. In your mixing bowl, beat the softened butter and sugar together on medium-high speed for a full 3-4 minutes. I know it seems like a long time, but you’re not just mixing; you’re incorporating air to make the cookies light and tender. The mixture should become pale, fluffy, and almost whipped. Then, beat in the egg and vanilla extract until just combined. Scrape down the sides of the bowl to make sure everything is homogenous. The smell at this stage is already sweet and promising.
Now, we add the flour. I add it all at once, then mix on low speed just until the flour disappears and a soft dough forms. The key word is just. The moment you no longer see dry flour, stop the mixer. Overmixing at this stage will develop the gluten in the flour and make your cookies tough instead of tender and crumbly. The dough will be soft and slightly sticky. I then gather it into a ball, wrap it in plastic wrap, and press it into a disc. Here’s my secret: I chill the dough for 30 minutes. This firms up the butter, making the dough much easier to handle and roll, and prevents the cookies from spreading too much.
After chilling, preheat your oven to 350°F (175°C) and line your baking sheets with parchment paper. Take portions of dough and roll them into 1-inch balls. If you want that classic sparkly edge, roll each ball in a small dish of coarse sugar. Now for the signature move: place the balls on the sheet, spaced about 2 inches apart. Take your thumb (I keep a small bowl of water nearby to dip it in to prevent sticking) and press a firm, deep indentation into the center of each ball. Don’t be shy—you want a well that will hold a good amount of jam without overflowing.(See the next page below to continue…)
Bake the cookies for 12-15 minutes. You’re looking for the edges to be set and just barely starting to turn a light golden brown. The indentations will have puffed up a bit, which is normal. As soon as you pull the trays from the oven, I take the back of my small spoon and gently re-press the indentations. This is a crucial step I learned after my first batch’s wells nearly disappeared! Let the cookies cool on the sheet for 5 minutes, then transfer them to a wire rack. Once completely cool, fill the wells generously with your chosen jam.
Pro Tips for Best Results
For the most beautiful cookies with defined edges, I always chill the dough before baking. I tested this three different ways: baking immediately, chilling for 15 minutes, and chilling for 30+ minutes. The 30-minute chill produced cookies that held their perfect round shape and had a more delicate, melt-in-your-mouth texture. It’s a small wait for a vastly superior result. If you’re in a rush, you can even chill the rolled, indented balls on the baking sheet for 15 minutes before baking.
When making the thumbprint, don’t just press straight down. Use a gentle, swirling motion with your thumb to create a wider, more even well. I also found that using the handle end of a wooden spoon, dipped in water or flour, can create a perfectly round and uniform indentation if you’re making a large batch and want them all to look identical.
To prevent the jam from bubbling over and burning, choose a thick preserve, not a runny jelly. If your jam is too loose, you can simmer it in a small saucepan for 5-10 minutes to reduce and thicken it slightly, then let it cool before filling. Another trick is to bake the cookies empty, and then fill the wells with jam after they’ve cooled. I’ve done it both ways, and while baking with the jam gives a lovely baked-in flavor, filling after cooling guarantees a perfectly glossy, neat finish.
Common Mistakes to Avoid
The first mistake I made was using cold butter. I was impatient and tried to cream rock-hard butter with the sugar. My mixer groaned, the butter flew everywhere, and the resulting dough was uneven and greasy. The cookies spread into sad, flat puddles in the oven. Properly softened butter is non-negotiable. It should yield to gentle pressure but still hold its shape. Don’t skip this step.(See the next page below to continue…)
Don’t overmix the dough once you add the flour. This is the most common way to end up with tough, dense cookies. You want to mix just until the flour is incorporated. It’s okay if the dough looks a little shaggy before you gather it with your hands. Overmixing develops gluten, which is great for bread but the enemy of a tender thumbprint cookie.
Avoid making your thumbprint too shallow. A timid press will result in a tiny well that barely holds any jam, and it will often bake closed. Press firmly and confidently, almost to the baking sheet. The cookie dough is resilient and will puff up around the edges, but a deep well will remain. I use the tip of my thumb to really get in there and create a good home for the jam.
Finally, don’t fill the indentations with jam before baking if your jam is very sugary or runny. I made this mistake with a loose strawberry jelly, and it caramelized and burned in the oven, creating a bitter, sticky mess. If you’re unsure, do a test cookie first. Baking the cookies empty and filling them afterward is the foolproof method that always yields a beautiful, glossy finish.
Serving Suggestions
I love presenting these cookies on a vintage cake stand or a simple wooden board. They look so charming piled high, with different colored jams creating a jewel-toned mosaic. They are the star of any cookie tray and always elicit compliments for their dainty, homemade appearance.
For a festive touch during the holidays, I’ll fill some with red raspberry jam, others with golden apricot, and a few with a dollop of lemon curd. The variety is visually stunning and caters to different tastes. A light dusting of powdered sugar over the lemon curd ones just before serving looks like a light snowfall.
These cookies pair beautifully with beverages. They are perfect with a mid-afternoon cup of Earl Grey tea, a glass of cold milk for the kids, or even a dessert wine like a late-harvest Riesling for an adults-only gathering. Their sweetness is balanced by their buttery crumble, making them a versatile partner.
Variations & Customizations
For a nutty variation, roll the dough balls in finely chopped pecans, walnuts, or almonds before making the thumbprint and baking. The nuts toast in the oven, adding a wonderful flavor and crunch that contrasts beautifully with the soft jam center. This is a classic variation that feels extra special.
Instead of jam, consider other fillings. A square of dark chocolate pressed into the warm indentations creates a chocolate-filled version. A spoonful of salted caramel sauce, dulce de leche, or even a small bit of peanut butter topped with a chocolate chip after baking are all delicious alternatives. For a tangy twist, try filling with a cream cheese mixture after baking.
You can also play with the dough itself. Adding a tablespoon of citrus zest (lemon or orange) to the dough brightens the whole cookie. For a spiced winter version, add a half teaspoon of cinnamon or a pinch of cardamom to the dry ingredients. The basic dough is a wonderful, forgiving canvas for your creativity.
How to Store, Freeze & Reheat
Once filled and completely cool, store these cookies in a single layer in an airtight container at room temperature. They will keep beautifully for up to 5 days. If you stack them, place a sheet of parchment paper between layers to prevent them from sticking together. The jam may soften the cookie slightly over time, but they will still be delicious.
You can freeze the baked, unfilled cookies brilliantly. Let them cool completely, then store them in a freezer-safe container or bag for up to 3 months. Thaw at room temperature and fill with jam before serving. You can also freeze the shaped, unbaked dough balls on a tray, then transfer to a bag. Bake straight from the freezer, adding a minute or two to the baking time.
I do not recommend freezing the cookies after they have been filled with jam, as the moisture from the jam can make the thawed cookie soggy. For best results, always freeze plain and fill fresh. There’s no need to reheat these cookies; they are meant to be enjoyed at room temperature.
Conclusion
Thumbprint Cookies are more than a recipe; they’re a tradition, a moment of creativity, and a bite-sized piece of comfort. They’ve brought a touch of handmade elegance to my holidays and everyday baking for years. I hope this recipe encourages you to get your hands a little dusty with flour, make a few thumbprints, and create something beautiful and delicious to share. So soften that butter, choose your favorite jam, and get ready to make cookies that are as fun to create as they are to eat. Happy baking