
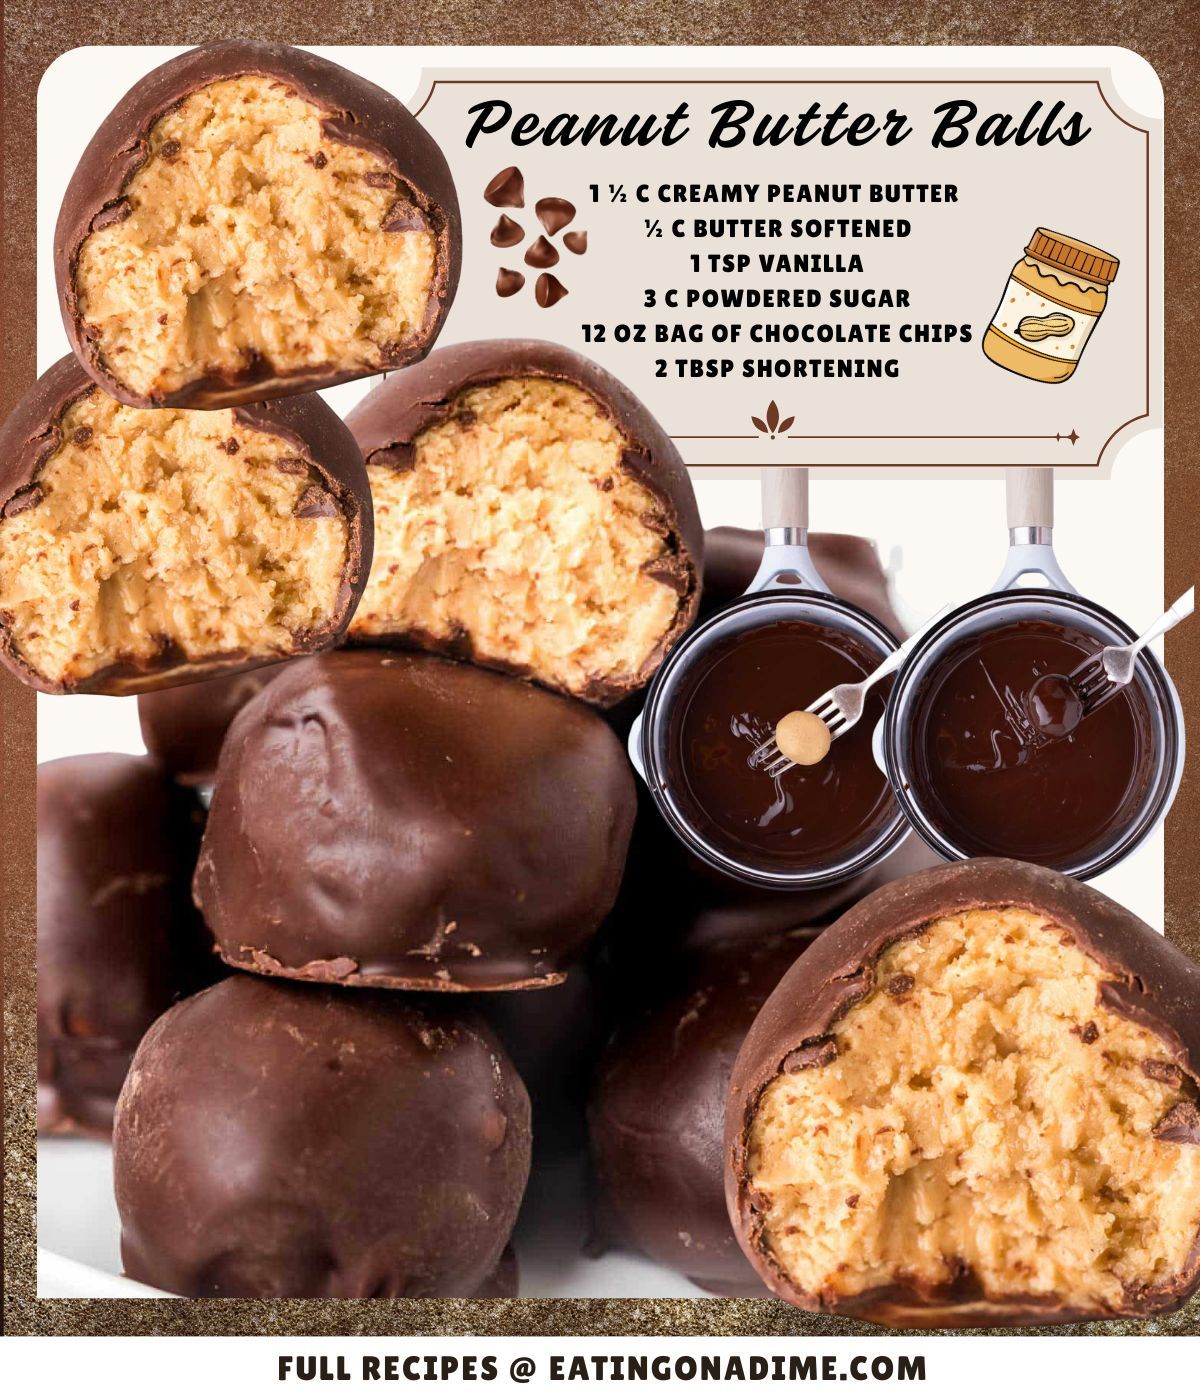
I have a distinct memory of standing in my grandmother’s kitchen, covered in powdered sugar, rolling peanut butter dough into little balls. The scent of sweet peanut butter and vanilla was pure childhood joy. Years later, when I decided to recreate that memory, my own kitchen filled with that same nostalgic aroma. The moment I dipped the first chilled peanut butter ball into the glossy, melted chocolate and set it on the wax paper, I felt like a confectionery wizard. Watching them set into perfect, chocolate-shelled truffles was magic. That first bite—the snap of the chocolate giving way to the creamy, sweet, salty center—tasted like a hug from the past.
Why You’ll Love This Recipe
You will absolutely adore this recipe because it’s a no-bake, foolproof path to the most satisfying homemade candy. It requires just a handful of simple ingredients, it’s incredibly fun to make (perfect for getting kids involved!), and the results look and taste like you bought them from a fancy chocolate shop. They are the perfect treat for holiday platters, thoughtful gifts, or simply satisfying a midnight peanut butter craving. Once you learn the simple technique of tempering the chocolate coating, you’ll feel a sense of accomplishment every single time.
Ingredients
- 1 ½ cups creamy peanut butter
- ½ cup unsalted butter, softened
- 1 teaspoon pure vanilla extract
- 3 cups powdered sugar (confectioners’ sugar)
- 1 (12 oz) bag of semi-sweet chocolate chips
- 2 tablespoons vegetable shortening or coconut oil
Let’s talk ingredients. The type of peanut butter you use is crucial. You need a standard, creamy, shelf-stable peanut butter like Jif or Skippy. Do not use natural peanut butter that separates, as the oils will cause your mixture to be greasy and prevent it from setting properly. This was my first big mistake, and it resulted in a sad, oily puddle. The shortening (or coconut oil) mixed with the chocolate chips is also non-negotiable. It thins the chocolate to the perfect dipping consistency and gives the hardened shell a beautiful, professional-looking sheen and snap. Don’t skip it!(See the next page below to continue…)
Equipment Needed
- A large mixing bowl
- An electric hand mixer or stand mixer (you can mix by hand, but a mixer is easier)
- A medium, microwave-safe bowl
- A baking sheet
- Wax paper or parchment paper
- A fork or dipping tools
- A small cookie scoop or tablespoon
Step-by-Step Instructions
We start with the peanut butter center. In your large mixing bowl, combine the creamy peanut butter, softened butter, and vanilla extract. Using your electric mixer on medium speed, beat these together for a full minute or two until they are completely smooth, creamy, and fully incorporated. It should look like a light, fluffy, tan cloud. This step ensures there are no lumps of butter and creates a silky base for the sugar. The smell at this stage is already incredible—rich and nutty.
Now, gradually add the powdered sugar. I add it one cup at a time, mixing on low speed after each addition. When you add the third cup, you’ll likely need to switch to mixing by hand with a sturdy spoon or even clean hands. The dough will become very thick and crumbly at first, but keep mixing. It will eventually come together into a pliable, smooth dough that holds its shape when pinched. If it’s too sticky to handle, you can add a little more powdered sugar, a tablespoon at a time. This is the fun part—it’s like edible playdough.
Using a small cookie scoop or a tablespoon, portion the dough and roll it between your palms into 1-inch balls. Place each ball on a baking sheet lined with wax or parchment paper. Once all the balls are rolled, place the entire baking sheet in the freezer for at least 30 minutes. This chilling step is critical. It firms up the balls so they don’t fall apart when you dip them in the warm chocolate. I learned this the hard way when I tried to dip them after only 15 minutes in the fridge, and my first few balls completely melted into the chocolate.(See the next page below to continue…)
While the balls chill, melt your chocolate. In your microwave-safe bowl, combine the chocolate chips and the shortening. Microwave in 30-second bursts, stirring vigorously after each burst, until the chocolate is completely smooth and fluid. Do not overheat it, or the chocolate will seize and become grainy. Once smooth, take your chilled peanut butter balls from the freezer. Using a fork or a dipping tool, dip each ball into the chocolate, tap off the excess, and place it back on the wax paper. Let them set at room temperature until the chocolate hardens completely, which takes about an hour.
Pro Tips for Best Results
For the smoothest, most professional-looking coating, I swear by using a dipping fork or two regular forks. I place a ball on one fork, lower it into the chocolate, then use the second fork to help roll it and lift it out, letting the excess chocolate drip back into the bowl through the tines. This method gives you a perfectly coated ball with a clean, classic swirl pattern on top. Using your fingers is messy and warms the ball too much.
I tested chilling methods three different ways: fridge only, freezer for 15 minutes, and freezer for 30+ minutes. The 30-minute freezer chill is the absolute game-changer. The centers become firm enough to handle the warmth of the melted chocolate without losing their shape. If you’re working in a warm kitchen, you might even want to chill them for 45 minutes. A solidly cold center is your best friend here.
If you want to ensure your chocolate coating stays shiny and doesn’t develop a white, dusty-looking “bloom” (which is harmless but less pretty), make sure your peanut butter balls are completely dry and free of condensation before dipping. I take them straight from the freezer to the chocolate. Also, avoid storing them in the refrigerator after they’re set, as the humidity can cause bloom. Room temperature in an airtight container is best.
Common Mistakes to Avoid
The first mistake I made was using natural peanut butter. I thought I was being healthy, but it was a disaster. The oils separated, the mixture was a greasy mess, and the balls never set up properly. They oozed in the chocolate and created a grainy texture. Stick to conventional, stabilized creamy peanut butter for foolproof results. Trust me on this one.(See the next page below to continue…)
Don’t rush the chilling process. If your peanut butter balls are even slightly soft or room temperature, they will start to melt and crumble the second they hit the warm chocolate. You’ll end up with peanut butter swirls in your dipping chocolate and misshapen balls. I’ve ruined a whole batch of chocolate by being impatient. That 30-minute freezer time is your insurance policy for perfect dipping.
Avoid overheating your chocolate. Chocolate is delicate. If you microwave it for too long or on too high a power, it can “seize,” turning into a thick, grainy, unusable clump. The gentle, 30-second burst method with thorough stirring in between is the safest way. If your chocolate does seize, you can sometimes rescue it by stirring in a teaspoon of additional shortening, but prevention is much easier.
Finally, don’t skip the shortening or coconut oil. I tried melting chocolate chips alone once, thinking it would be richer. The chocolate was too thick, created a lumpy coating, and hardened into a dull, brittle shell that cracked easily. The shortening thins it to the perfect viscosity for a smooth, thin, shiny coating that sets with a satisfying snap. It’s the secret to that professional finish.
Serving Suggestions
I love presenting these on a simple white platter or in a festive holiday candy box. They look so elegant lined up in rows. For a party, I’ll sometimes sprinkle a few with flaky sea salt immediately after dipping for a gourmet sweet-and-salty touch, or drizzle a little white chocolate over the top for contrast.
These make the most wonderful homemade gift. I pack them in a clear cellophane bag tied with a ribbon or in a small decorative tin lined with parchment paper. They’re always received with more excitement than store-bought chocolates because people can taste the love (and peanut butter) in every bite.
For a fun dessert spread, I’ll serve them alongside a pot of strong coffee or tall glasses of cold milk. They’re also fantastic as a sweet ending to a casual dinner with friends—a little bite of decadence that doesn’t require plates or forks.
Variations & Customizations
For a different nutty flavor, you can swap the peanut butter for almond butter or cashew butter. Just make sure it’s the stabilized, no-stir kind. I’ve also mixed in a half cup of crushed graham crackers or rice krispies into the peanut butter mixture for a bit of crunch, which is delightful.
You can customize the chocolate coating, too. Use milk chocolate chips for a sweeter treat, dark chocolate for a more sophisticated bite, or even white chocolate for a beautiful contrast. You can also roll the dipped balls in crushed peanuts, sprinkles, or cocoa powder before the chocolate sets for added texture and flair.
For a “buckeye” style, which is classic in my region, you only dip the balls about three-quarters of the way, leaving the top circle of peanut butter exposed to look like the nut of a buckeye tree. This not only looks pretty but also gives you a perfect spot to pick it up without getting chocolate on your fingers.
How to Store, Freeze & Reheat
Once set, store these peanut butter balls in an airtight container at cool room temperature. They will keep beautifully for up to 2 weeks. I don’t recommend storing them in the fridge, as condensation can make the chocolate sweat and develop bloom. If your kitchen is very warm, you can store them in the fridge, but let them come to room temperature for about 10 minutes before serving for the best texture.
These freeze exceptionally well! Place the fully set balls in a single layer on a baking sheet to flash-freeze for an hour, then transfer them to a freezer-safe bag or container. They will keep for up to 3 months. Thaw them at room temperature for about 30 minutes before serving. This is my secret for always having a homemade treat ready for unexpected guests or holiday prep.
There is no need to reheat these candies, as they are meant to be enjoyed at room temperature. If you take one straight from the freezer, just let it sit for a little while to thaw. The chocolate may become slightly dull if frozen, but the taste remains perfect.
Conclusion
These Peanut Butter Balls are more than just candy; they’re a edible tradition, a simple pleasure, and a tangible piece of kitchen magic. They’ve brought so much joy to my holiday baking and everyday treat-making. I hope this recipe becomes a beloved staple in your home, creating sweet memories and satisfying cravings for years to come. So grab that jar of peanut butter, get your hands a little messy, and get ready to make something truly, deliciously special. Happy dipping