
Next, in a separate bowl, beat the eggs and then add in the milk, vegetable oil, and vanilla extract. When these are combined, slowly pour this liquid mixture into the dry ingredients. Mix until just combined. Don’t worry if there are a few lumps—overmixing can lead to a tougher cake. Now, here comes the magic: carefully stir in the boiling water. This step is crucial as it creates that moist texture we all want. The batter will be thin, but that’s completely normal!
Once your batter is ready, divide it evenly between the prepared cake pans and tap them gently on the counter to release any air bubbles. Then, pop them in the oven and bake for about 30-35 minutes or until a toothpick inserted in the center comes out clean. After baking, allow them to cool in the pans for about 10 minutes before transferring them to a cooling rack. The anticipation is real!
Pro Tips for Best Results
I tested this recipe three ways: with different types of cocoa powder, varying the amount of sugar, and even with different size pans. I found that using Dutch-processed cocoa gave the cake a deeper flavor. Also, if you are looking to enhance the rich taste, try substituting ¼ cup of sugar with brown sugar for a moister texture and a hint of caramel flavor.
Another trick I learned is to let your eggs and milk come to room temperature before mixing. It really does make a difference in creating that velvety batter that bakes up beautifully. I keep them out for about 30 minutes before I start baking; it’s a small step that really elevates the dish.
Lastly, don’t skip the boiling water! It might sound a bit weird when you’re stirring it into the batter, but this is what keeps your cake super moist. The hot water activates the cocoa powder and creates a lush texture. Trust me, it’s worth the extra effort!
Common Mistakes to Avoid
One common mistake I see is using cold ingredients straight from the fridge. This can lead to a denser cake. Always let your eggs and milk come to room temperature for the fluffiest result. I remember the first time I rushed this step—I ended up with a cake that was more like a chocolate brick!
Another pitfall is overmixing the batter. You want everything just combined—don’t let the perfectionist in you take over! When I first started baking, I’d mix until the batter was perfectly smooth, and I soon learned that this led to a dry cake.
Also, timing is crucial. Always set a timer and start checking for doneness a few minutes before the recommended bake time. Ovens can vary, and I once forgot about my cake while it was in the oven, resulting in a slightly burnt edge. Learn from my mistake—use that toothpick test!
Serving Suggestions
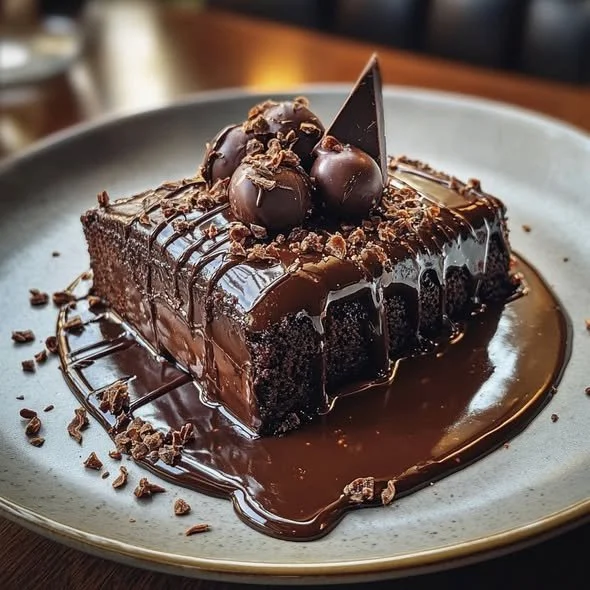
Once your cake is cool, the serving possibilities are endless. My favorite way is to simply dust it with powdered sugar for a classic presentation, but sometimes I like to get a little adventurous and top it with a rich chocolate ganache for an over-the-top dessert experience.
You can also layer it with fresh whipped cream and berries for a delightful contrast and a bit of freshness. The combination of chocolate cake with the lightness of whipped cream and tanginess of berries is simply divine!
For a casual gathering, cut it into generous slices and serve it with a scoop of vanilla ice cream. Trust me, the warm cake paired with cold ice cream creates an unforgettable treat that everyone will love.
Variations & Customizations
If you’re feeling creative, there are endless variations to this cake! You can add in chocolate chips or chopped nuts to the batter for an extra crunch and chocolatey goodness—just be mindful of the balance in the wet ingredients to keep the texture right.
Another fun idea is to play around with different flavor extracts. Almond extract, for instance, adds an unexpected twist! Just a teaspoon mixed into your wet ingredients can elevate the flavor profile beautifully.
If you’re looking for a healthier twist, try substituting some of the all-purpose flour with whole wheat flour or almond flour. I’ve done this several times and loved the nutty flavor that whole wheat flour adds, though it may alter the moistness a bit, so feel free to experiment!
How to Store, Freeze & Reheat
To store your Super Moist Chocolate Cake, simply wrap it tightly in plastic wrap and place it in an airtight container at room temperature. It’ll last for about 3 days, but I doubt it will last that long in your household! If you want to keep it for more extended storage, consider freezing it.
When freezing, make sure to wrap individual slices in plastic wrap and then place them in a freezer-safe bag. This way, you can pull out a slice whenever the chocolate craving strikes! It keeps well for up to 3 months in the freezer.
When you’re ready to enjoy, thaw it in the refrigerator overnight or bring slices to room temperature. If you prefer warm cake, just pop it in the microwave for about 10-15 seconds, and you’ll have a delightful treat that tastes freshly baked!
Conclusion
Baking this Super Moist Chocolate Cake is not just about satisfying a sweet tooth; it’s about creating wonderful memories in the kitchen. Whether you’re baking for a celebration or just indulging in a slice with coffee, this cake never disappoints. So, roll up your sleeves, gather your ingredients, and get ready for some delicious chocolate joy! Happy baking!