
Next, I combine the flour, baking powder, baking soda, and salt in a separate bowl. This helps evenly distribute the leavening agents throughout the flour. I gradually add the dry ingredients to the creamed butter mixture, alternating with the buttermilk. I can’t tell you how wonderful this mixture looks—it’s so smooth and creamy! Finally, I stir in the pureed strawberries and vanilla extract until everything is just combined. This leads to the moment I’ve been waiting for—the batter is gorgeous, with flecks of pink, hinting at the delicious berry flavor to come.
Now comes the fun part: pouring the batter into my Bundt pan! I make sure to grease the pan well to prevent any sticking. Once the batter is in, I give it a gentle shake to level it out, and then it’s off to the oven. I bake the cake for about 60-70 minutes, keeping a close eye on it towards the end. The aroma filling my kitchen is heavenly, like a cozy hug. When it’s golden brown and a toothpick inserted in the center comes out clean, I know it’s ready to come out.
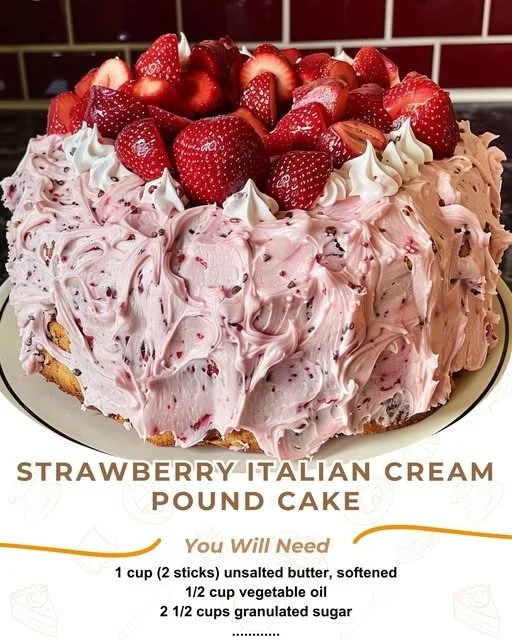
After the cake has cooled in the pan for about 10 minutes, I carefully turn it out onto a cooling rack to cool completely. Believe me, the anticipation builds as I wait for it to cool! This time is also a great opportunity to prepare a simple glaze or whipped cream to pair with the cake when serving it. The textured cake with that sweet strawberry flavor is just begging for a topping.
Pro Tips for Best Results
From my baking adventures, I’ve learned a few tricks that have truly enhanced my Italian Cream Pound Cake. For starters, I tested the cake using both fresh strawberries and frozen strawberries. While fresh ones are absolutely ideal for flavor, frozen work just fine if you’re in a pinch—just make sure to let them thaw and drain excess liquid before pureeing them to avoid a soggy batter.
Another tip I often share is to ensure your ingredients are at room temperature before mixing. This small step, whether it’s the eggs or buttermilk, can make a big difference in the batter’s consistency. I’ve also noticed that taking the time to really cream the butter and sugar well creates that light, fluffy texture that makes every bite melt in your mouth.
Lastly, don’t skip the cooling step! Allowing the cake to cool completely in the pan helps it set, and has made all the difference in avoiding crumbles later on when I slice it. Trust me, giving it that time pays off with perfectly clean slices every time!
Common Mistakes to Avoid
One mistake I’ve often made is not measuring my flour properly. It might seem like a minor detail, but using too much flour can lead to a dense cake instead of the lovely, light texture we’re aiming for. I’ve found that spooning the flour into my measuring cup and leveling it off, rather than scooping straight from the container, yields better results. (See the next page below to continue…)