
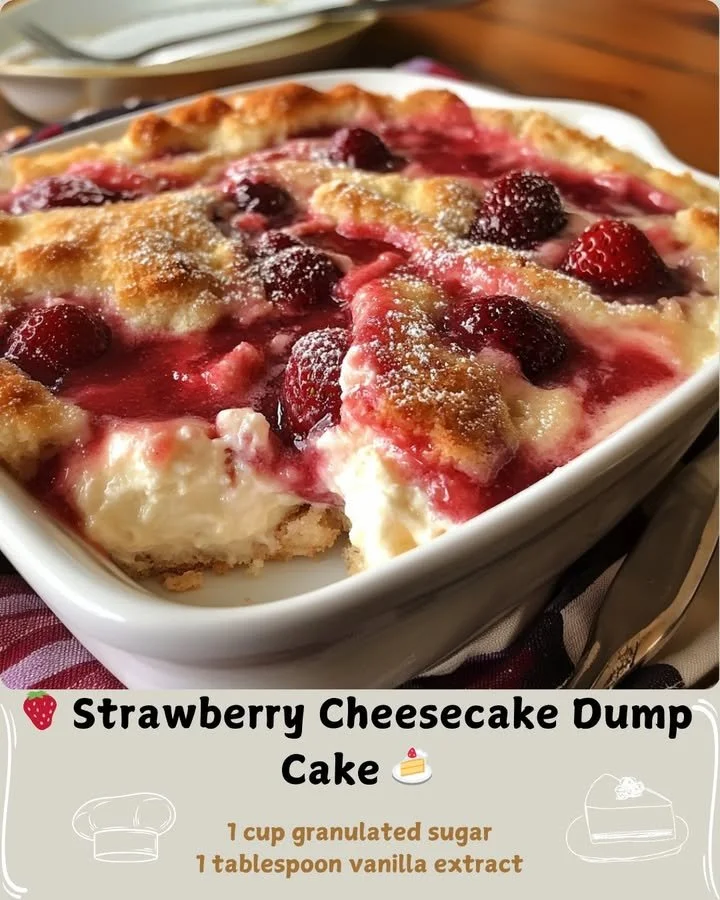
Welcome to my cozy kitchen, where the aromas of baking and sweet fruits fill the air! Today, I’m thrilled to share one of my favorite dessert recipes: Strawberry Cheesecake Dump Cake. This delightful treat is so easy to make and perfect for any occasion, whether it’s a family gathering, a potluck, or just a simple dessert to enjoy at home. Let me take you through this delicious and uncomplicated recipe that brings together the classic flavors of strawberry and cheesecake in a warm, comforting cake.
Why You’ll Love This Recipe
What’s not to love about a dessert that tastes as heavenly as a strawberry cheesecake but takes hardly any effort to whip up? This Strawberry Cheesecake Dump Cake is not only deliciously rich and creamy, but it also has fresh strawberries that burst with flavor in every bite. The dump cake method ensures minimal prep time, meaning you can savor your time in the kitchen without the stress. Plus, the delightfully gooey texture combined with the buttery cake topping is simply irresistible! (See the ingredients in the next page below…)
Ingredients
– 1 box of butter cake mix
– 1 cup of fresh strawberries, hulled and sliced
– 1 cup of cream cheese, softened
– 1/2 cup of granulated sugar
– 1/4 cup of milk
– 1/2 cup of unsalted butter, melted
– 1 teaspoon of vanilla extract
– Optional: whipped cream and additional strawberries for garnish
Equipment Needed
– Large mixing bowl
– Measuring cups and spoons
– Wooden spoon or spatula
– 9×13 inch baking dish
– Oven
Step-by-Step Instructions
First, preheat your oven to 350°F (175°C). In my experience, having the oven nice and warm before you start mixing is key to ensuring your cake bakes evenly. In a large mixing bowl, combine the softened cream cheese, granulated sugar, and milk. Whisk together until the mixture is smooth and creamy. The sweet aroma of the sugar merging with the cream cheese makes my mouth water just thinking about it! (See the next page below to continue steps…)
Next, gently fold in the sliced strawberries. It’s always a joy for me to see those beautiful vibrant colors merging together. Then, pour this creamy mixture into the bottom of your greased baking dish. Now, sprinkle the dry butter cake mix evenly over the top. Don’t be afraid—this is where the magic truly begins! Finally, drizzle the melted butter over the cake mix, ensuring you cover it as evenly as possible.
Bake in the preheated oven for about 40-45 minutes or until the cake is golden brown and bubbly. My whole kitchen fills with that warm, sweet fragrance, making it almost unbearable to wait as the cake bakes! I usually check it a few minutes earlier just to sneak a peek. When it’s ready, let it cool for a few minutes before serving. Trust me, you won’t want to skip this part; allowing it to set a little makes it easier to serve.
Pro Tips for Best Results
I’ve made this dessert several times, and here are a few tips I found really enhance the final product. First, be sure to use fresh strawberries. Frozen strawberries can work in a pinch, but fresh berries bring a brightness and texture that simply makes this cake magical. I also prefer to mix the butter cake batter a bit too much to ensure those buttery crumbs create nice clusters on top, adding a lovely crunch.
If you want that extra cheesecake flavor, consider adding a splash of lemon juice or a sprinkle of lemon zest to the cream cheese mixture. I’ve tried this a few times, and the citrus adds a delightful zing that beautifully complements the strawberries. Lastly, don’t rush the cooling process; this cake gets even better as it cools!
Common Mistakes to Avoid
One common mistake I made was not measuring the ingredients accurately. It may seem trivial, but baking is all about precision. I once added too much butter; it turned out entirely too greasy and lost its lovely texture. Stick to the measurements, and you’ll thank yourself later. (See the next page below to continue…)
Another thing to watch out for is pouring the melted butter unevenly over the cake mix. I learned the hard way that it’s important to cover everything, or it could lead to dry parts on the top. Just drizzle slowly and give attention to coverage. One of my biggest goofs was not preheating the oven long enough, leading to a daunting wait time while my cake took ages to cook.
Lastly, don’t forget to leave it out to cool before diving in! I’ve burned my tongue more times than I can count because I couldn’t resist the heavenly smell. Allowing it to set makes it a more delightful dessert experience for you and your loved ones.
Serving Suggestions
When it comes to serving this delightful Strawberry Cheesecake Dump Cake, I like to pair it with a fluffy dollop of whipped cream on top. You can also garnish it with a sprig of fresh mint for a lovely pop of color and freshness. Picture this cake drizzled with homemade strawberry sauce—now that’s a crowd-pleaser!
For a fun twist, serve it up with a scoop of vanilla ice cream. The combination of warm cake and cold ice cream creates a delicious contrast that’s irresistible. I’ve had guests rave about how those two textures play off each other, and it’s a simple way to elevate your dessert to the next level!
Finally, if you’re feeling adventurous, consider serving it in individual ramekins. It gives the dessert that personal touch and allows everyone to enjoy their own serving, making each slice feel extra special.
Variations & Customizations
While I adore the classic strawberry version, there are endless possibilities to customize this dump cake. For instance, you could substitute blueberries or raspberries or even a mix of different berries for a delightful berry medley. Each fruit has its own unique flavor and sweetness, which can change the entire feel of your cake!
If you want a more decadent experience, consider adding cream cheese frosting on top after it cools. Trust me, it takes the already creamy texture over the top! You could even sprinkle chocolate chips or crushed nuts in between the layers before baking for an added texture dimension.
For a special occasion, why not try layers with a different fruit filling, such as peaches or pumpkin during the fall season? The fruit balance with the creamy layer is simply irresistible no matter what you choose!
How to Store, Freeze & Reheat
I always save any leftovers (if there are any!) in a covered container in the fridge. This dump cake is best enjoyed within a few days, but trust me, it can last up to a week in the fridge—although, good luck keeping it around that long!
If you want to prepare this dessert in advance, consider freezing it before baking. Just be sure to wrap it tightly with plastic wrap, and you can simply pop it in the oven straight from the freezer. I’ve found that baking from frozen takes about 10-15 minutes longer, so keep an eye on it.
When it comes time to reheat, I usually just pop it in the microwave for about 20-30 seconds. Just enough to warm the gooey cheese layer without losing that scrumptious texture.
Conclusion
There you have it—a deliciously simple, mouthwatering Strawberry Cheesecake Dump Cake that has become a favorite in my kitchen. I hope you get as much joy from making it and sharing it with friends and family as I do. Happy baking, and may your home be filled with the sweet fragrance of strawberries and cream!