
Next, in a separate bowl, mix the creamy peanut butter and powdered sugar until it’s well-combined. This isn’t just any peanut butter mixture; it should be thick yet spreadable, almost like a peanut butter frosting. Now, dollop spoonfuls of that heavenly mixture over the chocolate batter in the pan. You want it to create this beautiful mess, as it will mix during baking to create that signature “earthquake” effect. Then, sprinkle the chocolate chips and chopped Reese’s over the top, allowing them to settle in beautifully.
Now, here’s the magic part! Carefully pour the hot water over the entire cake before you pop it into the oven. Trust me on this—the hot water helps create that wonderful gooey center. Bake the cake for about 30 to 35 minutes, or until a toothpick inserted comes out mostly clean. Your kitchen will be filled with irresistible aromas—chocolate, peanut butter, and something that screams comfort food.
Once it’s out of the oven, allow your cake to cool for a bit, but don’t wait too long! It’s best served slightly warm, as the peanut butter and chocolate will still have that delicious melty quality. I promise you’ll want to dig in right away!
Pro Tips for Best Results
I’ve tested this recipe three ways, and one thing I learned is to ensure your ingredients are at room temperature. It can make a significant difference in how well they mix and ultimately affect the texture of your cake. So, take a moment to let those eggs and peanut butter warm up—it’s worth it!
Another tip is to use high-quality chocolate chips. I’ve tried various brands, and the richer, darker chips add a more intense flavor to the cake, enhancing the overall experience. If you want to elevate it even further, consider adding mini chocolate chips for more chocolaty goodness in each bite!
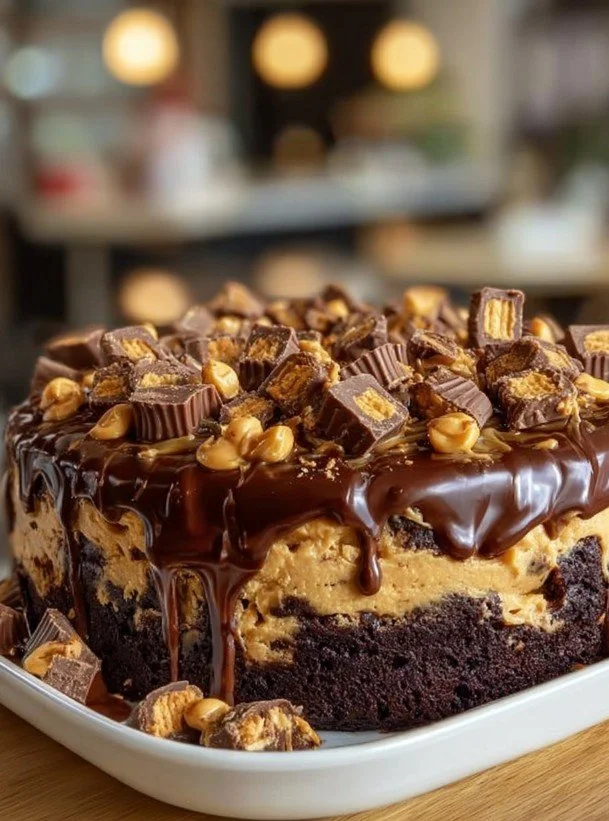
Lastly, don’t skip on the toppings. A drizzle of melted peanut butter or chocolate ganache on top right before serving takes this cake from delicious to extraordinary. Trust me, your guests will love it, and you’ll be showered with compliments!
Common Mistakes to Avoid
One common mistake I made was not greasing the pan properly. The last thing you want is your beautiful cake to stick! I highly recommend using non-stick spray or lining the bottom with parchment paper to ensure easy removal. Trust me, it saves you from a sad disaster that can ruin your perfect cake presentation. (See the next page below to continue…)
Another pitfall is overmixing once you add the wet ingredients to the dry. It’s easy to get carried away with mixing, but doing so can lead to a dense texture instead of the light, fluffy cake we want. Mix just until combined for the best results.
Additionally, be mindful of the baking time. It may be tempting to open the oven door regularly to check, but every peek lets precious heat escape. I’ve learned to trust my timer and do the toothpick test only when it’s getting close to the suggested baking time to avoid overbaking.
Serving Suggestions
This cake is surprisingly versatile when it comes to serving. I love to pair slices with a scoop of vanilla ice cream for a delightful contrast in temperatures and textures. The cool ice cream complements the warm, gooey cake perfectly, creating a delightful treat you won’t forget!
Another great idea is to serve it with a dollop of whipped cream on top. The lightness of the whipped cream balances the richness of the cake, making every bite harmonious. You could also sprinkle some crushed Reese’s cups on top for that extra pizazz!
Lastly, I love to enjoy this cake with a hot cup of coffee or even a glass of cold milk. The chocolate and peanut butter flavors resonate so well with coffee; it’s a match made in dessert heaven. Perfect for an afternoon treat or an after-dinner delight!
Variations & Customizations
Feeling adventurous? One simple customization I’ve tried is adding a pinch of sea salt to the peanut butter mixture. It enhances the flavors beautifully and really brings out that sweet and salty combination that we all love. Just a tiny touch can elevate the cake immensely!
If chocolate isn’t your thing, you can experiment with a vanilla cake mix instead. I’ve played around with a yellow cake mix, and while it’s delicious, it does yield a different final product. But hey, it’s still yummy and worth a try if you’re looking for a bit of a twist. You can even add in white chocolate chips for a unique flavor experience!
For the peanut butter lovers, you might want to add extra creamy peanut butter on top after baking. The extra layer of peanut butter adds a tantalizing texture and an even stronger peanut flavor. Who can say no to more peanut butter, right?
How to Store, Freeze & Reheat
After whipping up this delightful cake, you might be wondering how to store any leftovers! I usually let my cake cool completely before covering it with plastic wrap or placing it in an airtight container. It keeps well at room temperature for a couple of days, but it can also last up to a week in the fridge if covered properly.
If you’ve made a big batch or want to prepare for later, freezing is a fantastic option! I slice the cake into pieces before wrapping each one in plastic wrap and then placing them in a freezer-safe container. It freezes beautifully, and when I’m ready for a slice, I simply let it thaw in the refrigerator overnight or microwave it for a few seconds for that warm, fresh-from-the-oven feel.
When it comes to reheating, I love to pop a slice in the microwave for about 10-15 seconds. This warms the cake perfectly and re-melts the chocolate and peanut butter, giving it that irresistible gooey texture. Just be careful not to overheat it, or you might end up with a dry piece—nobody wants that!
Conclusion
There you have it—my cozy recipe for Reese’s Peanut Butter Earthquake Cake! I hope you find as much joy in baking and indulging in this cake as I do. It’s a delightful treat that never fails to bring smiles to my friends and family. Grab your ingredients and start creating this chocolaty, peanut butter extravaganza today! Happy baking!