
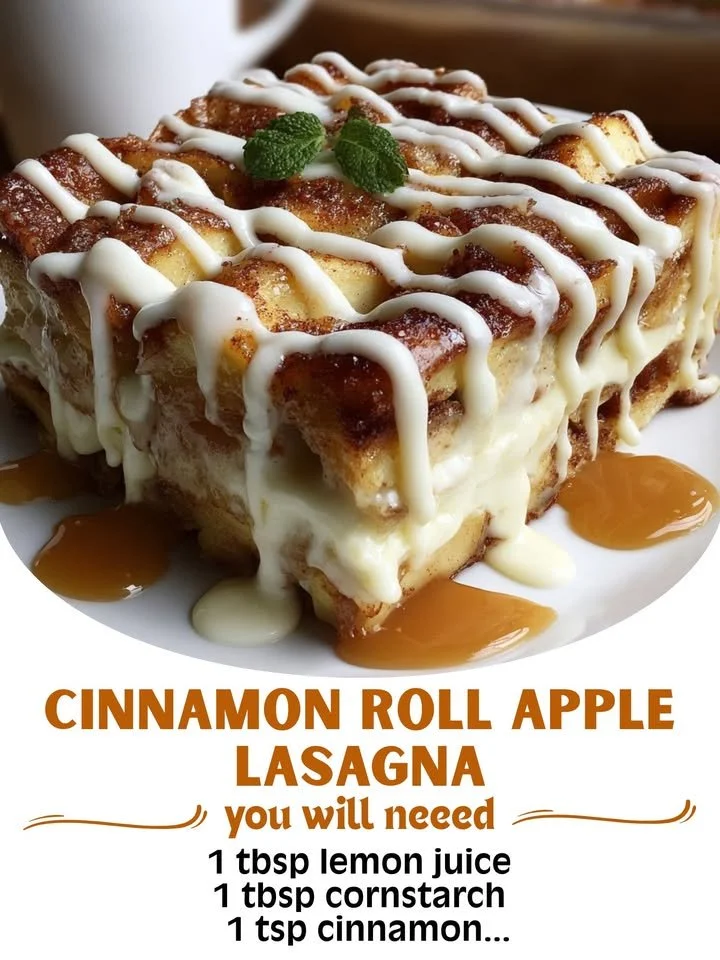
Cinnamon rolls and apples. That’s right, folks, it’s time to whip up some Cinnamon Roll Apple Lasagna! This delightful dish layers everything we love in a classic cinnamon roll with caramelized apples, creating a fusion that’s both delicious and visually stunning. Perfect for gatherings or a cozy evening at home, each slice promises comfort and satisfaction.
Why You’ll Love This Recipe
What makes this recipe so special is the beautiful blend of flavors and textures that create a dessert experience like no other. The gooey cinnamon roll layers interspersed with sweet, tender apples and a cream cheese glaze feel like a warm hug in every bite. Plus, it’s a fun twist on traditional lasagna that will impress your family and friends! You’ll find that this cinnamon roll apple lasagna comes together more easily than you might think, making it a go-to for special occasions or simply to satisfy a sweet tooth. (See the ingredients in the next page below…)
Ingredients
– 2 cans of cinnamon roll dough
– 3 cups of sliced apples (such as Granny Smith or Honeycrisp)
– 1/2 cup of brown sugar
– 1 tsp ground cinnamon
– 1/4 cup of butter, melted
– 1/4 cup of chopped walnuts or pecans (optional)
– 8 oz cream cheese, softened
– 1/2 cup of powdered sugar
– 1 tsp vanilla extract
– 1/4 cup of milk
Equipment Needed
– 9×13 inch baking dish
– Large mixing bowl
– Whisk
– Knife for slicing apples
– Spatula
– Oven
Step-by-Step Instructions
First, preheat your oven to 350°F (175°C). While the oven warms up, peel and slice your apples into thin wedges. In a large bowl, toss the apple slices with brown sugar and cinnamon until they are well coated. Let this mixture sit for a bit so the apples can absorb that amazing flavor. Once your oven is ready, spray your baking dish with non-stick spray to ensure an easy cleanup. We want the apples to caramelize perfectly without sticking! (See the next page below to continue steps…)
Next, open the cans of cinnamon roll dough and separate the rolls. You’ll want to roll out each piece slightly to create a flat layer. Start to lay down half of the cinnamon roll pieces on the bottom of the greased baking dish, stretching them slightly so they cover the whole bottom. Once that’s complete, pour half of the apple mixture over this layer and top with a sprinkle of walnuts or pecans if you’re feeling adventurous. Repeat this process with another layer of cinnamon roll pieces, followed by the rest of the apples.
Now let’s make the cream cheese glaze! In a mixing bowl, beat the softened cream cheese with powdered sugar, vanilla extract, and milk until it’s smooth and creamy. This glaze is absolutely divine and will really tie everything together. Drizzle half of this glaze over the layers in the baking dish. Then, take the remaining cinnamon rolls and place them over the top. Bake in the preheated oven for about 30-35 minutes, or until the top is golden brown and the apples are bubbly. When you pull it out of the oven, the smell will be heavenly!
Once baked, let the Cinnamon Roll Apple Lasagna cool for about 10 minutes before drizzling the rest of the cream cheese glaze on top. Slice it up, serve, and watch everyone’s faces light up. You can enjoy it warm or at room temperature—either way, it’s a crowd-pleaser!
Pro Tips for Best Results
I’ve made this recipe quite a few times to get everything just right, and here are my favorite tips. First, I tested various types of apples, and I found that Granny Smith apples worked best because their tartness balances the sweetness of the cinnamon rolls beautifully. It brings a delightful contrast to the dish.
Another thing I learned is to ensure your cream cheese is truly softened. If it’s too cold, you’ll end up with lumps in your glaze, which might not be ideal. I find keeping the cream cheese out for about an hour before mixing makes all the difference. Plus, your kitchen will smell divine as it warms up!
Finally, don’t skip the resting period after baking. Allowing this lasagna to cool for a bit helps the layers to set, making it easier to slice. Trust me, you’ll appreciate a clean cut and neatly stacked layers for that perfect Instagram-worthy shot!
Common Mistakes to Avoid
One common mistake I’ve made in the past is not rolling out the cinnamon rolls enough. If you just place them straight from the can without stretching or flattening them, you might end up with uneven layers and gaps. Take that extra minute to make sure they cover the bottom of the dish well! (See the next page below to continue…)
Another mistake is overbaking it. You want that golden brown color, but be cautious not to leave it in the oven too long. Once those smells start wafting through your kitchen, it’s a good time to check! You can always return it to the oven if it needs more time, but overcooking can lead to dry apples, which we certainly don’t want.
Also, make sure your pan is large enough. I once attempted it in a smaller dish, and the entire thing overflowed! A 9×13 inch baking dish is the perfect size to let all those glorious layers come together without issue.
Lastly, don’t restrict yourself to just one type of nut or decide to skip them altogether. I love the extra crunch they provide, but it’s entirely up to you! Just know that adding nuts really elevates the texture and adds an extra layer of flavor.
Serving Suggestions
When serving your Cinnamon Roll Apple Lasagna, I love to pair it with a scoop of vanilla ice cream or a dollop of whipped cream. The cool creams contrast beautifully with the warm lasagna, creating that perfect combination of temperature and flavor. You can’t go wrong with adding a sprinkle of cinnamon on top for a touch of flair!
This dish is also perfect for brunch gatherings or holiday breakfasts. Imagine serving this beauty straight from the oven, and watching everyone’s faces as they dig in. It’ll become a sought-after recipe in your circles, and I predict you’ll be asked to make it more than once!
If you’re hosting friends or family, consider creating a little dessert bar with this lasagna as the centerpiece. Include toppings like extra nuts, caramel sauce, and a sprinkle station with cinnamon and powdered sugar. It adds an interactive element and makes for a fun atmosphere.
Variations & Customizations
One of the beauties of this recipe is how versatile it can be! If you want a little extra flavor, you can add some raisins or dried cranberries to the apple mix. This adds an entirely new layer of sweetness and texture that’s simply delicious.
For a pumpkin spice twist, switch out the cinnamon for pumpkin pie spice. The warm spices work beautifully with the apples, giving it a comforting, seasonal flair that’s perfect for fall gatherings. I’ve also added a splash of apple cider into the apple mixture for an extra burst of flavor.
If you’re looking for a healthier version, you can use whole grain or sugar-free cinnamon rolls. While it may not have the same indulgent feel, it’s a fun way to adjust the recipe without sacrificing taste. After all, no one will complain if you’ve made it a bit healthier!
How to Store, Freeze & Reheat
After making this dessert, you might find yourself with some leftovers (if you’re lucky!). Store it covered in the fridge for up to three days. Simply warm individual slices in the microwave for a quick and comforting treat that feels just as delightful as when it was freshly baked.
If you want to prepare it ahead of time, this lasagna freezes beautifully! Simply wrap the entire dish tightly in plastic wrap and then foil before storing it in the freezer. It can last up to three months. Thaw it in the fridge the night before you plan to serve it and bake it as directed—your future self will thank you!
When reheating, I recommend placing it in the oven at 350°F for about 20 minutes, covered with foil, to reheat gently without drying it out. Then, remove the foil for the last few minutes to crisp up the top if you prefer that delightful texture.
Conclusion
I hope you’re as excited to make this Cinnamon Roll Apple Lasagna as I am to share it with you! It’s a delightful creation that merges comforting flavors and textures in a way that makes everyone feel at home. Perfect for sharing with friends or treating yourself, I know you’re going to love every gooey, delicious bite. Happy baking from my kitchen to yours!