
Another thing I learned is to really mix the brownie batter only until the ingredients are just combined. Overmixing creates air in the batter, which leads to a cake-like texture instead of that fudgy brownie we’re aiming for. So, once your flour and cocoa are mixed in, stop right there!
Also, cooling the brownies completely before cutting is crucial. The cheesecakey layer needs time to set, and cutting too soon may cause them to fall apart. I know the temptation is strong, but let patience prevail; your hard work will pay off in the end!
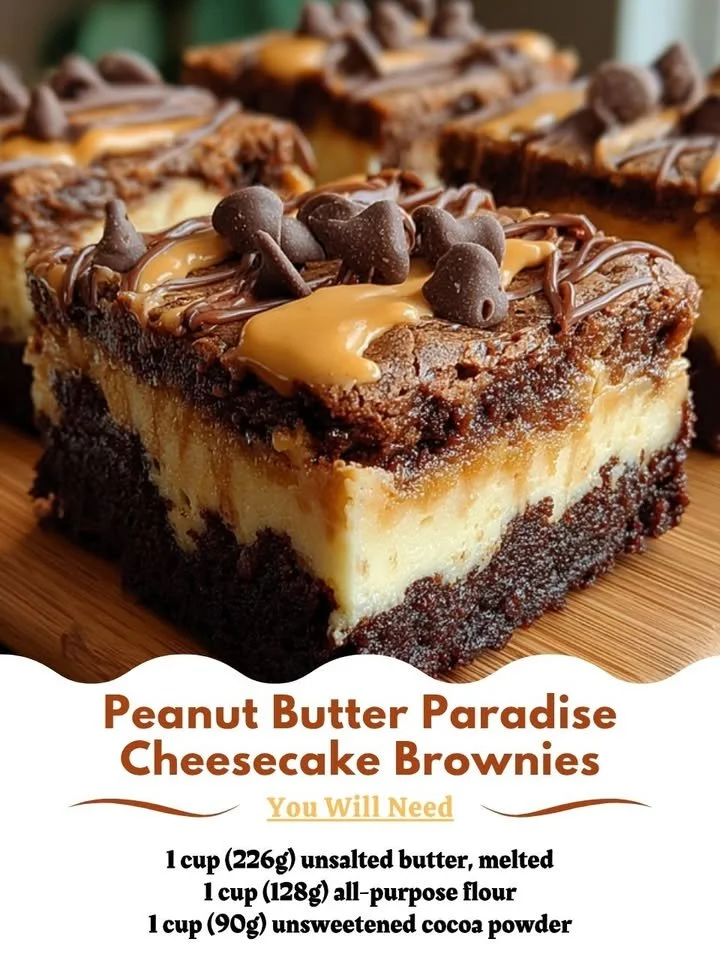
Serving Suggestions
When it comes to serving these luscious brownies, less is more! I like to top them with a drizzle of melted chocolate or a dollop of whipped cream. A sprinkle of coarse sea salt also adds a delightful contrast to the sweetness. If you want to go all out, pair them with a scoop of vanilla ice cream; the warm, gooey brownies with cold ice cream are pure magic!
For a more personal touch, I sometimes package these brownies in cute boxes or gift tins for friends and family. It’s a heartfelt gesture that makes for a great gift, especially during holiday seasons or birthdays.
If you’re hosting a gathering, consider serving these brownies alongside a make-your-own sundae bar. Set out different toppings—think crushed nuts, sprinkles, and caramel sauce! This allows everyone to customize their brownie experience, turning your dessert into a fun and interactive treat.
Variations & Customizations
If you’re feeling adventurous, why not try adding some mix-ins to the brownie batter? Chocolate chips, either semi-sweet or dark, add an extra layer of chocolatey goodness. Or, if you love texture, consider folding in chopped nuts like walnuts or pecans for a delightful crunch!
For a twist on the peanut butter flavor, try using crunchy peanut butter instead of creamy. It adds a unique texture and a more pronounced peanut flavor that pairs beautifully with the chocolate. You can also experiment with flavored cream cheeses, like chocolate or cinnamon, for a fun and tasty variation.
And let’s not forget about toppings! Drizzling your brownies with different sauces, like caramel or white chocolate, can totally transform the experience. You can even sprinkle crushed Reese’s cups on top for that extra peanut butter punch, taking them from delicious to divine!
How to Store, Freeze & Reheat
To store your leftovers (if there are any!), place the brownies in an airtight container at room temperature for up to three days. If you want to keep them fresh longer, you can refrigerate them for about a week. Just make sure to let them come to room temperature before enjoying; this way, they’ll be nice and fudgy!
If you’re like me and you often find yourself baking in excess, these brownies freeze beautifully. Just wrap them in plastic wrap and then place them in a freezer-safe bag or container. They can be frozen for up to three months. When you’re ready to enjoy them, simply thaw in the fridge overnight, and they’ll be just like freshly baked!
Reheating is also straightforward. A simple microwave zap for about 20-30 seconds does the trick! This will bring back that warm, fudgy texture we all love. Just be cautious not to overheat, or you might end up with a gooey mess instead of the gooey goodness you’re after.
Conclusion
I hope you find as much joy in making and enjoying these Peanut Butter Paradise Cheesecake Brownies as I do! They are a perfect combination of flavors and textures that are sure to please anyone with a sweet tooth. Whether you’re baking for a special occasion, or just treating yourself on a random Tuesday, these brownies are sure to become a favorite in your kitchen. Happy baking!