
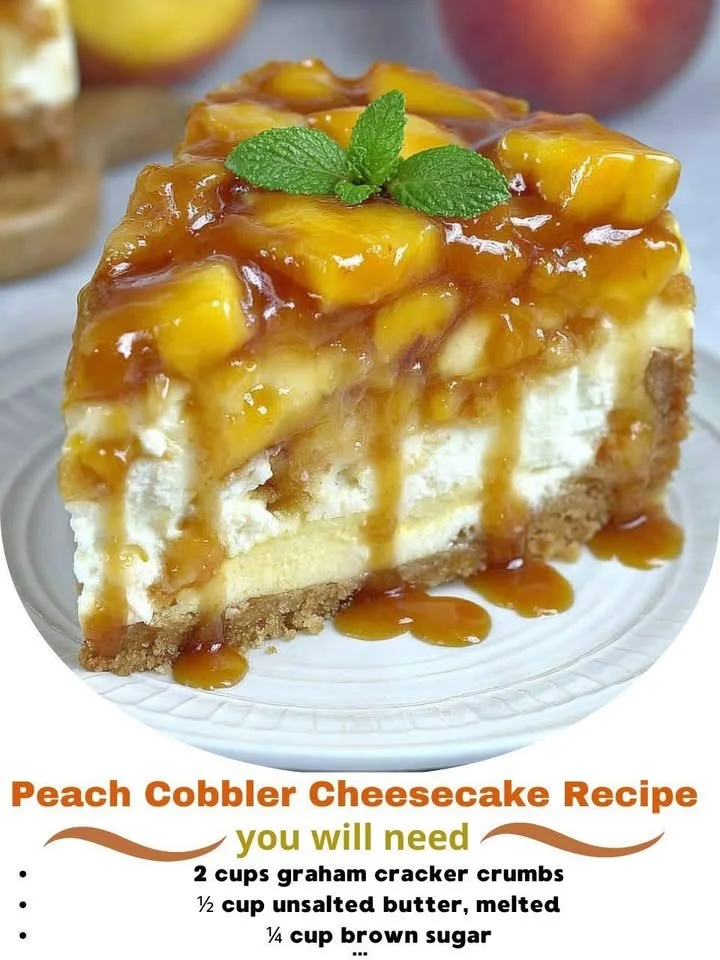
When the summer sun is shining, and peaches are at their peak, there’s nothing I love more than indulging in a delicious Peach Cobbler Cheesecake. It’s the perfect blend of two of my favorite desserts—rich, creamy cheesecake meets warm, gooey peach cobbler. This delightful dessert not only satisfies your sweet tooth but also fills your kitchen with the most heavenly aroma. From the buttery crust to the luscious peach topping, this recipe will win over your heart, just like it did mine.
Why You’ll Love This Recipe
I can guarantee that once you take a bite of this Peach Cobbler Cheesecake, you’ll be smitten. The combination of creamy cheesecake with caramelized peaches creates a symphony of flavors in your mouth; it’s just divine! Plus, it’s a crowd-pleaser that’s great for potlucks, family gatherings, or just a cozy night in. Trust me, everyone will be asking for seconds! (See the ingredients in the next page below…)
Ingredients
– 1 ½ cups graham cracker crumbs
– ½ cup unsalted butter, melted
– 1 cup sugar, divided
– 2 (8 oz) packages cream cheese, softened
– 3 large eggs
– 1 teaspoon vanilla extract
– 2 cups fresh peaches, peeled and sliced (or canned if out of season)
– 1 teaspoon ground cinnamon
– ½ teaspoon nutmeg
– 1 tablespoon lemon juice
– ¼ cup all-purpose flour
Equipment Needed
– 9-inch springform pan
– Mixing bowls
– Electric mixer (or whisk)
– Rubber spatula
– Saucepan
– Measuring cups and spoons
Step-by-Step Instructions
First, I start by preheating my oven to 325°F (160°C). In a mixing bowl, I combine the graham cracker crumbs and melted butter until the mixture resembles wet sand. I then press this crust mixture firmly into the bottom of my springform pan to form a solid base. Once it’s even, I pop it into the oven for about 10 minutes until it gets a nice golden color. This step sets the perfectly crunchy base for my cheesecake. (See the next page below to continue steps…)
Next, I turn my attention to the cheesecake filling. In a large mixing bowl, I beat the softened cream cheese and 1 cup sugar using my electric mixer until it’s smooth and creamy. I love the way it comes together like cloud-like goodness! I then add the eggs one at a time, mixing well after each addition, followed by the vanilla extract. The combination makes my mouth water just thinking about it! I slowly fold in the flour, ensuring there are no lumps and then pour this creamy mixture over the baked crust.
Now, it’s time to prepare the peach topping! I chop up my fresh peaches (or open my canned peaches), and in a saucepan, I combine them with the remaining sugar, cinnamon, nutmeg, and lemon juice. I cook this mixture over medium heat just until the peaches start to soften and the flavors meld together beautifully. The aroma of the peaches and spices wafting through the kitchen is simply irresistible! Once the peaches are ready, I pour them over the cheesecake filling, spreading them out evenly.
Finally, I bake the cheesecake in the preheated oven for about 55-60 minutes, or until the edges are set, but the middle still jiggles slightly. It’s a delicate balance of timing, and I always keep an eye on it! After baking, I let it cool in the oven with the door slightly ajar for about an hour. Then, I refrigerate it for at least 4 hours or overnight. Patience is key, but oh, that waiting is worth it!
Pro Tips for Best Results
I tested this recipe three ways and found that using fresh peaches makes a big difference in flavor! If you can get ripe, juicy ones, go for it. They make the cheesecake taste incredibly fresh and vibrant. When slicing the peaches, I like to leave them a bit thicker so they hold up well during baking.
Another thing I discovered is that letting your cream cheese come to room temperature is essential. I usually take it out of the fridge about 30 minutes before I start. This step helps it blend in smoothly with the other ingredients and prevents any lumps in your cheesecake. Who likes a lumpy cheesecake, right?
Lastly, make sure to cool the cheesecake gradually in the oven. This step helps prevent cracking on the surface. If you’re like me and want that flawless cheesecake look, this tip is a game changer. Just crack the oven door open after baking and allow it to hang out in there!
Common Mistakes to Avoid
One of the biggest mistakes I made the first time I made this cheesecake was not letting my cream cheese soften enough. The lumps in the mixture were quite disappointing when I sliced the cake. I’ve learned that patience pays off, so let that cream cheese sit! (See the next page below to continue…)
Another pitfall is overbaking the cheesecake. Keep an eye on it; if it’s firm all the way through, it might be too late! The center should still jiggle slightly when you take it out, as it will continue to set while it cools.
Also, don’t skip the chilling step! Trust me, it’s tough to resist that first slice, especially smelling all those wonderful flavors, but allowing it to chill overnight makes for a firmer texture and richer taste. You’ll be glad you waited!
Serving Suggestions
When it comes to serving my Peach Cobbler Cheesecake, I love to garnish it with a dollop of whipped cream and a sprinkle of cinnamon for that extra flair. It adds a lovely appearance while enhancing the flavors. Sometimes, I even go the extra mile and warm up a few peach slices to place on top right before serving; it’s a luscious touch!
If you want to make this dessert even more decadent, pair it with a scoop of vanilla ice cream. The combination of creamy cheesecake and melty ice cream is beyond tempting, especially on a warm day. It’s like summer in a bowl!
For a fun presentation, I often cut the cheesecake into small squares and serve them as bite-sized treats for parties. This makes it easier for guests to grab and enjoy, and let me tell you, they never last long!
Variations & Customizations
While I absolutely adore the classic peach version, there are endless possibilities for customizing this cheesecake! You can swap out the peaches for blueberries, cherries, or even strawberries for a delightful twist on the flavor profile. Each fruit brings its unique character to the dish, so feel free to get creative!
You can also try adding a layer of caramel sauce on top before the peach filling for a richer flavor. Drizzling caramel over each slice is a surefire way to make it even more indulgent, and you might find yourself sneaking seconds more often!
Lastly, for the crust, I’ve experimented with adding crushed oats to the graham cracker crust for a bit of texture and nuttiness. It adds a lovely complexity that might surprise your taste buds in the best way!
How to Store, Freeze & Reheat
To store any leftovers (if there are any!), I recommend covering the cheesecake with plastic wrap or placing it in an airtight container. It’ll keep well in the refrigerator for up to a week, and trust me, it tastes just as great days later!
If you want to prepare in advance or save some for later, freezing is a fantastic option. I slice the cheesecake into wedges, wrap each piece tightly in plastic wrap, and then place them in a freezer-safe container. It can last up to three months in the freezer without compromising its taste or texture.
When it’s time to enjoy those frozen slices, I simply let them thaw in the refrigerator overnight, or if I’m really impatient, I leave them on the countertop for about an hour. A gentle reheat in the microwave for about 15-20 seconds can bring that cheesecake back to life too!
Conclusion
I hope you find as much joy in making and savoring this Peach Cobbler Cheesecake as I do. It’s truly a dessert that warms the heart and soul and is perfect for making memories with family and friends. So, roll up your sleeves, grab those ripe peaches, and enjoy the sweet delight that only homemade cheesecake can offer. Happy baking!