
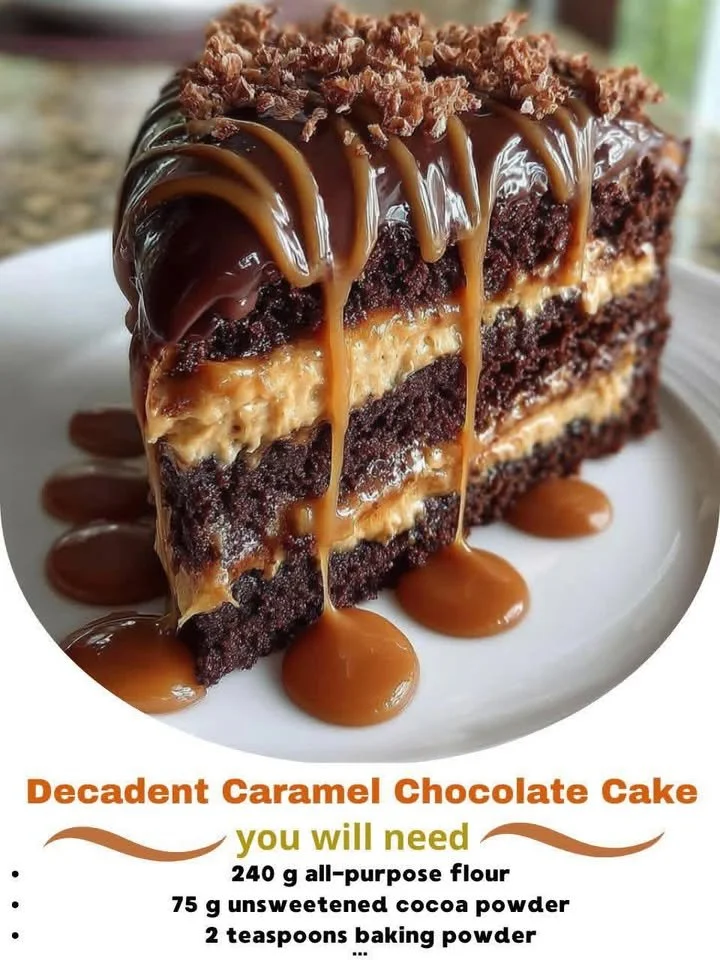
Welcome to my kitchen! Today, I want to share with you my absolute favorite dessert recipe: the Decadent Caramel Chocolate Cake. This cake is perfect for any special occasion or even just a cozy weekend at home. I promise you will want to savor every bite of this delightful treat. With rich layers of chocolate cake, luscious caramel, and a silky chocolate ganache, this dessert is sure to impress your family and friends.
Why You’ll Love This Recipe
There is something magical about the combination of chocolate and caramel that just makes my heart sing. This cake is not only delicious but also visually stunning. Every forkful brings together the rich bitterness of chocolate and the sweet, buttery flavor of caramel. Whether you’re celebrating a birthday or just need a little indulgence in your life, this cake is bound to become a favorite. (See the ingredients in the next page below…)
Ingredients
- 1 ¾ cups all-purpose flour
- 2 cups granulated sugar
- ¾ cup unsweetened cocoa powder
- 1 ½ teaspoons baking powder
- 1 ½ teaspoons baking soda
- 1 teaspoon salt
- 2 large eggs
- 1 cup whole milk
- ½ cup vegetable oil
- 2 teaspoons vanilla extract
- 1 cup boiling water
- 1 cup caramel sauce (store-bought or homemade)
- 1 cup semi-sweet chocolate chips
- 1 cup heavy cream
Equipment Needed
- 2 round 9-inch cake pans
- Mixing bowls
- Measuring cups and spoons
- Electric mixer or whisk
- Rubber spatula
- Cooling rack
- Small saucepan
- Piping bag (optional for decorating)
Step-by-Step Instructions
First, I always start by preheating my oven to 350°F (175°C) and greasing my cake pans—this helps prevent any sticking! In a large mixing bowl, I combine the flour, sugar, cocoa powder, baking powder, baking soda, and salt. I usually use a whisk to make sure all the dry ingredients are well combined. Next, I add the eggs, milk, oil, and vanilla extract, mixing until it’s nice and smooth. Then, I gently stir in the boiling water. This step may seem odd, but it makes the cake incredibly moist! (See the next page below to continue steps…)
Once the batter is ready, I evenly distribute it into the prepared cake pans. I then pop them into the oven and bake for about 30-35 minutes. The smell wafting through my kitchen at this point is heavenly! I know the cakes are done when a toothpick inserted into the center comes out clean. After taking them out of the oven, I let them cool in the pans for about 10 minutes before transferring them to a cooling rack.
While the cakes cool, I turn my attention to the chocolate ganache. In a small saucepan, I heat the heavy cream until just simmering, then pour it over the chocolate chips in a bowl. After letting it sit for a few minutes, I whisk everything together until it’s silky and smooth. Once the cakes are fully cooled, it’s time to assemble! I layer one cake on a serving plate, drizzling a generous amount of caramel sauce over the top before adding the second layer. Finally, I pour the warm chocolate ganache over the entire cake, allowing it to drip down the sides for that deliciously decadent look.
Pro Tips for Best Results
If you want your cake to be extra moist, I recommend letting it sit covered with plastic wrap overnight. This allows all the flavors to meld together beautifully. I’ve tested this recipe a few ways and found that making the cakes a day ahead really helps with the texture! When making ganache, ensure you don’t let the cream boil too vigorously; if it curdles, it won’t give you that smooth consistency we’re aiming for.
Another tip is to use high-quality cocoa powder and chocolate chips. Trust me on this one! I tried using a lower-grade brand once, and the difference in flavor was noticeable. Lastly, don’t skip letting your cake cool completely before you frost it. It may be tempting, but a warm cake can lead to a melted mess of ganache.
Common Mistakes to Avoid
One mistake I often made early on was not properly measuring my ingredients. Baking is a science, and precision matters! I recommend using a kitchen scale for the best results, especially for the flour and cocoa powder. It’s also crucial to bake the cakes in the right size pans; if you use smaller pans, the cakes might overflow and create a mess in your oven. (See the next page below to continue…)
Another thing is rushing the cooling process. I can tell you from experience that cutting into a warm cake can lead to a crumbly disaster. Patience is key! Letting the cakes cool completely ensures they hold their shape when layered and frosted. I’ve also had my fair share of crumbly cake because I didn’t use enough oil or eggs, so make sure you’re following the ingredient list closely.
Lastly, I highly recommend tasting your caramel sauce before adding it to the layers. Sometimes it can be too sweet or too salty, and adjusting these flavors will make all the difference in your final product.
Serving Suggestions
When it comes to serving this cake, I like to slice it into generous pieces and serve it with a scoop of vanilla ice cream on the side. The cold ice cream pairs beautifully with the warm caramel and rich chocolate, creating a gratifying contrast. You could also sprinkle some sea salt over the top for an extra flavor kick.
For special occasions, I enjoy decorating my cake with chocolate shavings or a drizzle of additional caramel sauce. It adds a lovely finishing touch that makes it feel even more indulgent. If I’m feeling extra festive, sometimes I’ll even top it with whipped cream for an added fluffiness.
Presentation is vital too! Setting the cake on a beautiful platter can enhance the experience. I often add some fresh berries around the base for a pop of color. Trust me, your guests will be wowed!
Variations & Customizations
One of the great things about this Decadent Caramel Chocolate Cake is how versatile it can be. If you want to mix things up, try adding a layer of hazelnut spread between the cake layers for a nutty twist! I once made a version with peanut butter frosting instead of ganache, and let me tell you—life-changing.
If you’re looking for a lower-sugar option, you can use dark chocolate instead of semi-sweet chocolate for ganache and reduce the sugar in the cake batter slightly. I’ve also experimented with adding a dash of espresso powder to the batter, which enhances the chocolate flavor beautifully.
And for those who enjoy citrus, a sprinkle of orange zest in the frosting can add a refreshing twist. The blend of chocolate and citrus creates a delightful surprise!
How to Store, Freeze & Reheat
Storing your cake is a breeze! I usually keep mine in an airtight container at room temperature for up to three days—if it lasts that long! If you live in a humid area, I recommend refrigerating it to prevent any melting, but let it come to room temperature before serving to enjoy that decadent texture.
If you need to make the cake ahead of time, you can freeze it! Just wrap each cake layer tightly in plastic wrap and then aluminum foil. The cake can last up to three months in the freezer. When you’re ready to serve, just take it out a few hours beforehand to thaw in the fridge.
Reheating is simple, too. I often microwave a slice for about 10 seconds to bring back that fresh-baked warmth. I really love that comforting feeling when that first bite hits my taste buds, and I recommend enjoying it with a warm cup of coffee or tea.
Conclusion
I hope you’re as excited as I am to try this Decadent Caramel Chocolate Cake! It’s a labor of love that truly pays off in delicious bites, and I guarantee it will be a hit with anyone who takes a piece. Happy baking, and remember to savor every moment in your kitchen, as well as every sweet bite of this delightful cake!