
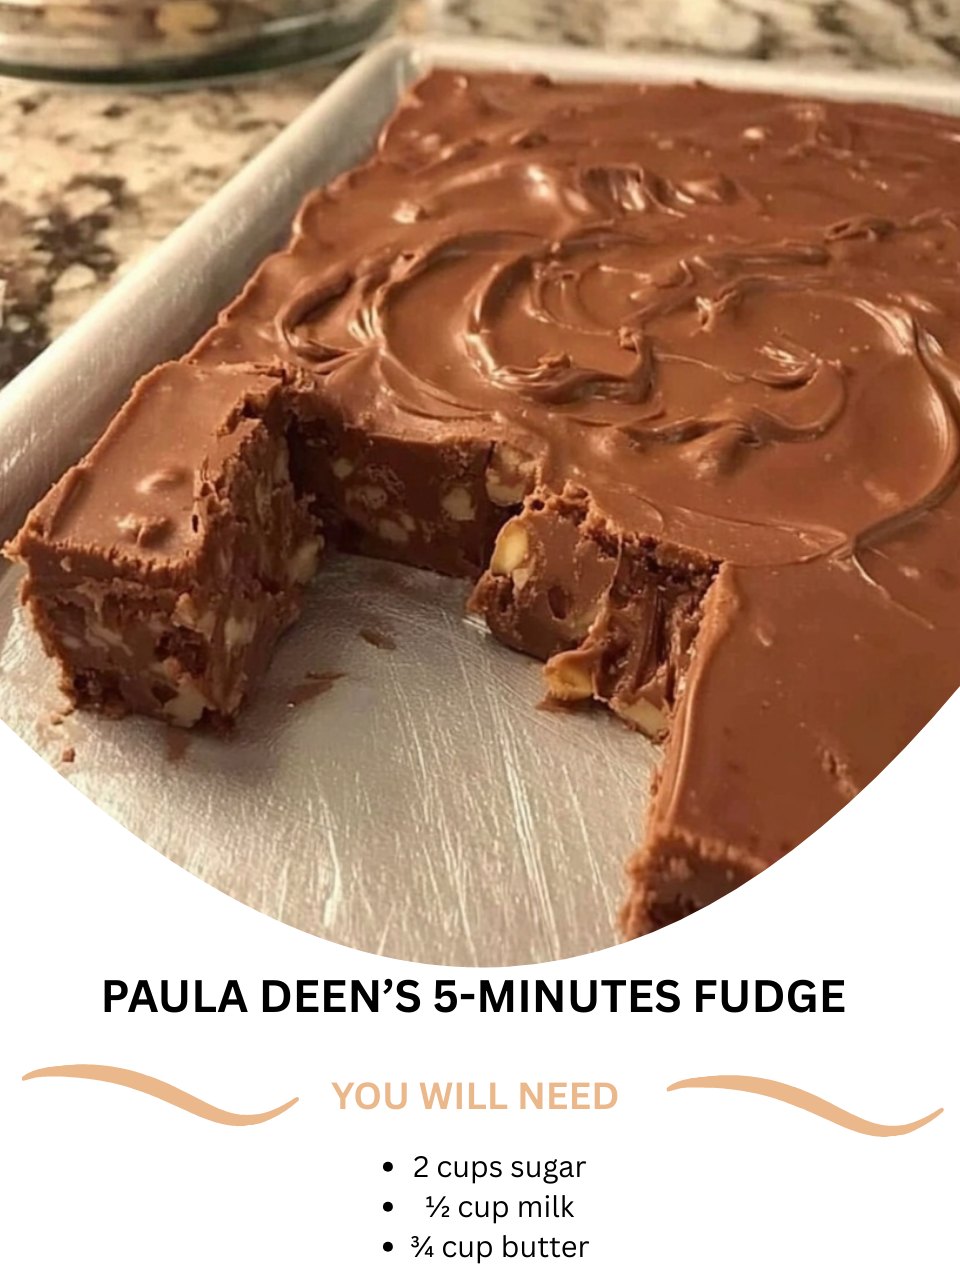
The first time I tried Paula Deen’s 5-Minute Fudge, I was skeptical. Could something so quick really be that good? As the sugar, butter, and milk bubbled furiously in my saucepan, my kitchen filled with a sweet, buttery scent that smelled like pure possibility. The moment I stirred in the chocolate chips and marshmallow creme, watching them melt into a glossy, dark river, I felt a surge of kitchen confidence. Pouring it into the pan felt like a magic trick, and after a few hours of chilling, I sliced into the smoothest, creamiest, most decadent fudge I’d ever made. It was pure, uncomplicated bliss, and it instantly became my emergency dessert secret weapon.
Why You’ll Love This Recipe
You are going to absolutely adore this recipe because it’s the ultimate “foolproof” fudge that actually lives up to its name. In the time it takes to boil water for pasta, you can have a rich, creamy fudge batter ready to set. It requires no candy thermometer, no finicky temperature stages, and uses simple, pantry-staple ingredients. This is the recipe you turn to when you need an impressive homemade treat for a party, a last-minute gift, or just a serious chocolate emergency. It’s the definition of easy indulgence, delivering old-fashioned fudge flavor with modern-day speed.
Ingredients
- 2 cups granulated sugar
- 1/2 cup whole milk
- 3/4 cup (1 1/2 sticks) unsalted butter
- 1 (7 oz) jar marshmallow creme
- 1 (12 oz) bag semi-sweet chocolate chips
- 1 teaspoon pure vanilla extract
- 1 cup chopped nuts, like walnuts or pecans (optional) (See the next page below to continue…)
Equipment Needed
- Medium-sized, heavy-bottomed saucepan (at least 3-quart capacity)
- Wooden spoon or heatproof spatula
- 9×13 inch baking pan
- Aluminum foil or parchment paper
- Measuring cups and spoons
Step-by-Step Instructions
My process starts with serious preparation because once you start cooking, things move fast. I line my 9×13 inch pan with aluminum foil, leaving an overhang on two sides for easy lifting, and I lightly grease it with a dab of butter. Then, I measure out everything—the marshmallow creme, chocolate chips, vanilla, and nuts—and have them sitting right next to the stove. I learned the hard way that scrambling for an ingredient while the hot syrup is ready will lead to a seized, grainy mess. Having a “mise en place” is non-negotiable for this five-minute sprint.
Now, for the active cooking. In my medium saucepan, I combine the sugar, milk, and butter. I turn the heat to medium and stir constantly until the butter melts and the mixture comes to a full, rolling boil. The key here is the boil—it needs to be vigorous, with big bubbles breaking the surface across the entire pot. The moment it reaches this state, I set a timer for exactly 5 minutes. I continue to stir gently but constantly during this entire boil. This prevents scorching on the bottom, which can give the fudge a burnt taste.
The second that timer beeps after 5 minutes, I immediately remove the pot from the heat. Working quickly, I stir in the marshmallow creme until it’s fully melted and incorporated. Then, I dump in the entire bag of chocolate chips and the teaspoon of vanilla. I stir vigorously until the chocolate is completely melted and the mixture is smooth, glossy, and uniformly dark. If I’m using nuts, I fold them in at this very last moment. The whole process from off-heat to poured should take less than two minutes. The mixture is hot and will start to set quickly, so speed and confidence are your best tools here.(See the next page below to continue…)
I immediately pour the thick, glorious fudge batter into my prepared pan. I use my spatula to spread it into an even layer, working swiftly before it begins to firm up in the pot. Then, I simply let it cool on the counter for about 30 minutes before transferring it to the refrigerator to chill completely and become firm enough to slice, which usually takes 2-3 hours. The wait is the hardest part, but the sight of that perfectly smooth, shiny surface is worth it.
Pro Tips for Best Results
My first pro tip is to use a heavy-bottomed saucepan. I tried this once in a thin, cheap pot and the bottom scorched before the five minutes were up, ruining the whole batch. A heavy pot distributes the intense heat evenly, preventing hot spots that burn the sugar. It’s the single most important piece of equipment for ensuring a smooth, not burnt, fudge.
Second, do not stop stirring during the 5-minute boil. I tested letting it boil unattended, and a film formed on top while the bottom threatened to burn. Constant, gentle stirring ensures even cooking and temperature throughout the syrup. It also helps dissolve any sugar crystals that might try to form on the sides of the pan, which can lead to graininess.
Finally, use real butter and real vanilla. This recipe is so simple that the quality of each ingredient shines through. Margarine or imitation vanilla will leave a flat, chemical aftertaste. The rich flavor of real dairy butter and the warm depth of pure vanilla extract are what make this fudge taste homemade and luxurious. Trust me, do not make substitutions here.
Common Mistakes to Avoid
The biggest mistake is misjudging the boil. A gentle simmer is not enough. You need a full, rolling, can’t-stir-it-down boil that covers the entire surface of the liquid. If you start your timer with a weak boil, your fudge won’t cook enough and may never set properly, remaining a soft, sticky goo. I made this mistake the first time and had to re-melt and re-cook the whole batch.(See the next page below to continue…)
Don’t guess the five minutes. Use a timer. Cooking it for four minutes will result in soft fudge; cooking it for six can make it hard and crumbly. The five-minute mark at a full boil is the sweet spot that cooks the sugar enough to set without crystallizing. It’s called “5-Minute Fudge” for a very specific reason.
Avoid adding the chocolate and marshmallow creme while the pot is still on the heat. The residual heat is more than enough to melt them. If you leave the pot on the burner, you can overheat the chocolate, causing it to seize or the fats to separate, resulting in a greasy, broken fudge. Remove from heat, then add your mix-ins.
Finally, don’t try to speed up the set by putting hot fudge directly into the fridge or freezer. The drastic temperature change can cause condensation to form on the surface, making the top of your fudge wet and sticky. Let it cool on the counter until the pan is just warm to the touch (about 30 minutes) before chilling. This ensures a perfect, dry surface and even texture.
Serving Suggestions
I love cutting this fudge into small, neat squares and piling them high on a vintage cake stand for parties. It’s so rich that small pieces are perfect. For the holidays, I’ll sometimes sprinkle the top with festive sprinkles or crushed candy canes right after pouring it into the pan for a fun, colorful finish.
This fudge is a legendary gift. I layer squares in a decorative cookie tin between sheets of wax paper, or I stack them in clear cellophane bags tied with a ribbon. It’s the perfect “thinking of you” treat for teachers, neighbors, or coworkers. Because it’s so easy, I often make a double batch just for gifting.
For a decadent ice cream sundae, I’ll warm a square in the microwave for just 5-7 seconds and place it on top of a scoop of vanilla bean ice cream. It softens into a thick, fudgy sauce that’s absolutely heavenly. A dollop of whipped cream and a cherry on top make it a spectacular dessert.
Variations & Customizations
For a classic “Fantasy Fudge” twist, use a bag of milk chocolate chips instead of semi-sweet. It creates a sweeter, creamier fudge that kids especially love. You can also swap the semi-sweet chips for dark chocolate chips for a more grown-up, intense chocolate experience.
The add-in possibilities are endless. Instead of (or in addition to) nuts, try folding in a cup of mini marshmallows, crushed peppermints, or toffee bits after the chocolate has melted. For a peanut butter version, swirl in 1/2 cup of creamy peanut butter along with the marshmallow creme.
To make a cookies and cream version, replace half the chocolate chips with white chocolate chips, and after pouring the fudge into the pan, press crushed Oreo cookie pieces into the top. The contrast is delicious and visually striking.
How to Store, Freeze & Reheat
This fudge stores beautifully at cool room temperature. I keep it in an airtight container with layers separated by parchment paper for up to two weeks. The high sugar content acts as a natural preservative. If your house is very warm, you can store it in the refrigerator, but let it come to room temperature before serving for the creamiest texture.
It freezes perfectly for long-term storage. Wrap the whole slab or individual pieces tightly in plastic wrap, then place in a freezer bag or airtight container. It will keep for up to 3 months. Thaw in the refrigerator overnight, then bring to room temperature before serving.
There is no need to reheat this fudge. Its perfect, creamy texture is best enjoyed at room temperature. If it’s been in the fridge and is too firm, let it sit on the counter for 20-30 minutes. Microwaving will melt it, so patience is key.
Conclusion
Paula Deen’s 5-Minute Fudge is more than just a quick recipe to me; it’s a little piece of kitchen magic that never fails to deliver joy and satisfaction. It has saved me from countless last-minute dessert panics and has brought smiles to more faces than I can count. I hope this recipe becomes your secret weapon, too, giving you the confidence to whip up something spectacular anytime the mood strikes. Now, go grab that saucepan—in five minutes, you’ll be on your way to fudge bliss.