
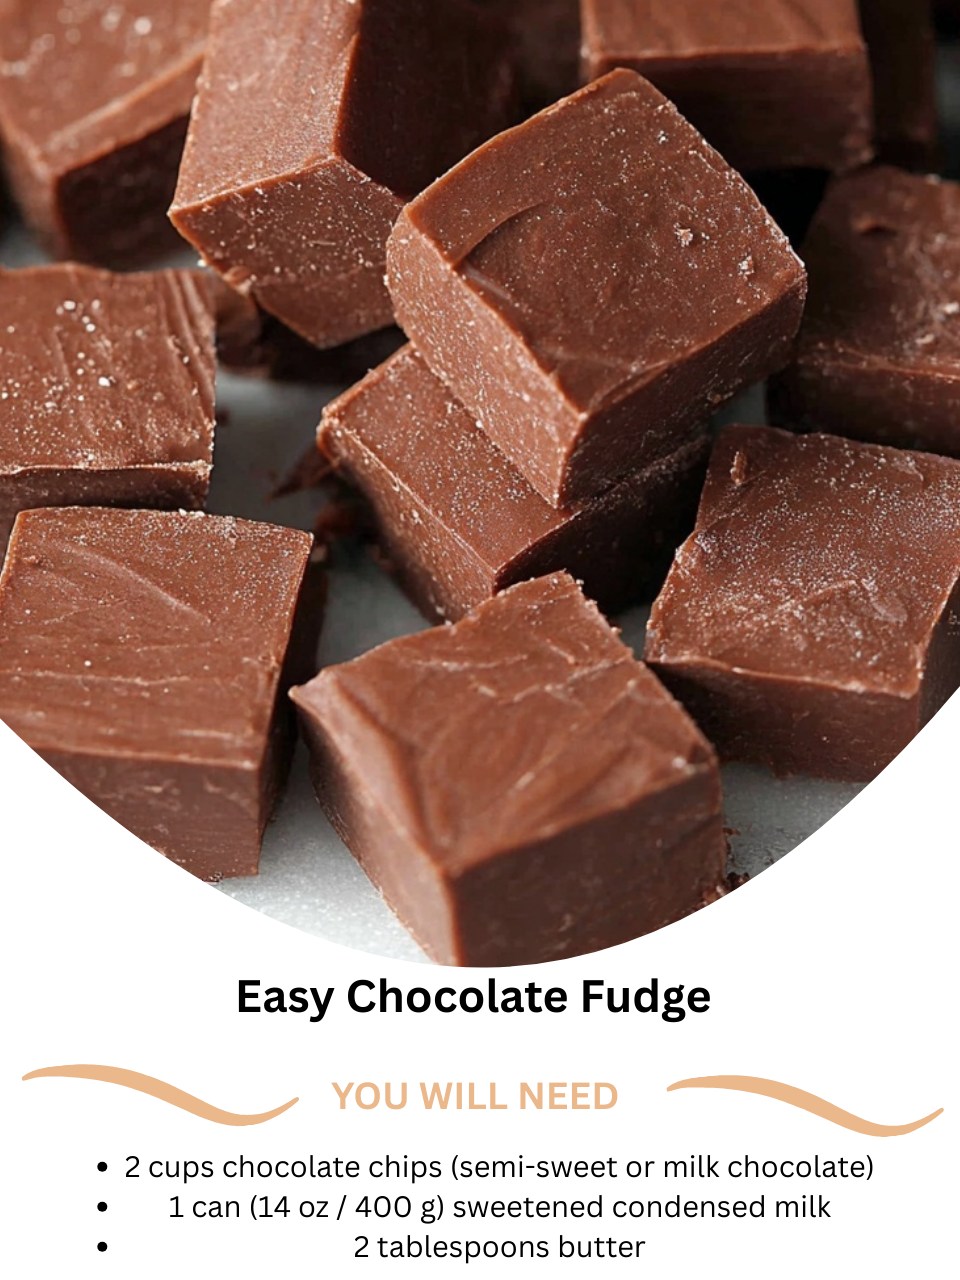
I’ll never forget the first time I made this Easy Chocolate Fudge. It was a snowy December afternoon, and I was in a panic because I’d promised to bring a homemade treat to a party. With just three ingredients in my pantry and zero candy-making confidence, I decided to try. As the chocolate chips melted into the sweetened condensed milk, my kitchen filled with a deep, comforting cocoa aroma that melted away my stress. In less than 10 minutes, I had a pan of smooth, glossy fudge chilling. The result was a rich, creamy, and decadent fudge that everyone assumed took hours. That day, this recipe became my forever kitchen hero.
Why You’ll Love This Recipe
You are going to absolutely love this recipe because it is the ultimate gateway to homemade candy, proving that you don’t need special skills or equipment to make something spectacular. With just three main ingredients and one saucepan, you can create a fudge that’s luxuriously smooth, intensely chocolatey, and incredibly satisfying. It’s foolproof, fast, and wildly adaptable, making it perfect for last-minute gifts, holiday trays, or satisfying a midnight chocolate craving. This is the recipe that will make you feel like a confectionery genius with almost zero effort.
Ingredients
- 2 cups chocolate chips (semi-sweet or milk chocolate)
- 1 can (14 oz / 400 g) sweetened condensed milk
- 2 tablespoons unsalted butter
- 1 teaspoon pure vanilla extract
- Optional: 1 cup of add-ins like chopped nuts, mini marshmallows, or crushed peppermints
- Optional: Flaky sea salt for garnish (See the next page below to continue…)
Equipment Needed
- Medium-sized, heavy-bottomed saucepan
- Wooden spoon or silicone spatula
- 8×8 inch baking pan
- Parchment paper or aluminum foil
- Measuring cups and spoons
Step-by-Step Instructions
My first step is always to prepare my pan—this simple act sets me up for success. I line my 8×8 inch pan with parchment paper, leaving an overhang on two sides. This isn’t just a suggestion; it’s a non-negotiable tip I learned after my first batch stuck terribly to a greased pan. The parchment paper creates a perfect sling, allowing me to lift the entire fudge block out for flawless, crumb-free slicing. Once the pan is ready, I measure out all my ingredients. Having everything at hand is crucial because the cooking process moves quickly once the heat is on.
Now, for the cooking, which is more of a gentle melting than actual cooking. In my medium saucepan, I combine the chocolate chips, the entire can of sweetened condensed milk, and the butter. I place the pot over the lowest heat setting on my stove. Patience is the secret ingredient here. I stir slowly and constantly with my wooden spoon, watching the chips gradually lose their shape. The mixture will start thick, then become a glorious, smooth, and glossy chocolate lava. I once turned the heat up to medium to speed things up, and I ended up with a slightly grainy, overheated mess. Low and slow is the only way to go.
The moment the mixture is completely smooth and no streaks of condensed milk remain, I immediately remove the pot from the heat. This is when I stir in the vanilla extract—that one teaspoon makes the chocolate flavor sing and adds a wonderful depth. If I’m using any add-ins like toasted pecans or mini marshmallows, I fold them in now. The residual heat is perfect for incorporating everything without melting the add-ins too much. I work quickly but gently, ensuring everything is evenly distributed throughout the velvety fudge base.(See the next page below to continue…)
I immediately pour the thick, warm fudge into my prepared pan. Using a spatula that I’ve lightly greased with butter, I spread it into a perfectly even layer. If I’m using flaky sea salt, I sprinkle a tiny pinch over the top now—the contrast with the sweet chocolate is sublime. Then, I let the pan cool on the counter for about 30 minutes before transferring it to the refrigerator. This gradual cool-down prevents condensation. The fudge needs to chill for at least 2-3 hours to become completely firm and sliceable. The wait is the hardest part, but the reward is a perfect, solid block of fudge.
Pro Tips for Best Results
My number one tip is to use high-quality chocolate chips. Since this fudge is essentially just chocolate and milk, the flavor of your chips is front and center. I’ve tested this with bargain-brand chips and premium ones, and the difference in smoothness and richness is undeniable. A good semi-sweet chocolate will give you a deep, adult-friendly fudge, while milk chocolate will be sweeter and creamier. Choose your favorite eating chocolate, and you’ll love the fudge.
Don’t skip the butter. I know it’s only two tablespoons, but it’s essential for both flavor and texture. The fat in the butter helps create a smoother mouthfeel and gives the fudge a richer taste. I tested a batch without it once, and while it set, it was denser and lacked that melt-in-your-mouth quality. The butter is your guarantee for that classic, creamy fudge texture.
Finally, let the fudge set properly. I’ve been tempted to speed up the process by putting the hot pan directly into the freezer. This causes the top to set too quickly while the center remains soft, and it can also create condensation, making the surface sticky. Letting it cool on the counter first, then chilling in the fridge, allows it to set evenly from edge to center, giving you the perfect firm-yet-creamy bite every time.
Common Mistakes to Avoid
The most common mistake is using high heat. Chocolate is delicate and can scorch or “seize” (turn into a gritty, clumpy mass) if exposed to too much direct heat. Always use the lowest setting on your burner. If you’re worried, you can even use a double boiler. I melted my first batch directly over medium heat, and it seized up into an unworkable lump I had to throw away. Low and slow is your mantra.(See the next page below to continue…)
Don’t swap the sweetened condensed milk for evaporated milk or regular milk. They are not the same! Sweetened condensed milk is thick, sweet, and sticky, which is what gives the fudge its structure and classic texture. Evaporated milk is unsweetened and thinner, and using it will result in a soupy mixture that will never set. This is the most important ingredient—don’t substitute it.
Avoid over-stirring once the fudge is in the pan. After you’ve poured and spread it, leave it alone. Poking at it or trying to smooth it repeatedly can introduce air bubbles and prevent a perfectly smooth, shiny top. Spread it once with your greased spatula, give it one gentle shake to settle, and then walk away.
Finally, don’t try to slice it before it’s fully set. Impatience led me to cut into a batch after just 90 minutes in the fridge. My knife dragged, creating ragged, messy squares. For clean, professional cuts, the fudge must be completely cold and firm. If you’re short on time, you can place it in the freezer for about an hour, but the fridge method is more reliable.
Serving Suggestions
I love cutting this fudge into neat, small squares and piling them high on a festive platter. For the holidays, I’ll sometimes top each square with a single pecan half or a drizzle of melted white chocolate right before serving. It looks incredibly elegant and is always the first treat to disappear at a party.
This fudge is the perfect homemade gift. I layer squares between sheets of parchment paper in a decorative cookie tin or stack them in clear cellophane bags tied with a ribbon. It’s personal, thoughtful, and so much more impressive than store-bought candy. I often make a double batch in December just for gifting to teachers, mail carriers, and neighbors.
For a decadent dessert, I’ll place a single square on a dessert plate next to a scoop of vanilla bean ice cream and a few fresh berries. The rich, cold fudge with the creamy ice cream is a match made in heaven. You can also microwave a square for 5-7 seconds to create a warm, spoonable chocolate sauce for sundaes.
Variations & Customizations
For a Rocky Road version, fold in 1 cup of mini marshmallows and 1 cup of chopped walnuts or pecans just before pouring the fudge into the pan. The textures are fantastic. For a Cookies and Cream twist, use white chocolate chips and fold in 1 ½ cups of crushed Oreo cookie pieces.
You can easily make this fudge with different chips. I’ve made delicious batches using dark chocolate chips for a more intense flavor, or even butterscotch chips for a caramel-like treat. The method is exactly the same. You can also swirl in two tablespoons of peanut butter or caramel sauce after pouring the fudge into the pan for a marbled effect.
To make it extra special, add a flavor extract. Along with the vanilla, try ½ teaspoon of peppermint extract for holiday peppermint fudge, or a teaspoon of orange extract for a chocolate-orange combination. Just be sure to use pure extracts, not artificial flavorings, for the best taste.
How to Store, Freeze & Reheat
This fudge stores beautifully at cool room temperature. I keep it in an airtight container, with layers separated by parchment paper, for up to two weeks. The high sugar content acts as a natural preservative. If your kitchen is warm, store it in the refrigerator, but let it come to room temperature for 20 minutes before serving for the best creamy texture.
It freezes perfectly for long-term storage. Wrap the whole slab or individual squares tightly in plastic wrap, then place them in a freezer bag or airtight container. It will keep for up to 3 months. Thaw in the refrigerator overnight, then bring to room temperature before serving.
There is no need to reheat this fudge. Its perfect texture is meant to be enjoyed cool and firm. If it’s been in the fridge and is too hard, simply let it sit on the counter until it softens slightly. Microwaving will melt it, so patience is key.
Conclusion
This Easy Chocolate Fudge is more than just a simple recipe to me; it’s a reliable spark of joy, a guaranteed crowd-pleaser, and proof that the best things don’t have to be complicated. It has saved me from countless last-minute dessert dilemmas and has brought sweet happiness to so many gatherings. I hope this recipe becomes your trusted friend in the kitchen, too, giving you the confidence to create something deliciously magical anytime. Now, go grab that can of sweetened condensed milk—your path to perfect fudge is just three ingredients away.