
For the cleanest slices, I have a few tools in my arsenal. I run a thin, sharp knife under very hot water, wipe it dry, and then make my cut. I repeat this between each slice. The heat helps glide through the creamy layers without dragging. I also use a small offset spatula or pie server to lift each piece out. Serving it with a dollop of freshly whipped cream on top, instead of more from the tub, adds a light, airy finish that makes it feel extra special.
Common Mistakes to Avoid
My first big mistake was using cold cream cheese. I was impatient and thought my mixer could power through the lumps. It couldn’t. I ended up with tiny, chewy bits of cream cheese throughout my beautiful, smooth layer. Now, I let the block sit on the counter for a good 2-3 hours until it’s so soft my finger leaves a deep indentation. If I’m in a pinch, I’ll microwave it (without the foil wrapper!) for 10-15 seconds, but room temp is always best. Smooth cream cheese is the foundation of a flawless cheesecake layer.
Not letting the pudding thicken before spreading was another lesson. The first time, I whisked the pudding and milk and immediately poured it onto the cheesecake layer. It was too thin and started to seep down and mix with the cheesecake, creating a muddy layer instead of defined stripes. Letting the pudding mixture stand for 3-5 minutes after whisking allows it to thicken to a soft-set, spoonable consistency that will sit proudly on top of the cheesecake without sinking. This brief wait is crucial for picture-perfect layers.
Skipping the toasting step for the pecans is a disservice to the dessert. Raw pecans can be a bit bitter and lack that deep, nutty aroma. Taking five minutes to toast them wakes up their oils and gives them a fantastic crunch that contrasts with all the creamy layers. I’ve also made the error of adding the caramel when it was too hot, which can melt the whipped topping layer. Let the caramel cool until it’s just warm to the touch—it should still be fluid but not hot enough to melt anything.
Finally, using the wrong tool to press the crust is a small thing with big consequences. Using just your fingers often leads to an uneven, lumpy base, and the edges can be too thick. I use the flat bottom of a measuring cup or a drinking glass to press the crumbs down firmly and evenly across the entire pan. I really lean into it, especially in the corners. A compact, solid crust is what allows you to lift out a perfect square without it falling apart at the bottom.
Serving Suggestions
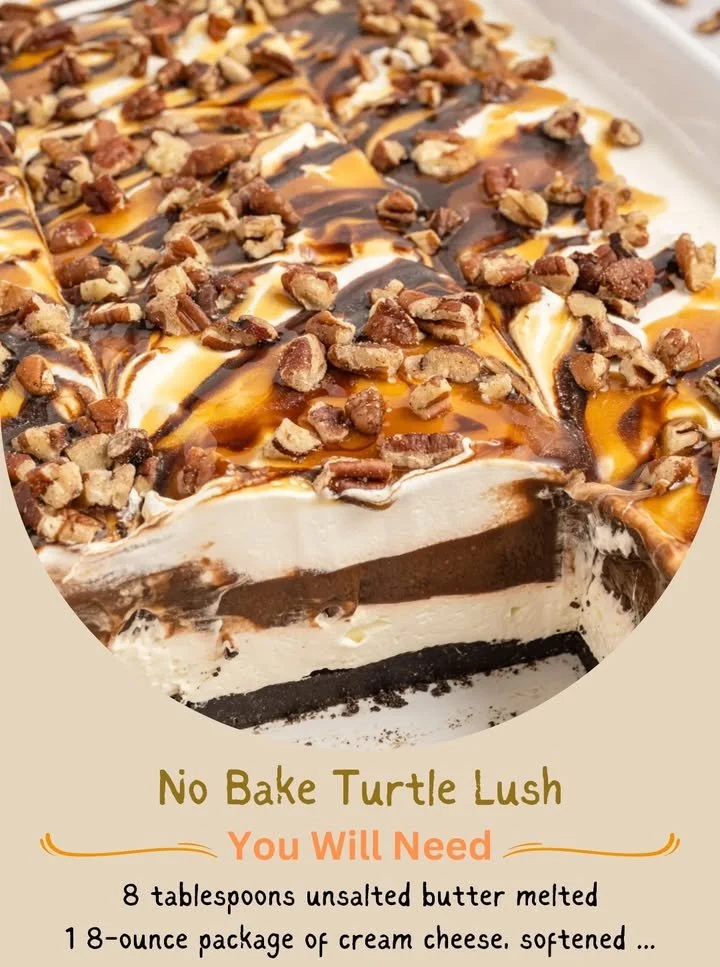
I love serving this lush straight from the pan, cut into generous squares. It’s rich, so I find smaller portions are often plenty. For a gorgeous presentation, I’ll garnish each plate with an extra drizzle of caramel, a few whole toasted pecans, and maybe a fresh mint leaf for a pop of color. Serving it in clear glass trifle bowls or dessert cups is also stunning, as it showcases every beautiful layer. I often assemble individual portions in jars for a portable treat.
For a special dinner party, I make this the centerpiece of a dessert board. I’ll arrange squares of the Turtle Lush alongside a bowl of fresh berries, some shortbread cookies, and a pot of strong coffee. It lets guests choose their own adventure, but the lush is always the star. The combination of the cool, creamy dessert with hot, bitter coffee is an absolute classic and perfect pairing.
If I’m bringing this to a potluck or picnic, I keep it simple. I transport the whole pan, tightly covered, in a cooler with ice packs. I bring my toppings (extra caramel, pecans, and a can of whipped cream) separately in little bags and jars, and do the final garnish on-site. This keeps the presentation fresh and prevents the whipped topping from getting squished in transit. A disposable 9×13 pan with a lid is perfect for these occasions.
Variations & Customizations
This recipe is a fantastic template. For a different flavor profile, I’ve made a “Salted Caramel Pretzel Lush” by using a crust made from crushed pretzels and butter, keeping the cheesecake layer, using vanilla pudding, and topping with caramel and crushed pretzel pieces. The sweet-salty combo is incredible. For a lemon lovers’ version, I use a graham cracker crust, add a teaspoon of lemon zest to the cheesecake layer, use lemon pudding, and top with whipped cream and fresh blueberries.
You can easily adapt it for different candy bar inspirations. For a “Snickers Lush,” I add a layer of chopped peanuts with the caramel and use vanilla pudding. For a “Mounds Lush,” I use a chocolate wafer crust, add a layer of sweetened shredded coconut to the cheesecake mix, use coconut cream pudding, and top with toasted coconut and a chocolate drizzle. The basic method remains the same; you’re just playing with the flavor components.
If you need to simplify further, you can use a pre-made chocolate cookie crust, though the texture won’t be as sturdy. You can also substitute the homemade caramel with a good-quality jarred sauce. For a lighter version, you can use Neufchâtel cheese and sugar-free/fat-free pudding mix and whipped topping, though the texture and richness will be different. My family’s favorite twist is adding a thin layer of mini chocolate chips between the cheesecake and pudding layers for an extra chocolate punch.
How to Store, Freeze & Reheat
This dessert stores beautifully. I cover the pan tightly with plastic wrap or its lid and store it in the refrigerator. It will keep perfectly for 3-4 days. The crust may soften slightly over time, but the flavors only improve as they meld. I do not recommend adding fresh whipped cream garnish until just before serving, as it will weep and deflate if stored for long.
You can freeze this Turtle Lush! For the best texture, I freeze it before adding the final whipped topping and caramel/pecan garnish. I wrap the pan (with just the pudding layer set) very tightly in a layer of plastic wrap and then a layer of aluminum foil. It will freeze well for up to 1 month. To serve, I thaw it overnight in the refrigerator. Then, I add the final whipped topping layer, caramel, and pecans. This method prevents the whipped topping from becoming icy and the caramel from seeping.
I do not recommend freezing it after it’s fully assembled with all the toppings, as the whipped topping can become grainy and the caramel can make the layers soggy upon thawing. Also, this is a strictly no-reheat dessert! It is meant to be served chilled. The layers are designed for a cool, refreshing texture, so simply keep it in the fridge until it’s time to serve.
Conclusion
This No Bake Turtle Lush is the dessert of my summer dreams and my potluck pride. It proves that you don’t need fancy techniques or a hot oven to create something spectacularly delicious and visually stunning. It’s a labor of love built from layers of simple joy, and the reaction you get when you serve it is worth every minute of chilling time. I hope this recipe finds its way into your kitchen and becomes the star of your next gathering, just as it has in mine. Now, go clear a shelf in your fridge—you’re about to make a masterpiece.