
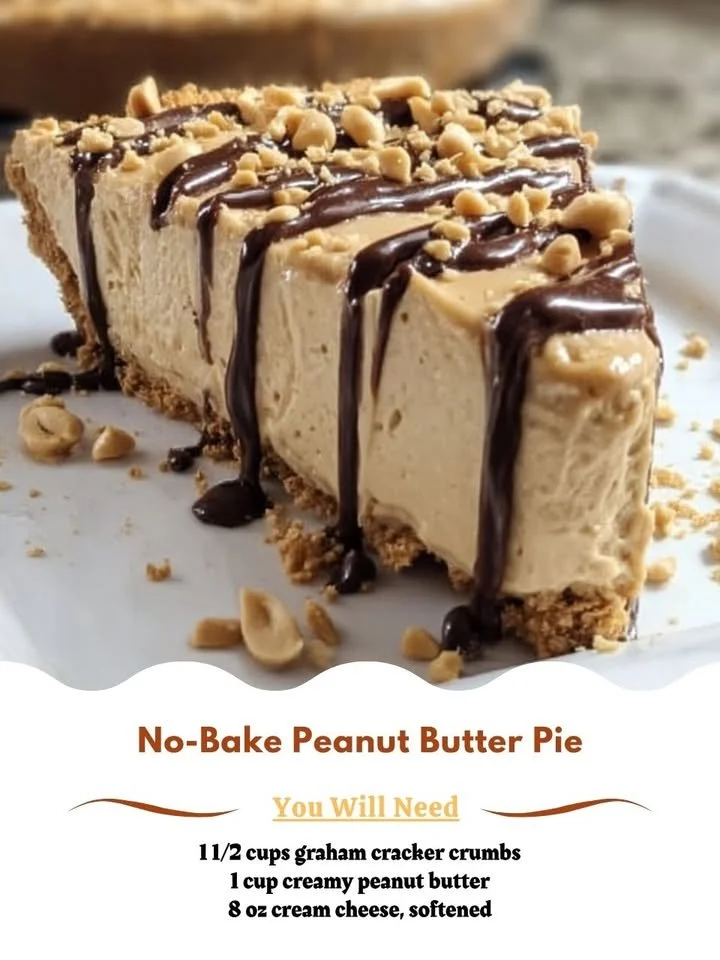
There’s something incredibly satisfying about a no-bake dessert, especially when it’s as indulgent and creamy as a Peanut Butter Pie. I remember the first time I whipped this pie up in my kitchen; I was looking for a quick yet delicious treat to satisfy my sweet tooth without turning on the oven. This recipe has since become my go-to, and I can’t wait to share it with you!
Why You’ll Love This Recipe
This No Bake Peanut Butter Pie is not only easy to make, but it’s a dessert that triumphs over many others with its rich, velvety filling and buttery crust. The combination of creamy peanut butter and whipped cream creates a luscious texture that simply melts in your mouth. Plus, the best part? You don’t need to turn on the oven! Whether you’re hosting a gathering or just want to indulge yourself, this pie is sure to impress. (See the ingredients in the next page below…)
Ingredients
– 1 ½ cups graham cracker crumbs
– ½ cup unsalted butter, melted
– 1 cup creamy peanut butter
– 1 cup powdered sugar
– 8 oz cream cheese, softened
– 1 tsp vanilla extract
– 1 cup whipped topping (like Cool Whip)
– Optional: chocolate shavings or mini chocolate chips for garnish
Equipment Needed
– Mixing bowls
– Mixer (hand or stand)
– 9-inch pie dish
– Rubber spatula
– Measuring cups and spoons
– A large sturdy spoon for mixing
Step-by-Step Instructions
First, let’s start by making the crust. In a mixing bowl, I combine the graham cracker crumbs and melted butter. I like to use my hands to mix everything together until it resembles wet sand. Then, press this mixture into the bottom and up the sides of my 9-inch pie dish. Make sure it’s packed tightly! Once that’s done, I pop it in the refrigerator to set while I prepare the filling. (See the next page below to continue steps…)
Next, in another mixing bowl, I beat the softened cream cheese until smooth. Then, I add in the creamy peanut butter, powdered sugar, and vanilla extract. This part is my favorite; the smell of peanut butter wafting through my kitchen is heavenly! I mix everything until it’s well combined and creamy. Finally, I gently fold in the whipped topping until no streaks remain. The mixture is sinfully delicious!
Now it’s time to fill the crust. I spoon the luscious peanut butter filling into the prepared crust, smoothing it out evenly. Sometimes I can’t resist sneaking a taste—trust me, it’s so good! After that, I cover the pie with plastic wrap and let it chill in the refrigerator for at least 4 hours, or ideally overnight. This step is key for the filling to set perfectly.
Once the waiting is over, I love to take the pie out and garnish the top with chocolate shavings or mini chocolate chips for a little extra flair. It makes it look so inviting! Now, I slice it up and serve it chilled. It’s always a hit!
Pro Tips for Best Results
One of my main tips is to make sure your cream cheese is really softened. I usually take it out of the fridge about an hour before I start making the pie. This helps ensure there are no lumps in the filling, giving it that smooth texture we all crave.
I also recommend letting the pie chill overnight if possible. I tested this recipe several times, and those extra hours in the fridge really make a difference in allowing all the flavors to meld together beautifully. Plus, it’s a great make-ahead option for gatherings!
Lastly, consider adding a pinch of salt to the filling. I’ve found that it enhances the peanut butter flavor and makes the pie amazingly balanced. Don’t skip this step if you’re a fan of that sweet and salty combo!
Common Mistakes to Avoid
One mistake I’ve made in the past is not packing the graham cracker crust tightly enough. If the crumbs are loose, the crust can fall apart when you slice the pie. So, make sure you’re pressing firmly and evenly into the pie dish for a solid base! (See the next page below to continue…)
Another pitfall is using crunchy peanut butter instead of creamy—unless, of course, that’s your thing. The texture can change dramatically, and I found that it doesn’t blend as smoothly into the creamy filling, which is key for that melt-in-your-mouth experience.
Don’t forget to taste the filling before you add it to the crust! I once forgot to check the sweetness and ended up with a pie that was too sweet for my taste. This recipe is all about balance, so be sure to adjust to your preference!
Lastly, avoid skipping the chilling time. I know it’s tempting to dive in right away, but letting it set in the refrigerator really does make a difference in texture and flavor. Trust me; the wait is worth it!
Serving Suggestions
This pie is incredibly versatile and can be served in various ways. I love to serve it chilled, topped with extra whipped topping and a drizzle of chocolate sauce. It adds a beautiful presentation and an extra layer of indulgence.
Sometimes I like to pair it with a scoop of vanilla ice cream. The combination of soft pie and icy ice cream is heavenly, especially on a warm day.
For an added touch, consider serving it alongside fresh fruit like strawberries or banana slices. The freshness adds contrast, and it brightens up the dessert, making it feel a bit lighter.
Variations & Customizations
If you’re a chocolate lover like me, adding chocolate chips into the filling or a layer of chocolate ganache on top can elevate this pie to a whole new level. It adds a rich, decadent twist that pairs beautifully with the peanut butter.
For a more exotic flavor, consider mixing in a bit of honey or maple syrup with the peanut butter. It gives a different flavor profile that some guests might prefer, especially if they enjoy those natural sweeteners.
You can also make this pie a bit healthier by swapping out some of the cream cheese with Greek yogurt. It adds a lovely tangy flavor while keeping the creaminess. Just make sure to use a brand that’s thick so it doesn’t affect the pie’s overall texture.
How to Store, Freeze & Reheat
Storing leftovers is simple. Just cover the pie tightly with plastic wrap and store it in the refrigerator. It stays fresh for about three to four days, perfect for those late-night cravings!
If you want to freeze the pie, I recommend slicing it before freezing for easier access later. Just wrap each slice in plastic wrap and place them in an airtight container. It can last up to two months frozen, but it’s so good; I doubt it’ll last that long!
When you’re ready to enjoy a slice after freezing, simply take it out a few hours beforehand and let it thaw in the refrigerator. I wouldn’t recommend reheating in the microwave because it could change the texture. Just let it soften up naturally for the best experience.
Conclusion
I hope you feel inspired to bring this No Bake Peanut Butter Pie into your kitchen! It’s easy to make, utterly delicious, and bound to impress friends and family alike. With its creamy filling and crunchy crust, this dessert is one you’ll want to make over and over again. Happy baking—I mean, mixing—and enjoy every bite!