
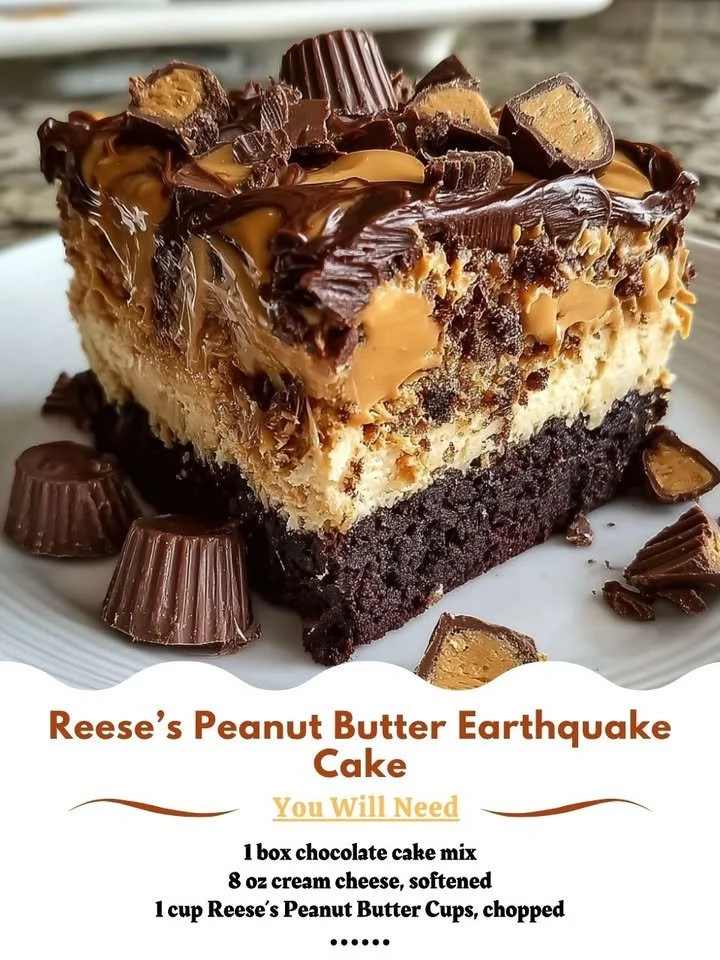
Welcome to my kitchen where sweet and savory collide in the most delightful way! Today, I’m excited to share with you my go-to recipe for Reese’s Peanut Butter Earthquake Cake. This dessert is a rich, indulgent treat that combines chocolate cake, creamy peanut butter, and gooey melted chocolate. Trust me, you won’t regret diving into this confectionary wonder, especially if you’re a peanut butter lover like me. So gather around, and let’s bake something amazing together!
Why You’ll Love This Recipe
Not only does this cake come together quickly, but it’s also loaded with layers of flavor and texture that will have your taste buds dancing. The best part is how the earthy flavors of peanut butter merge beautifully with the chocolate. When you pull this cake out of the oven, the aroma envelops you like a warm hug, making it hard to resist. You’ll get a beautiful, fudgy base topped with a creamy peanut butter swirl that makes every bite heavenly. Plus, it’s so easy to make, you’ll find yourself looking for excuses to whip it up again and again! (See the ingredients in the next page below…)
Ingredients
– 1 box of chocolate cake mix
– 1 cup water
– 1/2 cup vegetable oil
– 3 large eggs
– 1 cup creamy peanut butter
– 1 cup powdered sugar
– 1 cup chocolate chips (semi-sweet or milk chocolate)
– 1/2 cup chopped peanuts (optional)
– 1 teaspoon vanilla extract
Equipment Needed
– Mixing bowls
– Electric mixer or whisk
– 9×13 inch baking pan
– Rubber spatula
– Measuring cups and spoons
Step-by-Step Instructions
To begin, preheat your oven to 350°F (175°C). Grease your 9×13 inch baking pan lightly with non-stick spray or butter. In a large mixing bowl, combine the chocolate cake mix, water, vegetable oil, and eggs. Using an electric mixer, blend until everything is well mixed and you get a smooth, thick batter. The smell at this point is absolutely divine and will already have you excited for what’s to come! (See the next page below to continue steps…)
Next, pour half of the batter into your prepared baking pan and spread it evenly using a rubber spatula. Now, in another bowl, mix the creamy peanut butter, powdered sugar, and vanilla extract until everything is well combined and smooth. Spoon dollops of this glorious mixture over the chocolate batter, being sure to leave space between blobs for the peanut butter to flow. Finally, pour the remaining chocolate batter on top, spreading it gently to cover all the peanut butter.
Before placing it in the oven, sprinkle the chocolate chips and optional chopped peanuts over the top for that extra indulgence. Bake for 30-35 minutes, but keep an eye on it because all ovens are different! You want to make sure the cake springs back when touched and a toothpick comes out mostly clean. The real magic happens when the cake is cooling; the peanut butter and chocolate meld, creating the "earthquake" effect that is so irresistible!
Pro Tips for Best Results
One of my best tips is to let the cream cheese and peanut butter come to room temperature before mixing. This simple step helps them incorporate smoothly, avoiding any lumps. The first time I made this, I rushed this step, and while it still tasted amazing, the texture wasn’t quite as creamy as I wanted it to be.
Also, don’t be afraid to slightly underbake the cake. Trust me, the gooeyness adds to the overall experience. I’ve tested it by baking it perfectly and then underbaking by just a minute or two, and the slightly gooier version won my heart!
Lastly, I love adding a touch of sea salt on top once it’s out of the oven. It creates a beautiful contrast to the sweetness of the cake and enhances the chocolate flavor. I actually experimented without it once, and I have to say, I missed that added layer of complexity!
Common Mistakes to Avoid
One of the biggest mistakes I see people making is not greasing the pan enough. When I first made this cake, I was hesitant to use too much spray, and I ended up with a delicious cake that was half stuck to the bottom! Trust me, a well-greased pan is essential for this sticky beauty. (See the next page below to continue…)
Another common pitfall is not monitoring the baking time carefully. I’ve had cakes that turned out too dry because I was distracted watching my favorite show. Stick a toothpick in the center about five minutes before the suggested baking time so you know how much longer it needs.
And don’t forget, mixing the cake wrong can lead to a dense outcome. I’ve learned that mixing the ingredients just until combined creates a much lighter texture. Overmixing the batter can lead to a heavy cake, so the “just combine” rule is a good one to follow!
Serving Suggestions
Once your Reese’s Peanut Butter Earthquake Cake is baked and cooled, it’s time to dig in! I love serving my cake warm, fresh out of the oven, and topped with a scoop of vanilla ice cream. The melting ice cream pairs heavenly with the warm chocolate and peanut butter. It’s a classic that never fails to impress!
When I’m feeling a bit fancy, I drizzle a homemade chocolate ganache over the top for some added drama. Just melt chocolate with a bit of cream, let it cool slightly, and then pour it over the cake for that extra touch! It transforms an everyday cake into a dessert worthy of a celebration.
Lastly, consider slicing it up and serving it at your next gathering. I guarantee it will be the talk of the party! The delicious scent lingers, and people come back for seconds (or thirds!).
Variations & Customizations
One of the great things about this cake is how customizable it is. If you’re feeling adventurous, you can swap out the chocolate cake mix for a vanilla one for a totally different flavor experience. I’ve tried this, and the result is a lovely peanut butter cream cake that’s equally delicious!
Another fun variation is to experiment with different add-ins. I’ve tossed in crushed Oreo cookies or even caramel bits before baking, and both were fan favorites. They add a delightful crunch and a flavor twist that elevates the cake from ordinary to extraordinary.
If you’re a peanut butter fan, consider using chunky peanut butter instead of creamy. It adds a whole new delicious texture that I absolutely adore. Plus, you can never go wrong with more peanut butter, right?
How to Store, Freeze & Reheat
To store any leftover cake (if there are any!), I recommend keeping it in an airtight container at room temperature for up to three days. If I want the cake to last longer, I usually pop it in the fridge because of the peanut butter filling. Just make sure to cover it well so it doesn’t dry out.
If you’re looking to freeze this beauty, you’re in luck! Wrap individual portions tightly in plastic wrap and then place them in a freezer-safe bag. It can last in the freezer for about two months. When you’re ready for a piece, just thaw it in the fridge overnight, and it should taste just as good as the day it was baked.
For reheating, I simply pop a slice in the microwave for 20 seconds or so. I love the way the chocolate becomes melty again, and the peanut butter filling gets just warm enough to ooze out. It feels like having a fresh slice all over again!
Conclusion
Baking is all about joy, and this Reese’s Peanut Butter Earthquake Cake absolutely brings that joy right into my kitchen. Whether it’s a family gathering or just a treat for myself, this cake always delivers a smile. I can’t wait for you to try this recipe and share in the deliciousness! Happy baking, and enjoy every sweet moment!