
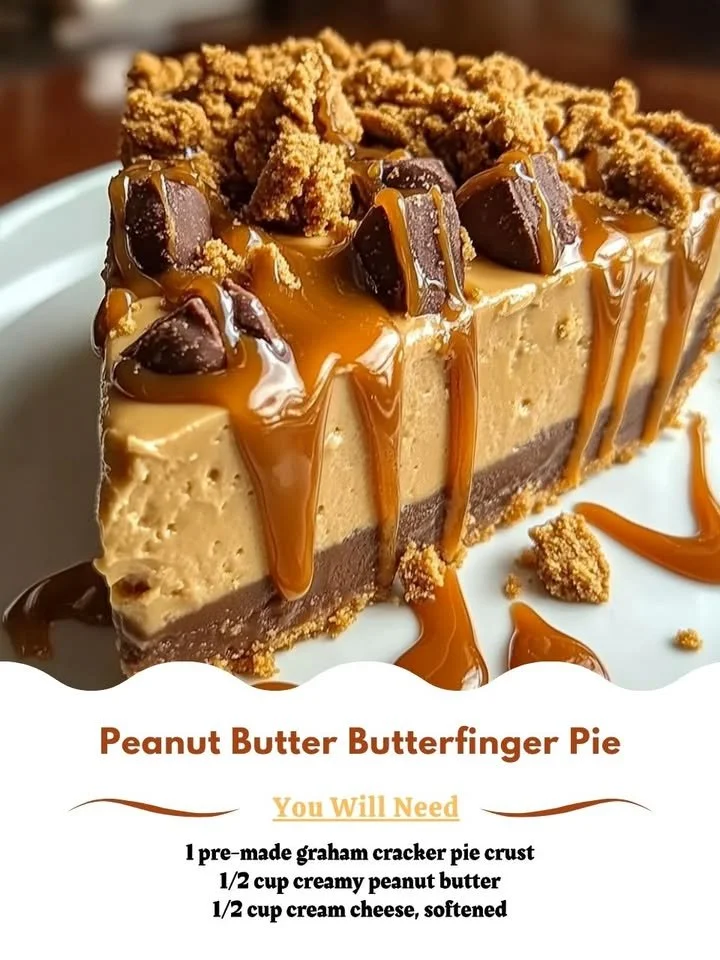
I can still remember the first time I tried Peanut Butter Butterfinger Pie. I was visiting a friend’s house, and the sweet, nutty aroma wafting through the kitchen instantly drew me in. As I took my first bite, I was hit with a delightful blend of creamy peanut butter, buttery vanilla, and crunchy candy pieces that sent my taste buds into a frenzy. That’s when I knew I had to recreate this heavenly dessert myself! And now, I’m excited to share my version of this irresistible no-bake pie with all of you.
Why You’ll Love This Recipe
There are countless reasons to adore this Peanut Butter Butterfinger Pie. For starters, it’s super simple to make and requires no baking, which means you won’t need to worry about turning on the oven during those warmer months. The creamy peanut butter filling paired with the crunch of Butterfinger candy is a match made in dessert heaven, and if you’re a peanut butter lover, this pie will be your new go-to treat. Every bite is like a sweet childhood memory, and it brings back all those warm, nostalgic feelings. Trust me; you won’t be able to resist going back for seconds! (See the ingredients in the next page below…)
Ingredients
– 1 pre-made graham cracker crust
– 1 cup creamy peanut butter
– 1 cup powdered sugar
– 1 cup whipped topping (like Cool Whip)
– 2 Butterfinger candy bars, crushed
– 1 teaspoon vanilla extract
– ½ cup chocolate sauce (for drizzling on top)
– Extra Butterfinger pieces for garnish
Equipment Needed
– Mixing bowl
– Whisk or electric mixer
– Rubber spatula
– Measuring cups and spoons
– Pie dish (if not using a pre-made crust)
Step-by-Step Instructions
To start, I usually gather all my ingredients and equipment before diving into the making process—trust me, it saves a lot of time and makes things mess-free. In a mixing bowl, I beat together the creamy peanut butter, powdered sugar, and vanilla extract until it becomes smooth and creamy. The aromas are absolutely heavenly at this point, and I can hardly wait to get to the next steps. Once that’s done, I gently fold in the whipped topping until everything is combined well. This gives the filling that light, airy texture that I adore. (See the next page below to continue steps…)
Next, I pour half of this luscious mixture into the prepared graham cracker crust, spreading it evenly with my spatula. Then, I sprinkle about half of the crushed Butterfinger candy bars over the filling. The crunch of the Butterfinger against the creamy peanut butter is just the right texture that makes this dessert so exciting to eat. After that, I spoon the remaining peanut butter mixture on top and lightly spread it out. For a special touch, I like to add a few extra Butterfinger pieces on the top as a garnish. You can never have too much candy, right?
Now comes the best part! I place the pie in the refrigerator for at least 4 hours, or even overnight if I can resist. This allows all the flavors to meld together beautifully, and trust me, the wait is worth it! When it’s finally time to slice into this decadent dessert, it feels like unwrapping a treasured gift. Don’t forget to drizzle some chocolate sauce over the top when serving—it’s the perfect finishing touch!
Pro Tips for Best Results
I’ve tested this pie in various ways, and one of my best tips is to ensure your peanut butter is at room temperature before mixing. This helps achieve that silky, smooth consistency that makes the filling so creamy. I’ve tried using cold peanut butter straight from the fridge, and the texture just wasn’t the same.
Another little secret I’ve learned is to pack the whipped topping into the measuring cup before adding it to the peanut butter mixture. It makes it easier to mix, and you won’t end up with a lumpy filling. I also recommend crushing the Butterfinger bars in a ziplock bag; it’s a fun way to release some stress, and you can control how fine or chunky you want those pieces to be.
Lastly, if you want to make this pie even richer, try adding some chopped peanuts into the filling. I tested this once, and it added an extra layer of crunch that I absolutely loved! It’s a simple tweak but adds a delightful surprise that everyone will enjoy.
Common Mistakes to Avoid
One mistake I made on my first attempt was not letting the pie chill long enough. It was more like a gooey mess than a sliceable dessert, which was disappointing. I suggest resisting the urge to cut into it too soon; trust me, patience pays off in this case! (See the next page below to continue…)
Another pitfall I faced was using a non-stick pie dish for this recipe. The filling tends to stick, which makes slicing the pie pretty tricky. I recommend either using a classic pie dish or a disposable aluminum one, which makes cleanup a breeze as well.
Also, be cautious with the ratio of peanut butter to powdered sugar. Too much powdered sugar will make the filling overly sweet, while too little can make it too heavy. Adjust according to your taste, but I found that a 1:1 ratio generally brings a balanced sweetness that everyone loves.
Serving Suggestions
When it comes time to serve the pie, I love pairing it with a scoop of vanilla ice cream. The cold, creamy ice cream complements the peanut butter filling perfectly and feels like an indulgent treat. Sometimes, I even sprinkle some crushed Butterfinger on top of the ice cream for an extra crunch.
I also enjoy serving this pie at gatherings. It has that “wow” factor, and people are always curious about how I made it. You’ll find that one piece usually leads to another as guests come back for more.
Lastly, for an added decorative touch, you can whip up a quick batch of sweetened whipped cream to top each slice before adding the chocolate drizzle. It makes each serving feel special and really elevates the presentation!
Variations & Customizations
If you’re feeling adventurous, try adding in some chocolate pudding layers for a richer flavor. Just make sure to adjust the filling consistency with a little less peanut butter to maintain that luscious mouthfeel. It’s a twist that adds depth and complexity to the pie that some might find irresistible.
Another fun variation I experimented with was using almond butter instead of peanut butter. It has a slightly different flavor profile but gives the pie a nutty, more sophisticated taste. Plus, it’s a great option for those with peanut allergies.
And if you want to get creative, consider mixing in some mini chocolate chips into the filling. They add an unexpected burst of chocolate in every bite, which pairs beautifully with the peanut butter and Butterfinger crumbles.
How to Store, Freeze & Reheat
If you somehow have leftovers (which rarely happens in my house), store the pie covered in the fridge for up to a week. I recommend using plastic wrap or an airtight container to keep it fresh and delicious. The flavors continue to meld together, making it even tastier the next day!
For longer storage, you can freeze the pie. Just make sure to wrap it tightly in plastic wrap and then in aluminum foil to prevent freezer burn. It can stay fresh for up to two months. When you’re ready to enjoy it again, allow it to thaw in the fridge overnight for the best texture.
As for reheating, there’s no real need to do this since it’s best served chilled. However, if you need to soften it up a bit, you can leave it out on the counter for a few minutes before slicing. Just be cautious not to let it get too warm!
Conclusion
Making Peanut Butter Butterfinger Pie has truly become one of my favorite dessert traditions in my kitchen. It’s simple, delicious, and always brings smiles to family and friends. The best part is, it reminds me of those simple, joyful moments of indulging in sweet treats together. I hope you find as much joy making and sharing this pie as I do! Happy baking!