
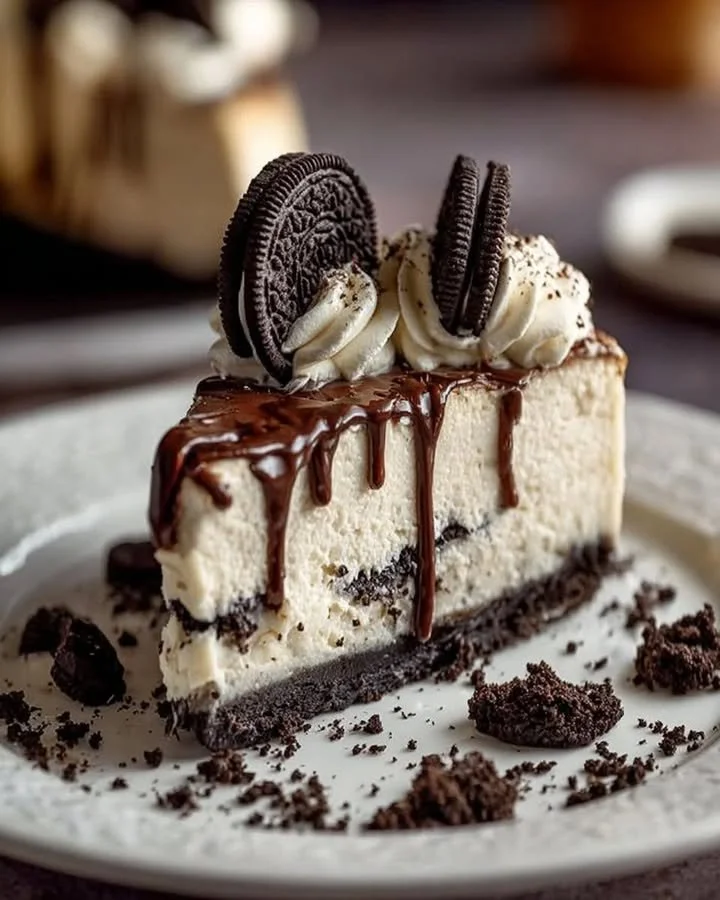
Today, I’m excited to share with you a delightful dessert that has quickly become a favorite in my kitchen: No Bake Oreo Cheesecake. This cheesecake is everything you want in a dessert—rich, creamy, and topped with the irresistible crunch of Oreo cookies. Best of all, you don’t need to turn on your oven! With a few simple steps, you’ll have a luscious treat that will impress your friends and family.
Why You’ll Love This Recipe
I love this No Bake Oreo Cheesecake because it combines two of my favorite things: Oreos and cheesecake. The silky smoothness of the cheesecake filling, paired with the chocolatey crunch of the cookie crust, creates a heavenly experience. Plus, it’s easy to make and perfect for any occasion, from potlucks to family gatherings. Trust me, once you taste it, you’ll be hooked! (See the ingredients in the next page below…)
Ingredients
– 24 Oreo cookies (plus extra for topping)
– ¼ cup unsalted butter, melted
– 16 oz cream cheese, softened
– 1 cup powdered sugar
– 1 teaspoon vanilla extract
– 1 cup heavy whipping cream
Equipment Needed
– 9-inch springform pan
– Mixing bowls
– Electric mixer (or whisk)
– Spatula
– Measuring cups and spoons
Step-by-Step Instructions
First, start by preparing the crust. In my kitchen, I always crush the Oreo cookies in a zip-lock bag with a rolling pin for a satisfying release of energy. Mix the crushed cookies with the melted butter in a bowl until the mixture resembles wet sand. Next, press this mixture firmly into the bottom of your springform pan. It’s okay if it takes a little muscle; you want a sturdy base! (See the next page below to continue steps…)
Now, let’s make that creamy filling! In another bowl, beat the softened cream cheese with an electric mixer until it’s smooth and fluffy. Gradually add in the powdered sugar and vanilla extract, mixing until fully combined. In a separate bowl, whip the heavy cream until stiff peaks form. Gently fold the whipped cream into the cream cheese mixture. It’s so fluffy and light; I could just eat it with a spoon!
Once your filling is well mixed, spread it over the prepared crust in the springform pan. For me, this step is so satisfying as I watch the filling plop down and level out, transforming my creation into a cheesecake. To finish, crush a few more Oreos and sprinkle them on top for a decorative touch. Pop the cheesecake into the refrigerator for at least 4 hours, or overnight if you can wait that long!
When it’s finally set, carefully remove the sides of the springform pan. You’ll be rewarded with a beautiful cheesecake just waiting to be sliced and served. I can’t tell you how wonderful it is to see everyone’s faces light up as they take their first bite.
Pro Tips for Best Results
I’ve made this cheesecake a few times, and I’ve found that the quality of cream cheese really makes a difference. I always opt for full-fat cream cheese because it provides the richest flavor and texture. Don’t try to skimp here; I’ve tried low-fat options before, and they often lead to a texture that just isn’t as creamy.
Also, make sure your cream cheese is softened before you start mixing. I usually take it out of the fridge at least an hour before I start. If you forget, you can microwave it for 10-15 seconds, but be careful not to melt it! The creaminess of the final cheesecake relies on this step, and nobody wants a lumpy filling.
Lastly, I love using a stand mixer for the whipped cream, but if you’re using a hand mixer, it’s totally doable! Just make sure to watch it closely so that it doesn’t turn into butter. Trust me, I learned this the hard way during my first attempt!
Common Mistakes to Avoid
One common mistake I made initially was not allowing the cheesecake enough time to set in the refrigerator. Patience is key with this recipe! If you don’t let it chill long enough, it may not hold its shape when you cut into it. I recommend making this cheesecake a day in advance to really let those flavors meld.
Another mistake is skipping the step of letting the cream cheese sit out to soften. If it’s too cold, your filling will be lumpy, and nobody likes a textured cheesecake when they’re expecting silky smoothness. A little timer on your phone can help remind you to pull it out before you start!
Lastly, don’t be tempted to skip the whipped cream step. Folding it into the cream cheese mixture gives the cheesecake its lightness and fluffiness. If you just mix everything together without that light touch, you’ll end up with a denser dessert, which can still be tasty but won’t have that dreamy quality everyone loves. (See the next page below to continue…)
Serving Suggestions
When it comes to serving this No Bake Oreo Cheesecake, I love to present it with a drizzle of chocolate sauce on the plate for a little extra flair. It’s such a simple addition, but it elevates the dessert to a whole new level. Fresh berries can be a fabulous pairing, too, as they offer a nice contrast to the rich, creamy cheesecake.
For a fun twist, I sometimes serve it alongside whipped cream or a scoop of vanilla ice cream. The combination of textures and flavors is just divine! You can even sprinkle some crushed Oreos on the plate as a final touch, making each serving visually appealing.
Lastly, if you’re serving a crowd, consider slicing it into smaller pieces. This cheesecake is rich, and a little goes a long way! Plus, mini slices mean you can offer a snack without overwhelming your guests.
Variations & Customizations
While Oreos are my go-to for this cheesecake, you can absolutely mix things up! Why not try using different flavored sandwich cookies? I’ve made this with peanut butter Oreos for a fun twist, and the unique flavor really added a new depth to the cheesecake.
If you’re feeling adventurous, consider folding in chocolate chips or crushed candy bars into the filling for added texture and sweetness. Honestly, the possibilities are endless when it comes to customizations, and I can guarantee your family will love whatever variation you come up with!
For those who want to make it more decadent, you can add a layer of chocolate ganache on top after it sets. This little addition takes it to a whole new sweeter level and really impresses those who are indulging in your delicious creation.
How to Store, Freeze & Reheat
Storing your No Bake Oreo Cheesecake is super easy! Just cover the top with some plastic wrap or aluminum foil to keep it fresh for up to five days in the refrigerator. Trust me, it’s hard for it to last that long, but it’s nice to have a tasty treat to enjoy for a few days after making it!
If you want to make this cheesecake in advance, you can also freeze it! Just be sure to wrap it well in plastic wrap and then in aluminum foil before placing it in the freezer. It will stay good for up to three months. When you’re ready to enjoy it, simply transfer it to the fridge to thaw overnight.
Reheating isn’t necessary for cheesecake (and should actually be avoided), but if you’ve got leftovers that are a bit too firm from the fridge, let them sit at room temperature for about 15-20 minutes before serving. This will help soften it up and restore that heavenly texture we all love!
Conclusion
I hope you give this No Bake Oreo Cheesecake a try; it’s an easy and delicious dessert that has never failed to impress me. The combination of flavors and textures is sure to create smiles and happy tummies. So grab those Oreos, gather your ingredients, and get ready to enjoy a slice (or two)—you, and everyone around you, won’t be able to resist its irresistible charm! Happy baking!